Ana içeriğe geç
Toshiba Satellite C55-A5100 CPU Cooling Fan Replacement

Toshiba Satellite C55-A5100 CPU Cooling Fan Replacement

Rei Rutkowski

Rei Rutkowski ve 4 diğer katkıda bulunanlar

En son July 8, 2023 tarihinde güncellendi

25 dakika
Orta

This guide will walk you through the process of replacing the CPU cooling fan. Cooling fans can deteriorate into a state where it loses efficiency. This state can cause loud noises and cause the computer to shut down if not properly maintained.

To do so, one must remove the back cover. The back cover is attached by not only screws, but also plastic clips.

Neye ihtiyacın var

Aletler

  1. Toshiba Satellite C55-A5100 CPU Cooling Fan Replacement, Hard Drive: adım 1, 3 resimden 1. Toshiba Satellite C55-A5100 CPU Cooling Fan Replacement, Hard Drive: adım 1, 3 resimden 2. Toshiba Satellite C55-A5100 CPU Cooling Fan Replacement, Hard Drive: adım 1, 3 resimden 3.
    • Place the laptop with the bottom facing up.

    • Remove the single 6mm Phillips #1 screw keeping the laptop panels in place.

  2. Toshiba Satellite C55-A5100 CPU Cooling Fan Replacement: adım 2, 1 resimden 1.
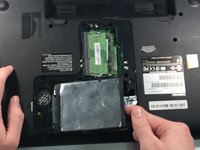
    • Using the Phillips #1 screwdriver, remove the 8mm screw that is holding the hard drive in place.

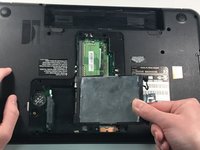
  3. Toshiba Satellite C55-A5100 CPU Cooling Fan Replacement: adım 3, 2 resimden 1. Toshiba Satellite C55-A5100 CPU Cooling Fan Replacement: adım 3, 2 resimden 2.
    • Use your finger to lift the hard drive up.

    • Pull out the hard drive to the right.

  4. Toshiba Satellite C55-A5100 CPU Cooling Fan Replacement, CPU Cooling Fan: adım 4, 2 resimden 1. Toshiba Satellite C55-A5100 CPU Cooling Fan Replacement, CPU Cooling Fan: adım 4, 2 resimden 2.
    • Unscrew all 15 of the screws in the back cover of the laptop.

    • Carefully pry the back cover off the laptop using the prying tools, starting from the hard drive side.

  5. Toshiba Satellite C55-A5100 CPU Cooling Fan Replacement: adım 5, 3 resimden 1. Toshiba Satellite C55-A5100 CPU Cooling Fan Replacement: adım 5, 3 resimden 2. Toshiba Satellite C55-A5100 CPU Cooling Fan Replacement: adım 5, 3 resimden 3.
    • Unscrew the two silver screws attaching the fan to the case.

    • Unplug the power connector for the fan.

    • Pull the fan up out of the slot.

Sonuç

To reassemble your device, follow these instructions in reverse order.

3 farklı kişi bu kılavuzu tamamladı.

Rei Rutkowski

Üyelik tarihi: 11/26/18

184 İtibar

2 adet Kılavuz yazıldı

Ekip

IUPUI, Team S8-G8, Wilson Fall 2018 IUPUI, Team S8-G8, Wilson Fall 2018 üyesi

IUPUI-WILSON-F18S8G8

4 Üyeler

6 adet Kılavuz yazıldı

Bir Yorum

The one I disassembled didn’t have a screw under the battery bay, but did have one under the HDD bay, just as described by a comment in the charge port replacement guide.

Luis Alejandro Araúz - Yanıt

Yorum Ekle

İstatistikleri Görüntüle:

Son 24 Saat: 0

Son 7 gün: 3

Son 30 gün: 10

Her zaman: 1,055