Ana içeriğe geç
Toshiba Satellite C55D-B5206 Fan Replacement

Toshiba Satellite C55D-B5206 Fan Replacement

Tayyaba

Tayyaba ve 6 diğer katkıda bulunanlar

En son April 22, 2023 tarihinde güncellendi

15 - 20 dakika
Orta

The fan of your Toshiba Satellite C55D device may malfunction at some point. If your constantly heats up shuts down, that indicates the fan has malfunctioned. This manual will provide a step-by-step guide to replace the fan,

Neye ihtiyacın var

Aletler

  • Spudger
    Spudger
  • Phillips #1 Screwdriver
    Phillips #1 Screwdriver
  1. Toshiba Satellite C55D-B5206 Fan Replacement, Battery: adım 1, 2 resimden 1. Toshiba Satellite C55D-B5206 Fan Replacement, Battery: adım 1, 2 resimden 2.
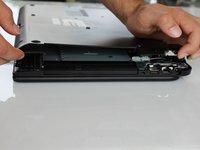
    • Turn the laptop upside down so the battery faces upwards.

    • Use a Phillips #1 screwdriver to remove the two, 7 mm screws that secure the battery.

  2. Toshiba Satellite C55D-B5206 Fan Replacement: adım 2, 2 resimden 1. Toshiba Satellite C55D-B5206 Fan Replacement: adım 2, 2 resimden 2.
    • Place both of your thumbs on the outside edges of the battery and push the battery out to remove it.

    • The battery should slide out with little resistance.

  3. Toshiba Satellite C55D-B5206 Fan Replacement, Back Casing: adım 3, 1 resimden 1.
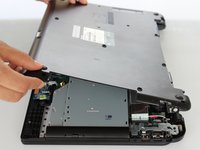
    • Use the screwdriver to remove the thirteen, 7 mm Phillips#1 screws from the bottom of the chassis.

  4. Toshiba Satellite C55D-B5206 Fan Replacement: adım 4, 1 resimden 1.
    • Insert a spudger at the center and into the crevice between the bottom casing and the keyboard and pry upwards.

    • Gently slide the spudger along the entire perimeter of the device and pry the casing loose to unhook 6 clips.

    • These images show a metal spudger, which has the potential to damage the device. Use a plastic opening tool or standard spudger instead.

    • Do not be alarmed if you feel a gentle tug or hear a click as you slide your spudger. These sounds are the clips detaching from the casing.

  5. Toshiba Satellite C55D-B5206 Fan Replacement: adım 5, 3 resimden 1. Toshiba Satellite C55D-B5206 Fan Replacement: adım 5, 3 resimden 2. Toshiba Satellite C55D-B5206 Fan Replacement: adım 5, 3 resimden 3.
    • Using fingers remove the casing.

  6. Toshiba Satellite C55D-B5206 Fan Replacement, Fan: adım 6, 2 resimden 1. Toshiba Satellite C55D-B5206 Fan Replacement, Fan: adım 6, 2 resimden 2.
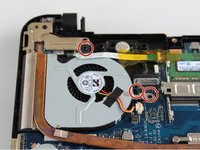
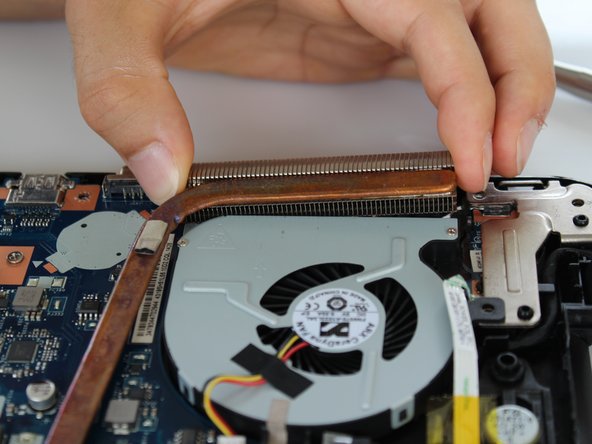
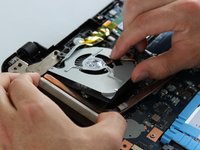
    • Remove the three 7 mm Philips head screws by turning the screws counter clockwise.

  7. Toshiba Satellite C55D-B5206 Fan Replacement: adım 7, 1 resimden 1.
    • Gently lift the copper heat sink to make the fan more accessible.

    • The copper heat sink should not detach. Do not pull on it too hard.

  8. Toshiba Satellite C55D-B5206 Fan Replacement: adım 8, 2 resimden 1. Toshiba Satellite C55D-B5206 Fan Replacement: adım 8, 2 resimden 2.
    • Maneuver the fan's bottom left corner above the copper heat sink.

  9. Toshiba Satellite C55D-B5206 Fan Replacement: adım 9, 1 resimden 1.
    • Cautiously move the white cable cover to allow for the fan to be lifted away.

    • Do not detach the white cable cover.

  10. Toshiba Satellite C55D-B5206 Fan Replacement: adım 10, 1 resimden 1.
    • Lift the fan approximately one inch upward from back of the laptop.

    • Detach the white cable connector from the connective port.

  11. Toshiba Satellite C55D-B5206 Fan Replacement: adım 11, 1 resimden 1.
    • Once the cable port is detached, lift the fan free from the device.

Sonuç

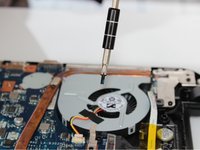
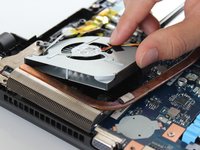
To reassemble your device, follow these instructions in reverse order.

Bir başkası bu kılavuzu tamamladı.

Tayyaba

Üyelik tarihi: 09/24/15

527 İtibar

4 adet Kılavuz yazıldı

Ekip

CSU Fullerton, Team 2-5, Bruce Fall 2015 CSU Fullerton, Team 2-5, Bruce Fall 2015 üyesi

CSUF-BRUCE-F15S2G5

4 Üyeler

18 adet Kılavuz yazıldı

0 Yorum

Yorum Ekle

İstatistikleri Görüntüle:

Son 24 Saat: 4

Son 7 gün: 14

Son 30 gün: 16

Her zaman: 486