
Toshiba Satellite P855-S5312 Fan Replacement
Giriş
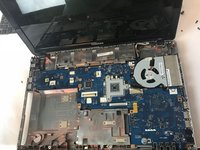
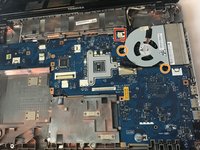
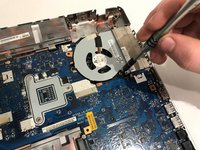
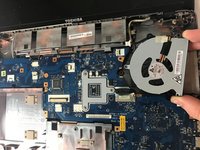
1. adıma gitThis Guide is to help replace the fan for theToshiba Satellite P855-S5312. Replacing the fan in the device will resolve overheating issues caused by inadequate cooling. Tools required for the guide are plastic opening tool and Phillips size 0 screwdriver.
Neye ihtiyacın var
Parçalar
Aletler


Daha fazlasını göster…
-
-
Turn laptop upside down with the spine facing towards you and locate the two tabs on the top of the back panel.
-
Move the sliders to the left and right to release the tabs holding the battery in.
-
While the tabs are pushed outwards, remove the battery from the device.
-
-
-
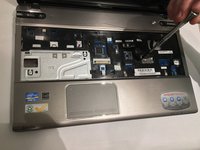
Using plastic spudger to pry up the edges of the keyboard and lift it towards the screen.
-
Unplug the ZIF connector ribbon using the plastic spudger by gently prying the edges of the plug.
-
Remove the keyboard from the device.
-
-
-
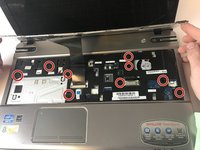
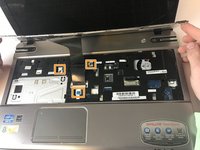
Unscrew the one 1.5mm screw using a Philips #0 screwdriver holding the L shape panel.
-
Pry up the panel to gain access to hidden screws.
-


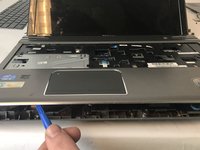


To reassemble your device, follow these instructions in reverse order.
To reassemble your device, follow these instructions in reverse order.
Ekip

USF Tampa, Team S10-G2, Thompson Fall 2017 USF Tampa, Team S10-G2, Thompson Fall 2017 üyesi
USFT-THOMPSON-F17S10G2
3 Üyeler
6 adet Kılavuz yazıldı