Ana içeriğe geç

Toshiba Satellite e205 Optical Drive Replacement

Neye ihtiyacın var

  1. Toshiba Satellite e205 Optical Drive Replacement, Battery: adım 1, 2 resimden 1. Toshiba Satellite e205 Optical Drive Replacement, Battery: adım 1, 2 resimden 2.
    • With the battery away from you, slide the locking clips out.

    • The left clip stays, the right clip is spring loaded.

    • Slide the battery away from you.

  2. Toshiba Satellite e205 Optical Drive Replacement, Keyboard: adım 2, 1 resimden 1.
    • Use a spudger to carefully pry up the keyboard screw cover.

  3. Toshiba Satellite e205 Optical Drive Replacement: adım 3, 1 resimden 1.
    • Remove the two screws securing the keyboard to the chassis.

  4. Toshiba Satellite e205 Optical Drive Replacement: adım 4, 1 resimden 1.
    • Carefully tilt the keyboard towards you and release the ribbon cables.

    • Use a spudger if needed to release the latch. The latch slides out.

    • The keyboard is now free and can be set aside.

  5. Toshiba Satellite e205 Optical Drive Replacement, Bottom Cover: adım 5, 1 resimden 1.
    • Remove the five black screws

    • Remove the one silver screw

  6. Toshiba Satellite e205 Optical Drive Replacement: adım 6, 1 resimden 1.
    • Flip the laptop over so the bottom is facing up.

    • Using a spudger, remove the seven rubber inserts.

    • The feet only go in one location on the bottom of the laptop, so save yourself some time and track where they go.

  7. Toshiba Satellite e205 Optical Drive Replacement: adım 7, 1 resimden 1.
    • Remove the six silver screws.

    • Remove the one black screw.

  8. Toshiba Satellite e205 Optical Drive Replacement: adım 8, 2 resimden 1. Toshiba Satellite e205 Optical Drive Replacement: adım 8, 2 resimden 2.
    • Stand the laptop up on end.

    • Remove the two rubber inserts from the back of the laptop. One insert is on each side of the laptop.

  9. Toshiba Satellite e205 Optical Drive Replacement: adım 9, 2 resimden 1. Toshiba Satellite e205 Optical Drive Replacement: adım 9, 2 resimden 2.
    • Remove the two screews.

  10. Toshiba Satellite e205 Optical Drive Replacement: adım 10, 1 resimden 1.
    • Carefully work a spudger in the crack at the back of the laptop and separate the small rubberized section from the bottom of the laptop.

  11. Toshiba Satellite e205 Optical Drive Replacement: adım 11, 1 resimden 1.
    • Remove the four screws.

    • Disconnect the black wireless antenna lead.

  12. Toshiba Satellite e205 Optical Drive Replacement: adım 12, 1 resimden 1.
    • The bottom of the laptop is now ready to lift off.

    • Carefully work a spudger around the seam of the laptop separating the bottom from the rest of the laptop.

    • There is a data connection at the front of the laptop that needs to be disconnected.

    • Use a spuder to carefully disconnect the wire from the motherboard. Once this is free the bottom will come off.

  13. Toshiba Satellite e205 Optical Drive Replacement, Optical Drive: adım 13, 2 resimden 1. Toshiba Satellite e205 Optical Drive Replacement, Optical Drive: adım 13, 2 resimden 2.
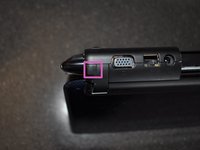
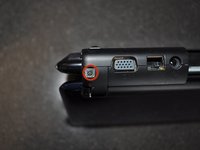
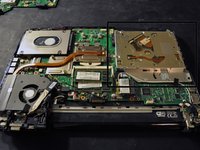
    • Locate optical drive

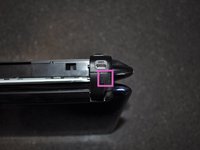
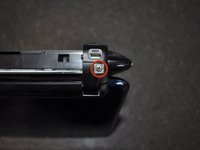
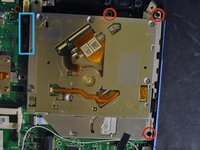
    • Remove the three screws securing the optical drive.

    • Slide the optical drive away from the motherboard, and carefully lift up.

Sonuç

To reassemble your device, follow these instructions in reverse order.

Tyler

Üyelik tarihi: 06/19/12

4.920 İtibar

16 adet Kılavuz yazıldı

Ekip

TechForce TechForce üyesi

Business

2 Üyeler

25 adet Kılavuz yazıldı

0 Yorum

Yorum Ekle

İstatistikleri Görüntüle:

Son 24 Saat: 0

Son 7 gün: 1

Son 30 gün: 2

Her zaman: 439