Giriş
Follow this guide to replace the head strap on a Valve Index VR headset.
Power off and unplug your Index before you begin your repair.
Neye ihtiyacın var
-
-
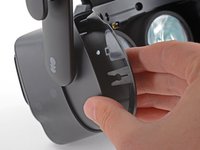
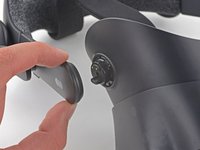
Twist the eye tube relief knob clockwise to fully extend it.
-
-
-
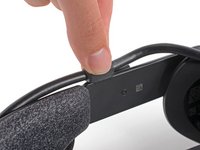
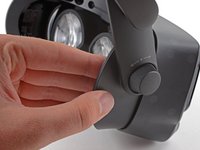
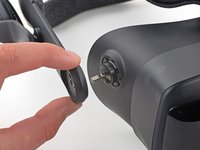
Insert an opening pick between the eye relief knob and the head strap.
-
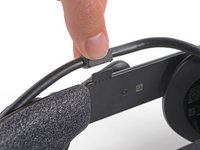
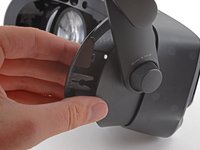
Gently pry with the opening pick while pulling the eye relief knob off until it is removed.
-
-
-
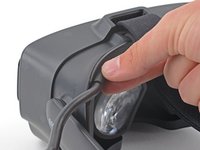
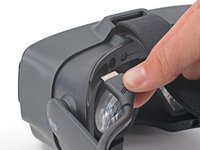
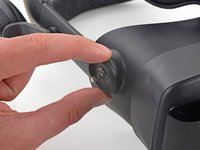
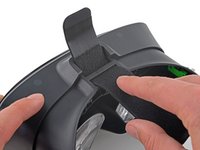
Insert the flat end of a spudger in between the bottom of the head strap clip and the head strap padding.
-
Pry up on the head strap clip until it is unclipped from the head strap.
I didn't really see the need to unclip this or do the next step so I skipped it. It seems easy enough to unplug the cable while it's still attached to these, so unless you're really concerned about the cable bending a little more than it already does it seems unnecessary.
-
-
-
Use your hand to gently pull the face gasket straight off of the headset.
-
-
-
Use your fingers to pull the tether cable straight up off of the head strap cable guide.
-
-
-
-
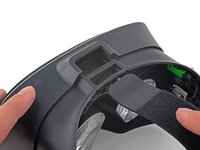
Insert your T6 Torx screwdriver into the hole on the face gasket bezel to remove the captive screw securing the left side of the head strap.
-
Skip to step 12.
Use a T6 driver on the screw securing the left side of the headband to the device. Usage of a T5 bit will damage this screw and make it impossible to remove.
I need a replacement screw for the left side as well. :(
ifixit kit did not come with t6 torx screwdriver so had to buy it separately.
What kind of screw is located where the red circle shows? I know its supposed to be a captive screw but it is missing on my right side. I just need to know the specs so i can order a replacement.
-
-
-
Use a T5 Torx screwdriver to remove the four 6.0 mm screws securing the face gasket bezel to the headset.
-
-
-
Grab the left edge of the face gasket bezel with your hand and slide it off of the headset.
-
-
-
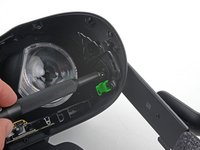
Use a T6 Torx screwdriver to remove the two 6.6 mm screws underneath the eye relief knob.
Theeeeese are the two screws that i found "after 3 years today" that comes loose over time of taking the headset on and off. And it is this that causes the sound glitching problem in the earphones. tried to thighten the earphones and cleaned them 100s of times. And today i saw this. So if you have problems with sound. thigten the screws on strap (left one is harder) But result is night and day.
-
-
-
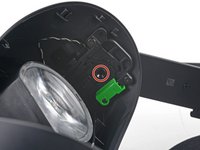
Use a T6 Torx screwdriver to loosen the screw securing the left side of the head strap to the headset.
-
If the black plastic cap surrounding the cap limits access, use an opening pick to remove the cap.
Thanks for noticing this! I am correcting it now.
This is a T6 screw and there is a plastic cap/ring that needs to be removed in order to loose the screw.
Yes had to find a T6 bit that was not included in the kit
in trying to attach the new strap this screw won't tighten all the way back in, it also won't back back out
use the t6 with the hole in it
the proper bit was included in the kit, but its the t6 torx with the hole in it idk what that's called, but my screw was slightly stripped and wasn't screwing back in all the way and I was wondering why it wasn't tightening, luckily even after applying pressure and twisting the wrong bit in there for about 30 turns the bit with the hole worked for securing the screw. there is also a small plastic cap/ring that you can spudge off to make it easier
Does the T6 Screwdriver need to be a certain length to get to the screw inside that hole? I think mine is too short and is bumping the outside of the plastic circle, not reaching the screw inside. Idk what else I could be doing wrong here
Does anyone know the size of the screw I lost mine
-
-
-
Slide the head strap band out from the headset.
-
The head strap is now fully removed.
reassembly tip, put your spudger in the front part and gently wiggle the STRAP it as you push it in, this will gently angle it up and around. https://prnt.sc/XnReN20WAKcV
-


Compare your new replacement part to the original part—you may need to transfer remaining components or remove adhesive backings from the new part before installing.
To reassemble your device, follow the above steps in reverse order.
Take your e-waste to an R2 or e-Stewards certified recycler.
Repair didn’t go as planned? Try some basic troubleshooting, or ask our Valve Index Answers community for help.
İptal et: Bu kılavuzu tamamlamadım.
26 farklı kişi bu kılavuzu tamamladı.

8 Yorum
I'm having troubles with my left speaker, I just got done replacing it, is this the next step I wanna try in troubleshooting it? The last thing I want to do is buy a whole new headset? It cuts out when the strap moves. I've already replaced the cable as well.
Try to tighten left part of the strap (step 14)
When will they be in stock again
Any word on restocking for this part?
No stock for 2 Years now. Great...
You can get a refurbished one on tundra labs
If you go to tundra labs website. They have refurbished head straps and stock. I just got one and it's basically like new. Hope this helps..
The piece that the top head strap band threads through is also broken on mine. What part besides the this one do I need?