Bu sürüm, hatalı düzenlemeler içerebilir. En son doğrulanmış bellek kopyası dönün.
Neye ihtiyacın var
-
Bu adım çevrilmemiş. Çevrilmesine yardım edin
-
Using a Phillips #00 screwdriver, remove four exposed 3mm screws.
-
You will find one screw on the top, one on the bottom, and one on each side of the camera.
-
-
Bu adım çevrilmemiş. Çevrilmesine yardım edin
-
Remove the sticker on the top of the camera.
-
Use the Phillips #00 screwdriver to remove the screw that was underneath the sticker.
-
-
-
Bu adım çevrilmemiş. Çevrilmesine yardım edin
-
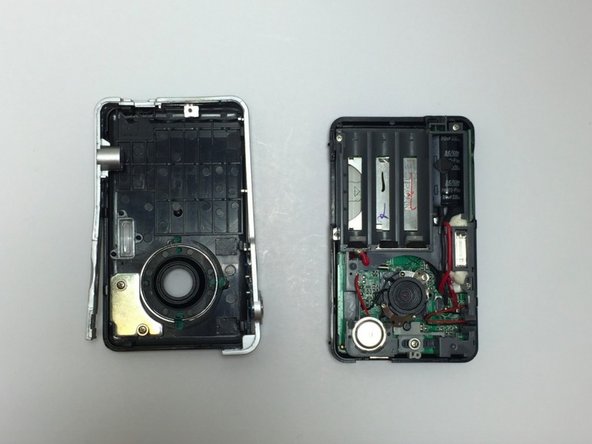
Separate the front and the back of the camera completely to expose the motherboard.
-
-
Bu adım çevrilmemiş. Çevrilmesine yardım edin
-
Locate the power button on the top of the camera.
-
Using tweezers, gently remove the black plastic cover from the power button.
-
-
Bu adım çevrilmemiş. Çevrilmesine yardım edin
-
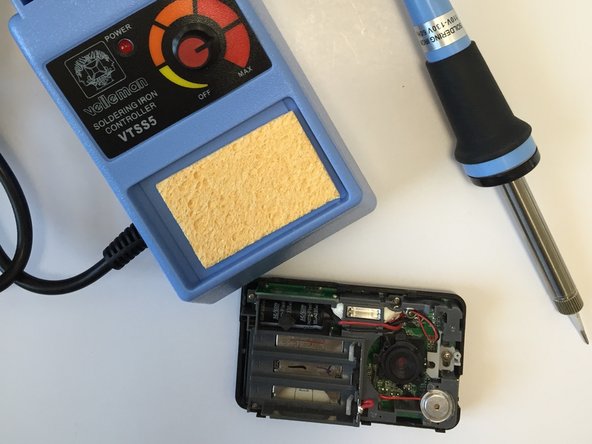
Using a soldering kit, de-solder the black and red wire from the silver power button.
-
Solder the new power button to the black and red wire.
-


Ekip

Marist, Team 15-13, Laflen Spring 2015 Marist, Team 15-13, Laflen Spring 2015 üyesi
MARS-LAFLEN-S15S15G13
4 Üyeler
3 adet Kılavuz yazıldı