Giriş
This guide will teach you how to remove the buttons.
Neye ihtiyacın var
-
-
-
Grip the controller firmly to remove the side handles, wedging a spudger into the seam between the front and handle plates.
-
Pry the side plate away from the front plate by moving the spudger back and forth. You will need to do this all the way around the side plate's seam.
-
-
-
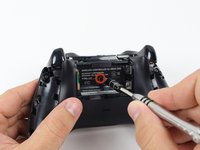
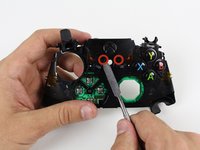
Use a screwdriver and punch a hole directly in the center of the label.
-
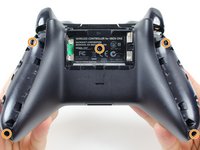
Remove the five 10mm screws located on the back of the controller using the TR8 Security Torx Screwdriver.
-
-
-
-
-
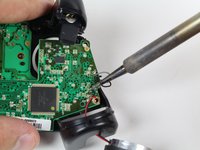
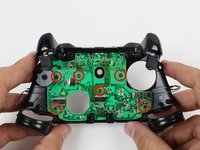
De-solder the soldered joints while holding the red and black wires down on the top motherboard.
-
De-solder the black and gray wires that are attached to the top motherboard.
-
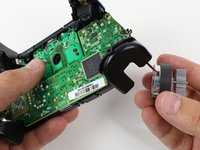
Remove the rumble motors and set them aside.
-
-
-
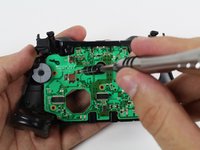
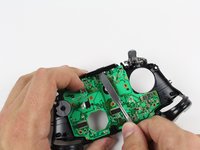
Firmly grip sides of motherboard near the middle.
-
Lift upwards while slightly wiggling the motherboard forward and backward.
-
-
-
-
-
Remove the six T6 Torx screws located on the bottom motherboard.
-
-
-
Remove the bumpers by prying them off of the pegs that secure them, using a spudger. They are located on the front and back of the controller.
-
-
-
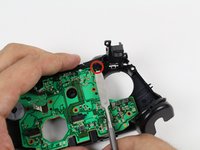
Lift the piece surrounding the Home button off of its pegs.
-
Pry it off of the other side, using a spudger on the pins.
-
-
-
-
-
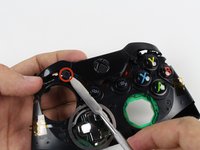
With the buttons facing down, push them up out of their housings, and remove.
-


To reassemble your device, follow these instructions in reverse order.
İptal et: Bu kılavuzu tamamlamadım.
110 farklı kişi bu kılavuzu tamamladı.
Ekip

Cal Poly, Team 20-15, Maness Winter 2015 Cal Poly, Team 20-15, Maness Winter 2015 üyesi
CPSU-MANESS-W15S20G15
5 Üyeler
62 adet Kılavuz yazıldı
32Kılavuz Yorumları
do you have a URL for the repair parts (rubber pads) ect. for the wireless controllers
For all of my Xbox One controllers, I needed the tamper-resistant Torx bits. They're the ones with the hole in the center, like these: http://www.amazon.com/Pro-Grade-13pc-Tam.... Any tamper-resistant or Torx security bit set should do as long as it has the sizes listed in the Tools section of this FixIt article.