Giriş
Use this guide to replace the top housing on your Xbox Series X|S Controller (model 1914).
The top housing may need to be replaced if it's cracked, or you may be installing a new, customized one. The top housing is sometimes called a front panel, faceplate or top shell.
Neye ihtiyacın var
-
-
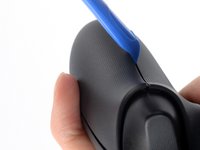
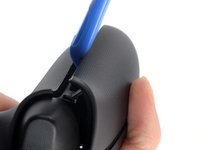
Insert an opening tool between the left handle cover and the bottom inner edge of the back housing.
-
-
-
Slide the opening tool along the inner edge of the left handle cover and pry intermittently to release the plastic clips.
-
-
-
-
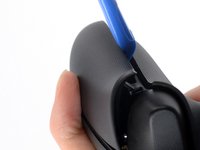
Pry up the middle inner edge of the handle cover with the opening tool to release the remaining clips.
-
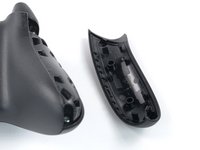
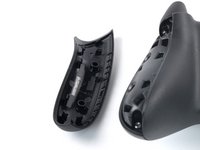
Remove the left handle cover.
-
-
-
Insert an opening tool between the right handle cover and the bottom inner edge of the back housing.
-
-
-
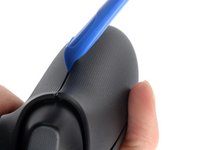
Slide the opening tool along the inner edge of the right handle cover and pry intermittently to release the plastic clips.
-
-
-
Pry up the middle inner edge of the handle cover with the opening tool to release the remaining clips.
-
Remove the right handle cover.
-
-
Bu adımda kullanılan alet:Tweezers$4.99
-
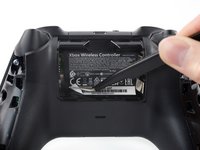
Use a pair of tweezers or your fingers to peel back the sticker to reveal the screw.
-
-
-
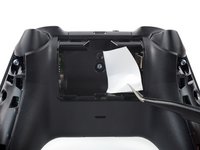
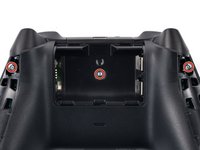
Use a T8R Torx Security driver to remove the five 9.3 mm-long screws securing the top housing, three near the top and two at the bottom.
-


To reassemble your device, follow these instructions in reverse order.
Take your e-waste to an R2 or e-Stewards certified recycler.
Repair didn’t go as planned? Try some basic troubleshooting, or ask our Answers community for help.
To reassemble your device, follow these instructions in reverse order.
Take your e-waste to an R2 or e-Stewards certified recycler.
Repair didn’t go as planned? Try some basic troubleshooting, or ask our Answers community for help.
İptal et: Bu kılavuzu tamamlamadım.
2 farklı kişi bu kılavuzu tamamladı.

