Bu sürüm, hatalı düzenlemeler içerebilir. En son doğrulanmış bellek kopyası dönün.
Neye ihtiyacın var
-
Bu adım çevrilmemiş. Çevrilmesine yardım edin
-
Loosen the two Phillips screws securing the access door to your iMac.
-
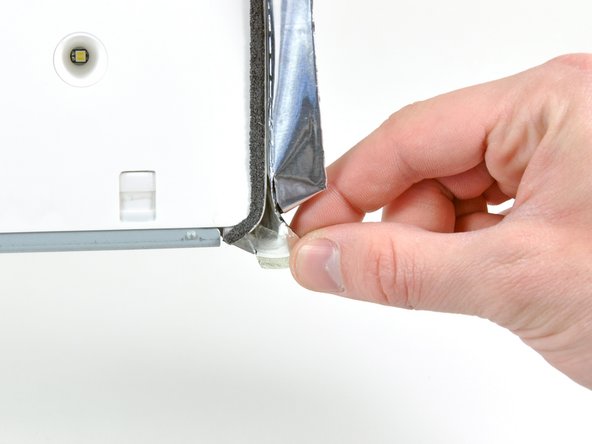
Remove the access door.
-
-
Bu adım çevrilmemiş. Çevrilmesine yardım edin
-
Remove the following screws along the lower edge of your iMac:
-
Three 6 mm T8 Torx screws
-
One 8 mm T8 Torx screw
-
-
Bu adım çevrilmemiş. Çevrilmesine yardım edin
-
To lift the front bezel off the iMac, simultaneously:
-
Use your thumbs to press in the RAM arms and hold the iMac down.
-
Use your index fingers to pull the small bridge of material on the front bezel toward yourself.
-
Pull the front bezel up with your index fingers.
-
Once the small bridge of material has cleared the RAM arms, lift the front bezel by its lower edge just enough to clear the bottom edge of the rear case.
My iMac did not have the "small bridge of material" mentioned, however the bezel just lifted off easily.
-
-
Bu adım çevrilmemiş. Çevrilmesine yardım edin
-
Lift the front bezel off the rear case and rotate it away from the bottom edge of the iMac, minding the camera and microphone cables still attached to its upper edge.
-
-
Bu adım çevrilmemiş. Çevrilmesine yardım edin
-
Disconnect the microphone cable.
-
Disconnect the camera cable by pulling its connector away from the socket on the camera board.
I agree that for a simple, quick battery change, don't risk damaging those delicate wires. Ignore Step 6 and instead of disconnecting the mic and camera wires, keep them in place and just have a friend hold the plastic frame up while you change the battery, or prop it up as mentioned by Stefano C above.
Make sure you double check the new logic board for the presence of the GPU assembly before installing. I stupidly installed a new board without moving the GPU from the old one first. So i guess you can say this guide worked for me twice. :)
-
-
Bu adım çevrilmemiş. Çevrilmesine yardım edin
-
Peel the two highlighted EMI shield tabs off the frame of the LCD.
-
-
Bu adım çevrilmemiş. Çevrilmesine yardım edin
-
Remove the two T6 Torx screws securing the display data cable to the logic board.
Wait, we need a T6 screwdriver as well?
I purchased the T8 and T10 from your site as per the parts list above and now am here with an opened iMac on the dining room table unable to continue :/
-
-
Bu adım çevrilmemiş. Çevrilmesine yardım edin
-
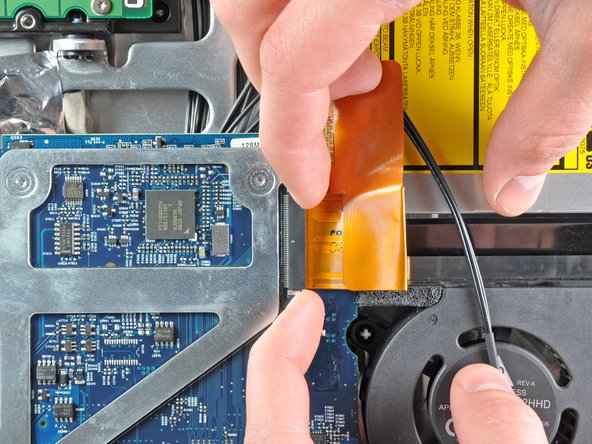
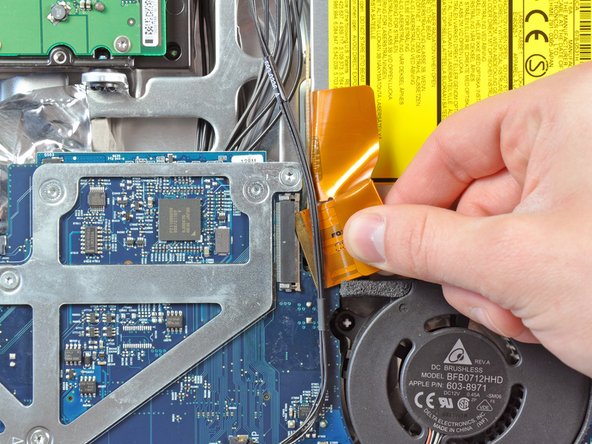
Pull the black plastic tab attached to the display data cable connector to disconnect it from the logic board.
-
-
Bu adım çevrilmemiş. Çevrilmesine yardım edin
-
Use your fingertips to pull both sides of the wide inverter cable connector out of its socket on the logic board.
-
De-route the inverter cable from its location next to the CPU fan.
-
-
Bu adım çevrilmemiş. Çevrilmesine yardım edin
-
Remove the eight T8 Torx screws securing the display assembly to the rear case.
It would be useful to use a torx screw driver with a long, narrow shank… some of these screws are in tight places.
It may also be useful to prop up the back so it is level. This will prevent the screws from falling inside. They can be retrieved once the scene is off.
-
-
Bu adım çevrilmemiş. Çevrilmesine yardım edin
-
Peel back the piece of EMI tape connecting the bottom edge of the right speaker to the metal frame of the iMac.
-
Peel the tape away from the lower corner of the right speaker.
-
-
-
Bu adım çevrilmemiş. Çevrilmesine yardım edin
-
De-route the right-hand speaker's cable from between the logic board and the optical drive fan.
-
Disconnect the cable from the logic board.
-
-
Bu adım çevrilmemiş. Çevrilmesine yardım edin
-
Remove the 26 mm T10 Torx screw securing the right speaker to the iMac.
-
-
Bu adım çevrilmemiş. Çevrilmesine yardım edin
-
Pull the right speaker away from the logic board and remove it from the iMac.
-
-
Bu adım çevrilmemiş. Çevrilmesine yardım edin
-
Use the flat end of a spudger to pry both antenna connectors off their sockets on the AirPort card.
-
-
Bu adım çevrilmemiş. Çevrilmesine yardım edin
-
Use both fingertips to disconnect the camera and microphone cable from its socket on the logic board.
-
-
Bu adım çevrilmemiş. Çevrilmesine yardım edin
-
Pull the optical drive fan connector toward the top edge of the iMac to disconnect it from the logic board.
-
-
Bu adım çevrilmemiş. Çevrilmesine yardım edin
-
Pull the left speaker connector toward the top edge of the iMac to disconnect it from the logic board.
-
-
Bu adım çevrilmemiş. Çevrilmesine yardım edin
-
Pull the optical drive thermal sensor connector toward the right side of the iMac to disconnect it from its socket.
-
-
Bu adım çevrilmemiş. Çevrilmesine yardım edin
-
Gently pull the cable retainer on the optical drive cable ZIF socket toward the right side of the iMac.
-
Pull the optical drive ribbon cable out of its socket, being careful not to rip it in the process.
-
-
Bu adım çevrilmemiş. Çevrilmesine yardım edin
-
Disconnect the hard drive thermal sensor and hard drive fan cables from the logic board by pulling their connectors toward the top edge of the iMac.
-
-
Bu adım çevrilmemiş. Çevrilmesine yardım edin
-
Pull the CPU fan connector toward the left edge of the iMac to disconnect it from the logic board.
-
-
Bu adım çevrilmemiş. Çevrilmesine yardım edin
-
Disconnect the power button cable from the logic board.
-
-
Bu adım çevrilmemiş. Çevrilmesine yardım edin
-
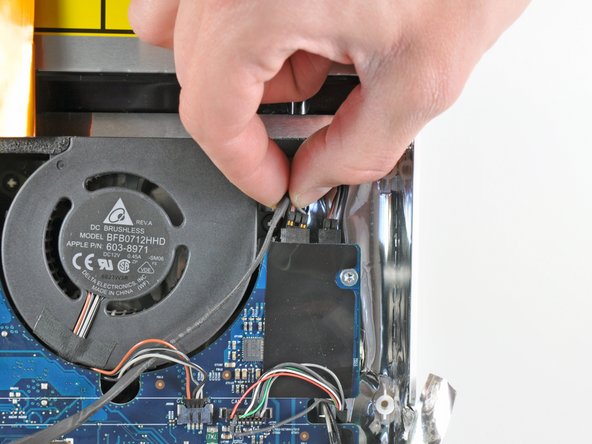
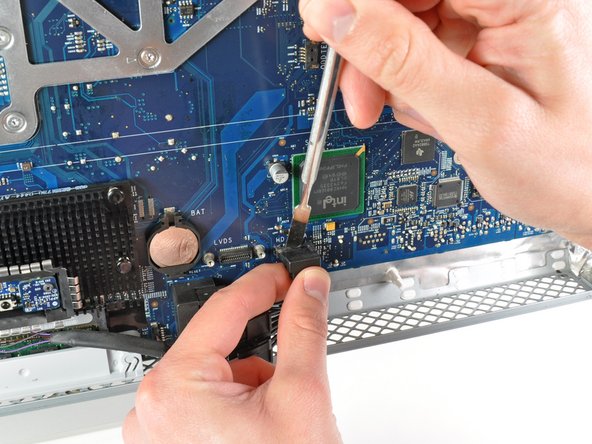
Use the flat end of a spudger to pry the single Bluetooth antenna off its socket on the Bluetooth board.
-
-
Bu adım çevrilmemiş. Çevrilmesine yardım edin
-
Pull the ambient temperature sensor cable perpendicular to the face of the logic board to disconnect it from its socket.
-
-
Bu adım çevrilmemiş. Çevrilmesine yardım edin
-
Disconnect the DC-In cable from the logic board by pulling its cable toward the right side of the iMac while depressing its locking mechanism.
-
-
Bu adım çevrilmemiş. Çevrilmesine yardım edin
-
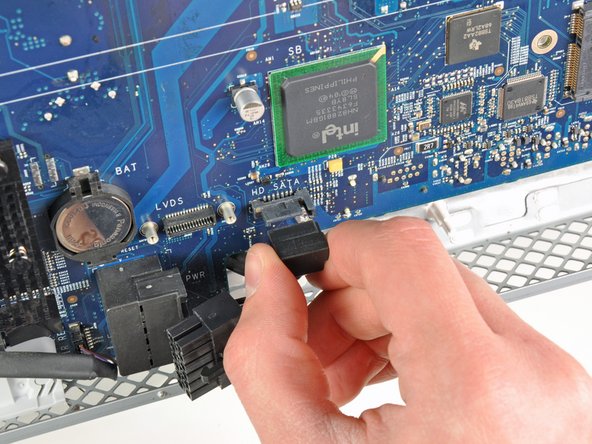
Pull the hard drive SATA data cable perpendicular to the face of the logic board to disconnect it from its socket.
-
-
Bu adım çevrilmemiş. Çevrilmesine yardım edin
-
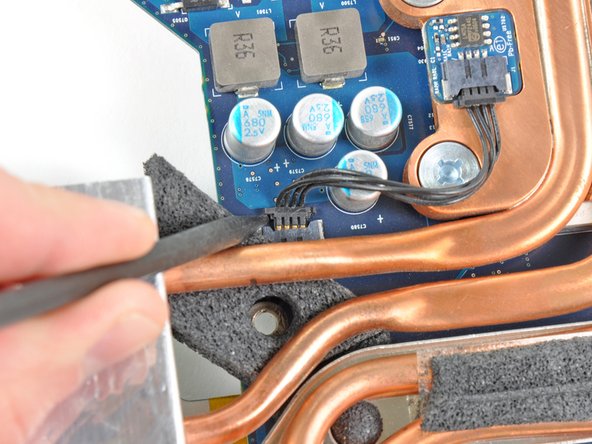
Peel the foam tape off the top edge of the heat sink framework.
-
-
Bu adım çevrilmemiş. Çevrilmesine yardım edin
-
Remove the following ten screws:
-
Three 6.6 mm T10 Torx fine thread screws
-
Three 7 mm T10 Torx coarse thread screws
-
Two 9.3 mm T10 Torx coarse thread screws
-
Two 5.3 mm T10 Torx coarse thread screws
-
-
Bu adım çevrilmemiş. Çevrilmesine yardım edin
-
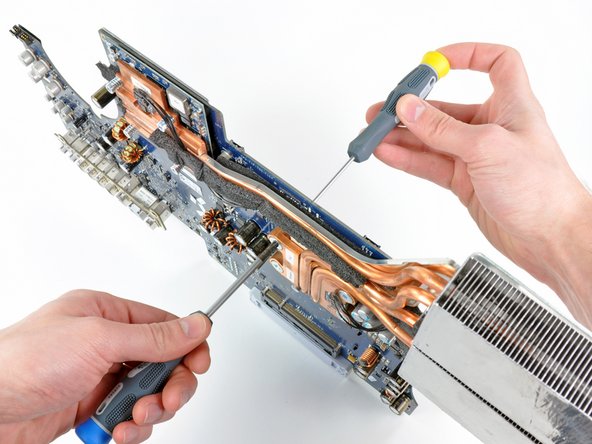
Pull the right edge of the logic board slightly away from the rear case to dislodge the rear I/O ports from their bezel.
-
Tilt the top edge of the board away from the rear case and lift the logic board assembly out of the rear case, minding any cables that may get caught.
-
-
Bu adım çevrilmemiş. Çevrilmesine yardım edin
-
Use the tip of a spudger to push the CPU thermal sensor cable connector out of its socket on the logic board.
-
-
Bu adım çevrilmemiş. Çevrilmesine yardım edin
-
Flip the logic board over so it is heat sink side down.
-
Remove the following T10 Torx screws.
-
One short screw near the end of the heat sink.
-
Four screws around the CPU itself.
-
-
Bu adım çevrilmemiş. Çevrilmesine yardım edin
-
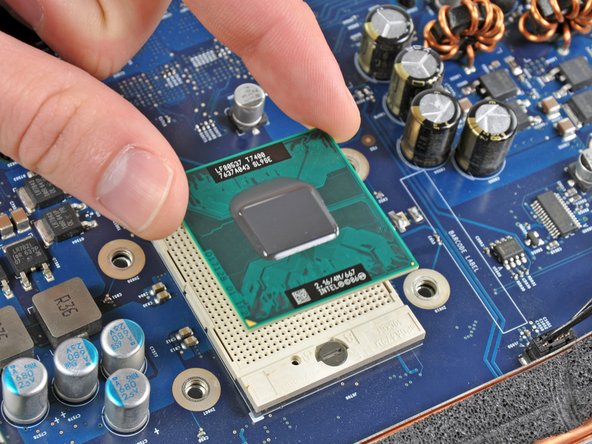
Use a small flathead screwdriver to rotate the CPU lock 180 degrees counter-clockwise.
-
Lift the CPU straight up from its socket.
I am here , could I put on it the x7900 2,8ghz cpu? I understand that if the cpu is an odd number , you could use another odd number of cpu like this , If not , you could use the T7600 as last cpu that works .
I'm right ??? the imac have a white light , no sound . no screen logo . I don't know if i could make work this x7900 on it ?????
-


İptal et: Bu kılavuzu tamamlamadım.
6 farklı kişi bu kılavuzu tamamladı.

Bir Yorum
Just finished this refurb…. fantastic site and great guide.
The GPU was overheating, and initially, I used SMFan to increase minimum fan speeds and disabled the GPU by following this video
https://www.youtube.com/watch?v=1GDSolVl...
but obviously this limited performance, so I thought , maybe refreshing the thermal paste was help and it has - I decided to do the CPU and the GPU at the same time and the only issue was the antenna terminals broke on the Bluetooth board as I remove the cable - being a bit heavy handed.
A Bluetooth dongle later and this is all fine, the system still runs a little hot, but that’s to be expected and for a 13 year old Mac, its pretty good.
Thanks Folks - really wonderful.