Giriş
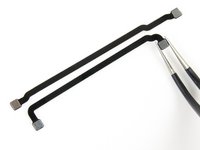
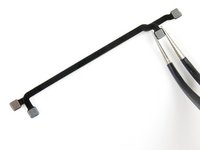
Use this guide to remove the two interconnect cables from the logic board of your iPhone 5. Be very careful, as the connector cables are delicate.
Neye ihtiyacın var
-
-
Lay overlapping strips of clear packing tape over the iPhone's display until the whole face is covered.
-
-
-
Power off your iPhone before beginning disassembly.
-
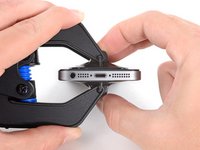
Remove the two 3.6 mm Pentalobe screws next to the Lightning connector.
-
-
-
Regardless of the tool you use, you need to be sure you pull up the entire display.
-
If the glass begins to separate from the plastic, as shown in the first image, slide a plastic opening tool between the plastic frame and the metal phone body to pry the metal clips out of the case.
-
-
Bu adımda kullanılan alet:Clampy - Anti-Clamp$24.95
-
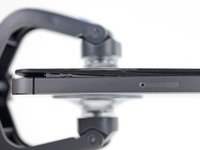
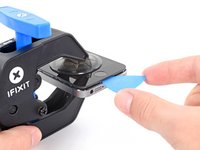
Pull the blue handle backwards to unlock the Anti-Clamp's arms.
-
Slide the arms over either the left or right edge of your iPhone.
-
Position the suction cups near the bottom edge of the iPhone just above the home button—one on the front, and one on the back.
-
Squeeze the cups together to apply suction to the desired area.
-
-
-
Press a suction cup onto the screen, just above the home button.
-
-
-
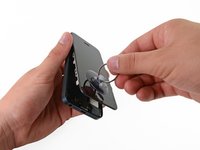
While holding the iPhone down with one hand, pull up on the suction cup to slightly separate the front panel assembly from the rear case.
-
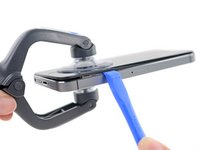
With a plastic opening tool, begin to gently pry the rear case down, away from the screen, while you pull up with the suction cup.
-
-
-
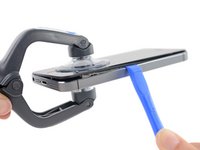
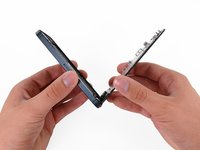
Continue to pry up around the sides of the front panel assembly, detaching the clips along the left and right side.
-
-
-
-
Once the clips have been released on the bottom and sides of the front panel assembly, pull the bottom of the assembly away from the rear case.
-
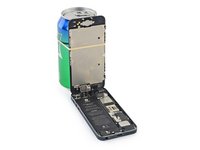
Open the display to about a 90º angle, and lean it against something to keep it propped up while you're working on the phone.
-
Add a rubber band to keep the display securely in place while you work. This prevents undue strain on the display cables.
-
-
-
Remove the following two screws securing the metal battery connector bracket to the logic board:
-
One 1.8 mm Phillips screw
-
One 1.6 mm Phillips screw
-
-
-
Remove the metal battery connector bracket from the iPhone.
-
-
-
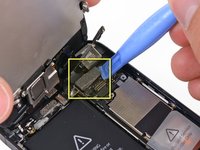
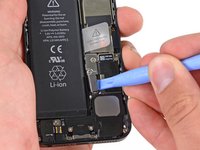
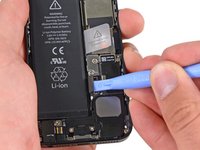
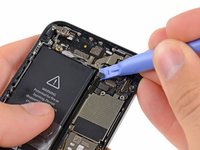
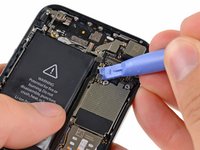
Use a plastic opening tool to gently pry the battery connector up from its socket on the logic board.
-
-
-
Remove the following screws securing the front panel assembly cable bracket to the logic board:
-
Two 1.2 mm Phillips screws
-
One 1.6 mm Phillips screw
-
-
-
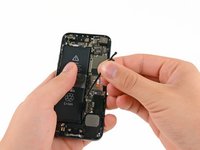
Lift the display cable bracket toward the battery to unhook it, and remove it from the iPhone.
-
-
-
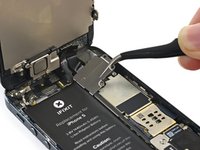
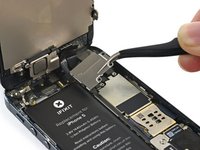
Use a plastic opening tool or a fingernail to disconnect the three front panel assembly cables:
-
Front-facing camera and sensor cable
-
LCD cable
-
Digitizer cable
-
-
-
Remove the front panel assembly from the rear case.
-
-
-
Remove the following two screws securing the metal battery connector bracket to the logic board:
-
One 1.8 mm Phillips screw
-
One 1.6 mm Phillips screw
-
-
-
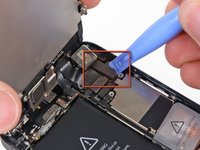
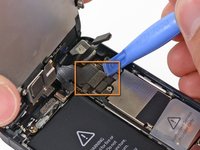
Remove the single 1.2 mm Phillips screw remaining in the mid logic board bracket.
-
Remove the mid logic board bracket.
-


To reassemble your device, follow these instructions in reverse order.
İptal et: Bu kılavuzu tamamlamadım.
38 farklı kişi bu kılavuzu tamamladı.

2Kılavuz Yorumları
io ho cambiato la batteria , la batteria funziona e funziona tutto ma non prende più la rete , i cavi sono tutti attaccati bene , cosa posso aver toccato ? grazie