Ana içeriğe geç

iPhone 5s Lightning Connector Replacement

Neye ihtiyacın var

Videoya Genel Bakış

  1. iPhone 5s Lightning Connector Replacement, Removing the Pentalobe screws: adım 1, 1 resimden 1.
    • Before you proceed, discharge your iPhone battery below 25%. A charged lithium-ion battery can catch fire and/or explode if accidentally punctured.

    • Power off your iPhone before beginning disassembly.

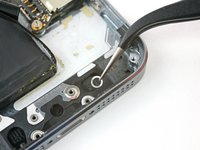
    • Remove the two 3.9 mm Pentalobe screws from either side of Lightning connector.

  2. iPhone 5s Lightning Connector Replacement, Taping the display glass: adım 2, 3 resimden 1. iPhone 5s Lightning Connector Replacement, Taping the display glass: adım 2, 3 resimden 2. iPhone 5s Lightning Connector Replacement, Taping the display glass: adım 2, 3 resimden 3.
    • If your display glass is cracked, keep further breakage contained and prevent bodily harm during your repair by taping the glass.

    • Lay overlapping strips of clear packing tape over the iPhone's display until the whole face is covered.

    • This will keep glass shards contained and provide structural integrity when prying and lifting the display.

    • Wear safety glasses to protect your eyes from any glass shaken free during the repair.

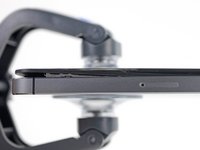
  3. iPhone 5s Lightning Connector Replacement, Display separation prevention: adım 3, 3 resimden 1. iPhone 5s Lightning Connector Replacement, Display separation prevention: adım 3, 3 resimden 2. iPhone 5s Lightning Connector Replacement, Display separation prevention: adım 3, 3 resimden 3.
    • In the following steps you will be pulling the display up out of the phone body. The display is composed of a glass screen and a plastic bezel with metal clips.

    • Regardless of the tool you use, you need to be sure you pull up the entire display.

    • If the glass begins to separate from the plastic, as shown in the first image, slide a plastic opening tool between the plastic frame and the metal phone body to pry the metal clips out of the case.

    • If you are reassembling a phone with a separated display bezel, you may want to place a thin strip of adhesive between the plastic bezel and the glass to keep the phone closed.

  4. iPhone 5s Lightning Connector Replacement, Anti-Clamp instructions: adım 4, 3 resimden 1. iPhone 5s Lightning Connector Replacement, Anti-Clamp instructions: adım 4, 3 resimden 2. iPhone 5s Lightning Connector Replacement, Anti-Clamp instructions: adım 4, 3 resimden 3.
    Bu adımda kullanılan alet:
    Anti-Clamp
    $24.95
    Satın Al
    • The next two steps demonstrate the Anti-Clamp, a tool we designed to make the opening procedure easier. If you aren't using the Anti-Clamp, skip down two steps for an alternate method.

    • For complete instructions on how to use the Anti-Clamp, check out this guide.

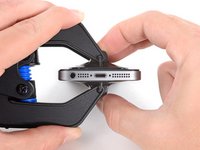
    • Pull the blue handle backwards to unlock the Anti-Clamp's arms.

    • Slide the arms over either the left or right edge of your iPhone.

    • Position the suction cups near the bottom edge of the iPhone just above the home button—one on the front, and one on the back.

    • Squeeze the cups together to apply suction to the desired area.

    • If the surface of your iPhone is too slippery for the Anti-Clamp to hold onto, you can use the included tape pad to create a grippier surface.

  5. iPhone 5s Lightning Connector Replacement: adım 5, 3 resimden 1. iPhone 5s Lightning Connector Replacement: adım 5, 3 resimden 2. iPhone 5s Lightning Connector Replacement: adım 5, 3 resimden 3.
    • Pull the blue handle forwards to lock the arms.

    • Turn the handle clockwise 360 degrees or until the cups start to stretch.

    • Make sure the suction cups remain aligned with each other. If they begin to slip out of alignment, loosen the suction cups slightly and realign the arms.

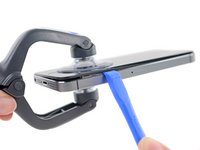
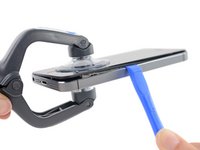
    • Insert an opening pick under the screen when the Anti-Clamp creates a large enough gap.

    • If the Anti-Clamp doesn't create a sufficient gap, rotate the handle a quarter turn.

    • Don't crank more than a quarter turn at a time and wait a few seconds between turns. Let the Anti-Clamp and time do the work for you.

    • Skip the next two steps.

  6. iPhone 5s Lightning Connector Replacement, Manual Opening Procedure: adım 6, 1 resimden 1.
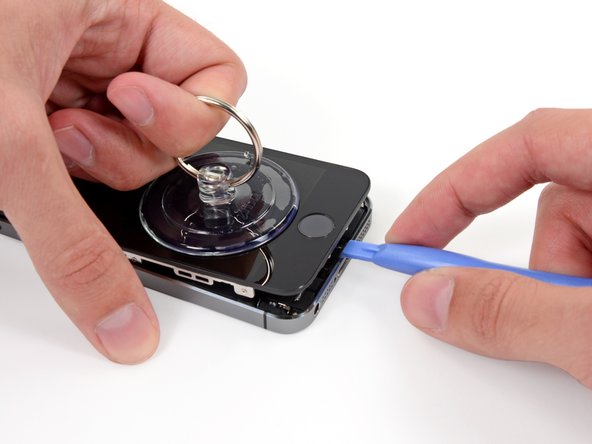
    • If you don't have an Anti-Clamp, use a single suction cup to lift the front panel:

    • Press a suction cup onto the screen, just above the home button.

    • Be sure the cup is completely on the screen to get a tight seal.

  7. iPhone 5s Lightning Connector Replacement, Start lifting the front panel assembly: adım 7, 1 resimden 1.
    • The front panel is attached with clips, and there are several ribbon cables connecting it to the rest of the phone. Your goal here is to release the clips and open the phone only enough to disconnect the cables. Go slowly and carefully to avoid damage.

    • Make sure the suction cup is firmly attached to the front panel assembly near the home button.

    • While holding the iPhone down with one hand, pull up on the suction cup to slightly separate the home button end of the front panel from the rear case.

    • With a plastic opening tool, gently pry the edges of the rear case down, away from the front panel assembly, while you pull up with the suction cup.

    • Take your time and apply firm, constant force. The front panel assembly is a much tighter fit than on most other devices.

  8. iPhone 5s Lightning Connector Replacement: adım 8, 2 resimden 1. iPhone 5s Lightning Connector Replacement: adım 8, 2 resimden 2.
    • Do not try to completely remove the front panel assembly from the rear case, as there are several delicate ribbon cables connecting them.

    • Pull the plastic nub to release the vacuum seal on the suction cup.

    • Remove the suction cup from the screen.

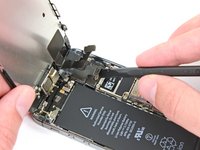
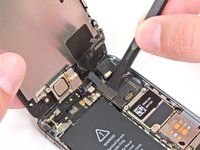
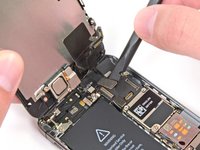
  9. iPhone 5s Lightning Connector Replacement, Removing the Touch ID cable bracket: adım 9, 3 resimden 1. iPhone 5s Lightning Connector Replacement, Removing the Touch ID cable bracket: adım 9, 3 resimden 2. iPhone 5s Lightning Connector Replacement, Removing the Touch ID cable bracket: adım 9, 3 resimden 3.
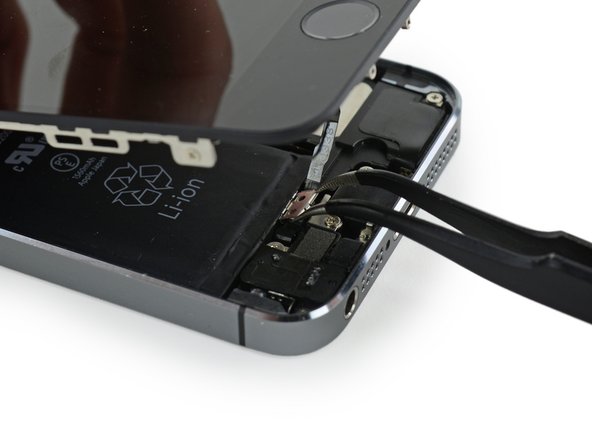
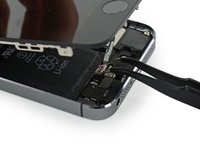
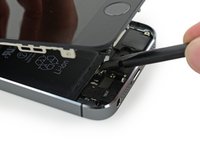
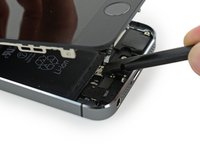
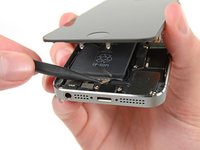
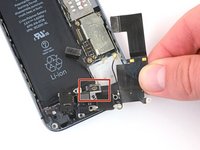
    • Open the phone just enough to reveal the metal bracket covering the home button cable.

    • Do not open the phone too far or you risk damaging the home button cable, or the socket it plugs into. Keep the cable loose—if it is stretched taut, that's too far.

    • Only the phone's original home button assembly will be capable of using the Touch ID functionality. If you rip the cable, installing a new home button will only restore ordinary home button functions, not the Touch ID features.

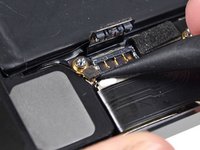
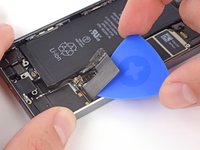
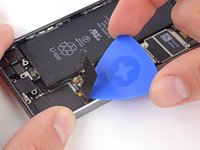
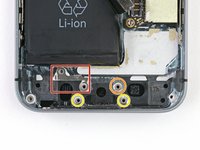
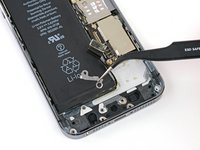
    • Use the tip of a spudger to push the bracket free and remove it with tweezers.

    • The next two steps apply to reassembly. Skip them and continue to Step 12 until reassembly.

  10. iPhone 5s Lightning Connector Replacement: adım 10, 2 resimden 1. iPhone 5s Lightning Connector Replacement: adım 10, 2 resimden 2.
    • During reassembly, you will need to reinstall the Touch ID cable bracket. The top of the bracket needs to slide between the battery and Touch ID cable connector, in front of the metal tab. The bottom must latch down over the connector.

    • Slide the top of the bracket over the Touch ID cable connector from left to right.

  11. iPhone 5s Lightning Connector Replacement: adım 11, 2 resimden 1. iPhone 5s Lightning Connector Replacement: adım 11, 2 resimden 2.
    • During reassembly, use the flat end of a spudger to snap the front portion of the Touch ID cable bracket down over the cable connector.

    • If the bracket does not snap down flush, you may need to remove the bracket and slide it over the cable connector again for a better fit.

  12. iPhone 5s Lightning Connector Replacement, Disconnecting the home button cable connector: adım 12, 2 resimden 1. iPhone 5s Lightning Connector Replacement, Disconnecting the home button cable connector: adım 12, 2 resimden 2.
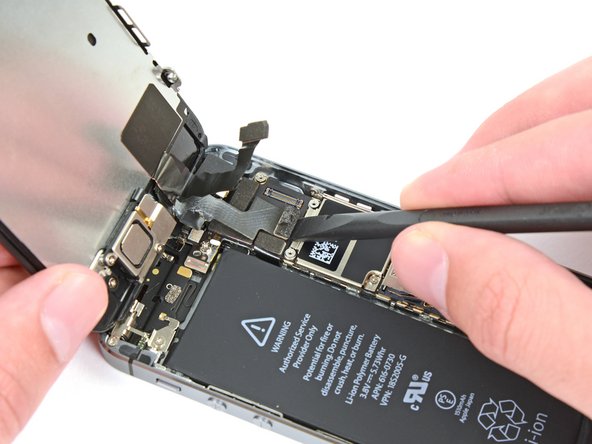
    • Use the tip of a spudger to pry the home button cable connector up out of its socket.

    • Be sure you're separating the cable connector from its socket, and not prying the entire socket up. The socket is on its own glued-down cable that can be pried up if you aren't careful.

  13. iPhone 5s Lightning Connector Replacement, Opening up the phone: adım 13, 3 resimden 1. iPhone 5s Lightning Connector Replacement, Opening up the phone: adım 13, 3 resimden 2. iPhone 5s Lightning Connector Replacement, Opening up the phone: adım 13, 3 resimden 3.
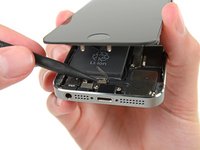
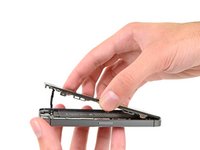
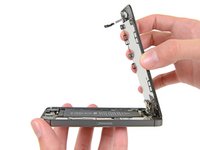
    • Once the connector has been released, pull the home button end of the assembly away from the rear case, using the top of the phone as a hinge.

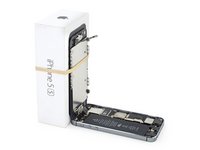
    • Open the display to about a 90º angle, and lean it against something to keep it propped up while you're working on the phone.

    • Add a rubber band to keep the display securely in place while you work. This prevents undue strain on the display cables.

    • In a pinch, you can use an unopened canned beverage to hold the display.

  14. iPhone 5s Lightning Connector Replacement: adım 14, 1 resimden 1.
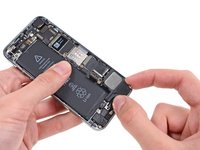
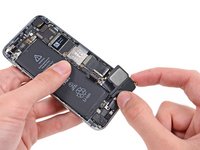
    • Remove the two 1.6 mm Phillips #000 screws securing the metal battery connector bracket to the logic board.

  15. iPhone 5s Lightning Connector Replacement: adım 15, 1 resimden 1.
    • Remove the metal battery connector bracket from the iPhone.

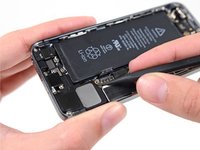
  16. iPhone 5s Lightning Connector Replacement: adım 16, 2 resimden 1. iPhone 5s Lightning Connector Replacement: adım 16, 2 resimden 2.
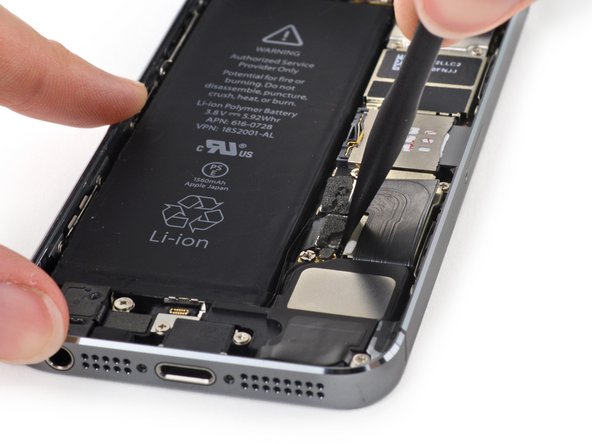
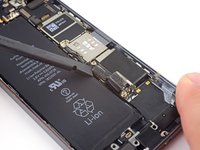
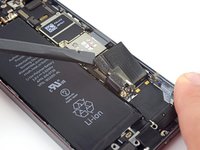
    • Use the flat end of a spudger to gently pry the battery connector up from its socket on the logic board.

    • Be very careful to only pry up on the battery connector itself and not the socket on the logic board. If you pry up on the logic board socket or the board itself, you may destroy the socket or damage nearby components on the board.

  17. iPhone 5s Lightning Connector Replacement: adım 17, 1 resimden 1.
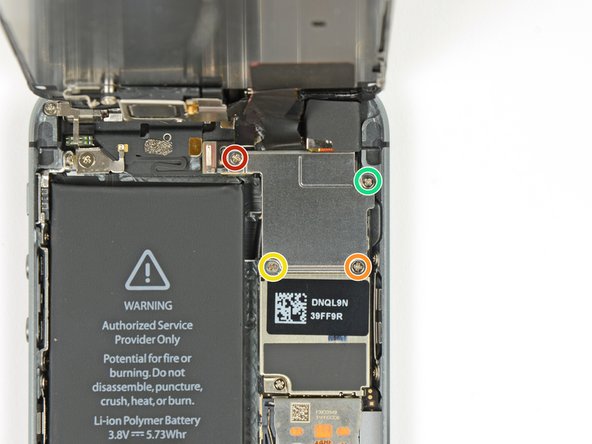
    • Remove the following screws securing the front panel assembly cable bracket to the logic board:

    • One 1.7 mm Phillips #000 screw

    • One 1.2 mm Phillips #000 screw

    • One 1.3 mm Phillips #000 screw

    • One more 1.7 mm Phillips #000 screw

    • This 1.7 mm screw tends to not be attracted to a magnetized screwdriver. Take care not to lose it when removing.

    • It is especially important to keep track of your screws in this step for reassembly. Accidentally using the 1.3 mm screw or one of the 1.7 mm screws in the bottom right hole will result in significant damage to the logic board causing the phone to no longer boot properly.

    • Be careful not to over-tighten the screws, and don't force them. If they don't fit easily when you are securing them, they may be the wrong size.

  18. iPhone 5s Lightning Connector Replacement: adım 18, 1 resimden 1.
    • Remove the front panel assembly cable bracket from the logic board.

  19. iPhone 5s Lightning Connector Replacement: adım 19, 2 resimden 1. iPhone 5s Lightning Connector Replacement: adım 19, 2 resimden 2.
    • Use a spudger or a fingernail to disconnect the front-facing camera and sensor cable.

  20. iPhone 5s Lightning Connector Replacement: adım 20, 2 resimden 1. iPhone 5s Lightning Connector Replacement: adım 20, 2 resimden 2.
    • Make sure the battery is disconnected before you disconnect or reconnect the cable in this step.

    • Disconnect the LCD cable connector.

    • When reassembling your phone, the LCD cable may pop off the connector. This can result in white lines or a blank screen when powering your phone back on. If that happens, simply reconnect the cable and power cycle your phone. The best way to power cycle your phone is to disconnect and reconnect the battery.

  21. iPhone 5s Lightning Connector Replacement: adım 21, 2 resimden 1. iPhone 5s Lightning Connector Replacement: adım 21, 2 resimden 2.
    • Finally, disconnect the digitizer cable connector.

  22. iPhone 5s Lightning Connector Replacement: adım 22, 1 resimden 1.
    • Remove the front panel assembly from the rear case.

  23. iPhone 5s Lightning Connector Replacement, Speaker: adım 23, 2 resimden 1. iPhone 5s Lightning Connector Replacement, Speaker: adım 23, 2 resimden 2.
    • Use the tip of a spudger to pry the antenna cable up from its socket on the logic board.

    • To reconnect the cable, use tweezers to position it directly over its socket, then push it straight down with the flat edge of your spudger.

  24. iPhone 5s Lightning Connector Replacement: adım 24, 1 resimden 1.
    • Remove the following Phillips #000 screws:

    • One 2.9 mm screw

    • One 1.5 mm screw

    • One 3.6 mm screw

  25. iPhone 5s Lightning Connector Replacement: adım 25, 2 resimden 1. iPhone 5s Lightning Connector Replacement: adım 25, 2 resimden 2.
    • Use the point of a spudger to gently pry between the speaker and the rear case, lifting the speaker enough to grab with your fingers.

    • Do not attempt to pry the speaker entirely out of the case, you may break plastic tabs holding the speaker in place.

  26. iPhone 5s Lightning Connector Replacement: adım 26, 3 resimden 1. iPhone 5s Lightning Connector Replacement: adım 26, 3 resimden 2. iPhone 5s Lightning Connector Replacement: adım 26, 3 resimden 3.
    • Swivel the speaker downwards and toward the left of the phone to free the upper tab from underneath the logic board.

    • Slide the speaker up and to the right to free the left-hand tab from under the home button cable connector.

    • Remove the speaker from the iPhone.

  27. iPhone 5s Lightning Connector Replacement, Lightning Connector: adım 27, 1 resimden 1.
    • Remove the following four Phillips #000 screws:

    • One 3.1 mm screw

    • One 2.9 mm screw

    • One 1.5 mm screw

    • One 3.4 mm screw

  28. iPhone 5s Lightning Connector Replacement: adım 28, 2 resimden 1. iPhone 5s Lightning Connector Replacement: adım 28, 2 resimden 2.
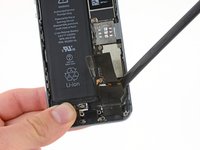
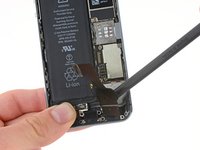
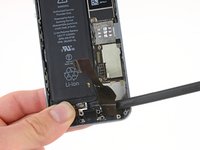
    • Use a spudger to pry the Lightning connector cable up from its socket on the logic board.

  29. iPhone 5s Lightning Connector Replacement: adım 29, 2 resimden 1. iPhone 5s Lightning Connector Replacement: adım 29, 2 resimden 2.
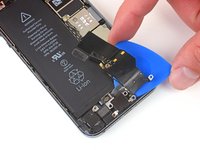
    • The Lightning connector data cable is held to the logic board and rear case with mild adhesive.

    • Use an opening pick to slowly separate the cable from the logic board.

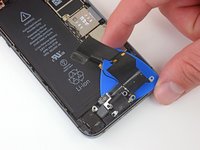
  30. iPhone 5s Lightning Connector Replacement: adım 30, 3 resimden 1. iPhone 5s Lightning Connector Replacement: adım 30, 3 resimden 2. iPhone 5s Lightning Connector Replacement: adım 30, 3 resimden 3.
    • Continue prying with the flat end of a spudger.

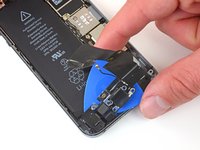
  31. iPhone 5s Lightning Connector Replacement: adım 31, 3 resimden 1. iPhone 5s Lightning Connector Replacement: adım 31, 3 resimden 2. iPhone 5s Lightning Connector Replacement: adım 31, 3 resimden 3.
    • Continue prying with an opening pick to separate the Lightning connector assembly from the rear case.

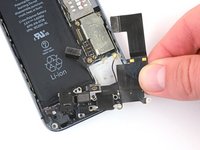
    • Be sure to separate all parts of the assembly from the rear case, including the Lightning connector, headphone jack and home button cable socket.

  32. iPhone 5s Lightning Connector Replacement: adım 32, 2 resimden 1. iPhone 5s Lightning Connector Replacement: adım 32, 2 resimden 2.
    • Remove the Lightning connector assembly.

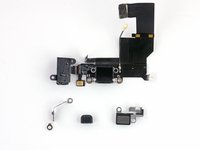
    • Examine your replacement part, and your original cable carefully to be sure they match. Your replacement Lightning connector assembly may be missing certain components that need to be transferred from the original.

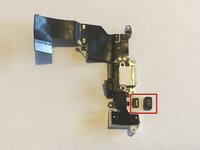
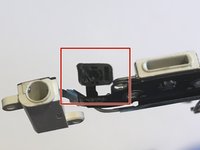
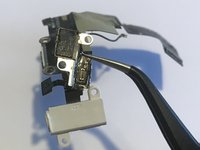
    • Components that commonly need to be transferred include a clip routed along the left and top edges of the headphone jack, the rubber microphone cover, and the bracket for the Touch ID cable connector. Refer to the following steps to transfer the rubber microphone cover and/or Touch ID cable connector.

  33. iPhone 5s Lightning Connector Replacement, Microphone cover: adım 33, 3 resimden 1. iPhone 5s Lightning Connector Replacement, Microphone cover: adım 33, 3 resimden 2. iPhone 5s Lightning Connector Replacement, Microphone cover: adım 33, 3 resimden 3.
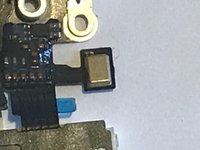
    • Fold the microphone cable down to straighten it out.

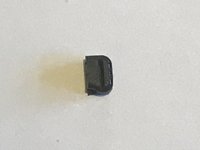
    • Pull the microphone cover off of the microphone with your fingers or tweezers.

  34. iPhone 5s Lightning Connector Replacement: adım 34, 3 resimden 1. iPhone 5s Lightning Connector Replacement: adım 34, 3 resimden 2. iPhone 5s Lightning Connector Replacement: adım 34, 3 resimden 3.
    • Remove any covering on the microphone (this one does not have a covering).

    • Slide the slotted side (shown facing up) onto the microphone. It may help to hold the microphone cover steady by inserting tweezers into the hole on the bottom.

    • Fold the microphone up so that it points out, as shown.

  35. iPhone 5s Lightning Connector Replacement, Touch ID cable connector: adım 35, 2 resimden 1. iPhone 5s Lightning Connector Replacement, Touch ID cable connector: adım 35, 2 resimden 2.
    • Flip the Touch ID cable and connector over to the reverse side of the Lightning connector assembly, and peel the Touch ID cable off of the bracket.

    • Thread the Touch ID cable on the replacement Lightning cable assembly into the bracket as shown. It is strongly recommended to affix the Touch ID cable to the bracket with mild adhesive, such as B-7000.

  36. iPhone 5s Lightning Connector Replacement: adım 36, 3 resimden 1. iPhone 5s Lightning Connector Replacement: adım 36, 3 resimden 2. iPhone 5s Lightning Connector Replacement: adım 36, 3 resimden 3.
    • There are several spacers loosely placed on screw posts under the Lightning connector assembly. While not essential to phone function, you should replace these washers where you found them when reassembling the phone. Spacers may vary between devices, this unit has spacers as follows:

    • One bracket

    • One C washer

    • Two small washers

    • If you are removing more components, take these pieces out and set them aside for safe keeping.

Sonuç

To reassemble your device, follow these instructions in reverse order.

398 farklı kişi bu kılavuzu tamamladı.

Sam Goldheart

Üyelik tarihi: 10/18/12

465.119 İtibar

538 adet Kılavuz yazıldı

Ekip

iFixit iFixit üyesi

Staff

135 Üyeler

16.476 adet Kılavuz yazıldı

43 Yorum

Can't you replace just the lightning port itself by soldering on a new one?

Josh Bacon - Yanıt

It's not even worth soldering another one on when it's pretty cheap to buy another charging port flex assembly.

Ben -

I got through this successfully and it solved my problem (phone wouldn't charge/iTunes wouldn't recognize it when plugged in). With the new part it works perfectly.

Two cautions: I bought a new lightning connector assembly and I had to transfer two items from the old assembly that were not mentioned in the steps.

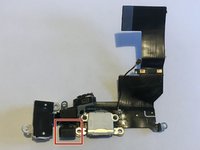
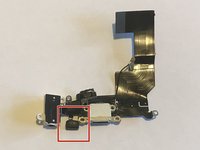
(1) There is a small black rubber "boot" which you can see in the step 38 photo. (on the very bottom between the lightning port and the headphone jack) Pull this off and put it in the same place on your new lightning connector assembly. It attaches to a fitting on the bottom wall of the aluminum case.

(2) There is a bracket that holds the home button connector socket in place. This is the socket that is exposed when you disconnect the home button cable in step 9. When you remove the old lightning connector assembly, this bracket needs to be transferred to the new assembly. It's attached by a small piece of double sided tape that you can salvage/reuse if you're careful!

Mike Ware - Yanıt

Right well that wasn't too much fun. In my case the adhesive connecting the lcd/digitiser and the lcd shield/bracket had gone making opening the device quite difficult. The screen and digitizer were coming up with the suction cup but the lcd shield and the metal bracket with all the clips stayed firmly secured to the main case. My solution was to drive a flat metal prying tool on the battery side between the metal bracket and the inside wall of the main casing. Not for the faint of heart but I got there in the end.

No complaints with the rest of the repair and the iFixit replacement lightning assembly works flawlessly (my lighting port and headphone jack had become loose fitting causing headphones to easily pop out and making charging very difficult).

When all is re-assembled remember to do a hard reset to get touch ID working again as only the home button function works immediately after reassembly (security feature?). Thanks a million iFixit, this brick will live to see another year hopefully :)

Barry O'Neill - Yanıt

Hi Barry,

Can you clarify what type of reset you had to do to get your TouchID working again as like you, only my home button is working after reassembly.

Thanks

Sean Gardner -

Yorum Ekle

İstatistikleri Görüntüle:

Son 24 Saat: 2

Son 7 gün: 40

Son 30 gün: 203

Her zaman: 280,464