Giriş
The button in the click wheel.
Neye ihtiyacın var
-
-
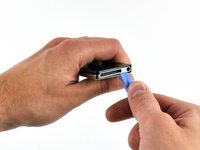
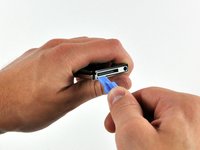
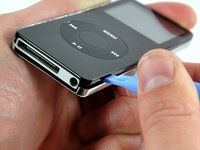
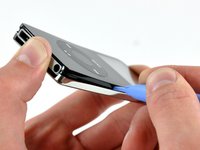
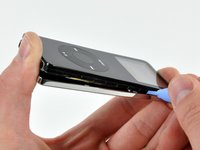
Insert the large iPod opening tool into the seam between the front case and rear panel of the iPod, below the dock connector. Run the tool back and forth to create an opening. The tool's edge should point toward the rear panel to prevent any accidental scratching of the aluminum front case.
-
-
-
Remove the following 3 screws:
-
Two 3 mm Phillips screws near the dock connector.
-
One 4 mm Phillips screw along the edge of the logic board.
-
-
-
-
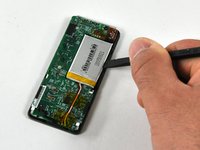
Insert the flat end of a spudger between the battery and the headphone jack side of the front case to pry the battery up off the adhesive securing it to the front case.
-
Rotate the battery out of the iPod and lay it next to the iPod. The battery is still soldered to the logic board by three wires, so don't remove it entirely.
-
-
-
Use a spudger to carefully pry up the adhesive holding down the edge of the display.
-
-
-
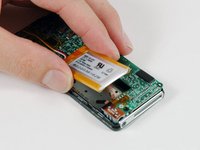
Lift up on the click wheel cover and carefully thread the orange click wheel ribbon through the slot in the click wheel cover.
-
Lift the click wheel cover out of the iPod.
-
-
-
Push the click wheel button through from the front side of the iPod and lift it out of the iPod.
-


To reassemble your device, follow these instructions in reverse order.
İptal et: Bu kılavuzu tamamlamadım.
11 farklı kişi bu kılavuzu tamamladı.
