Uyarı: Ön koşul olan bir kılavuzu düzenliyorsunuz. Yapacağınız herhangi bir değişiklik bu adımın yer aldığı bütün 4 kılavuzları etkileyecektir.
Adım 1 çevriliyor
Adım 1


-
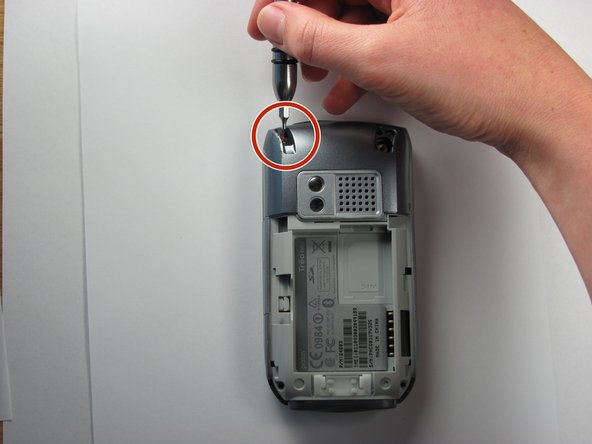
Remove the stylus in order to access the screw.
-
Remove the 27mm top-left screw using a T6 Torx screwdriver.
| - | [* |
|---|---|
| - | [* |
| + | [* black] Remove the stylus in order to access the screw. |
| + | [* red] Remove the 27mm top-left screw using a T6 Torx screwdriver. |
Katkılarınız, açık kaynak Creative Commons lisansı altında lisanslanmaktadır.