Uyarı: Ön koşul olan bir kılavuzu düzenliyorsunuz. Yapacağınız herhangi bir değişiklik bu adımın yer aldığı bütün 4 kılavuzları etkileyecektir.
Adım 4 çevriliyor
Adım 4


-
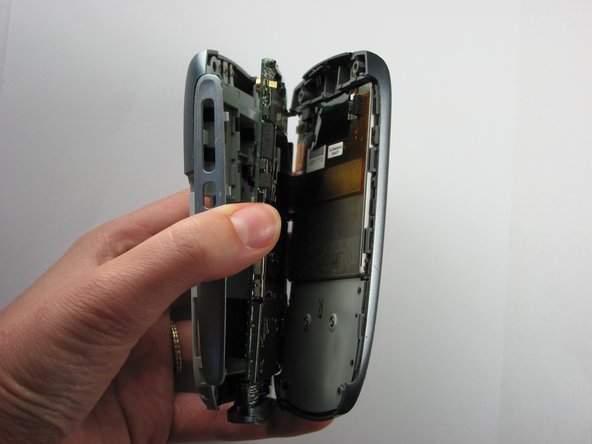
Turn the phone so the screen is facing the right side.
-
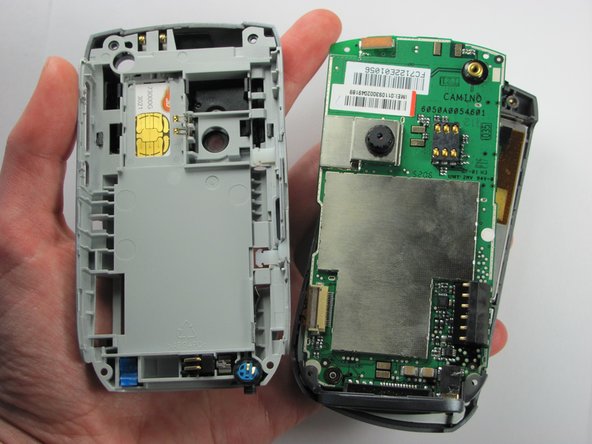
Use a spudger to carefully separate the back panel from the front panel to access components inside the phone.
-
Separate the covers from the left side of the device as indicated in the picture.
| - | [* black] Turn the phone 90 degrees to the right, so the screen is facing the right side. |
|---|---|
| - | [* red] Use a spudger to carefully separate the back panel from the front panel to access all the various components inside the phone. |
| - | [* icon_caution] Separate the covers from the left side of the device as indicated in the picture. The right side contains orange ribbons that are easily damaged. |
| + | [* black] Turn the phone so the screen is facing the right side. |
| + | [* red] Use a spudger to carefully separate the back panel from the front panel to access components inside the phone. |
| + | [* black] Separate the covers from the left side of the device as indicated in the picture. |
| + | [* icon_caution] The right side contains orange ribbons that are easily damaged. |
Katkılarınız, açık kaynak Creative Commons lisansı altında lisanslanmaktadır.