Adım 7 çevriliyor
Adım 7


-
Continued
-
Clock Reference (25 MHz crystal) --->
-
3 wire cable connected from TFT to RPI GPIO
-
Communication interface (USART1 (on PA10/PA9)) --->
-
USB Cable
-
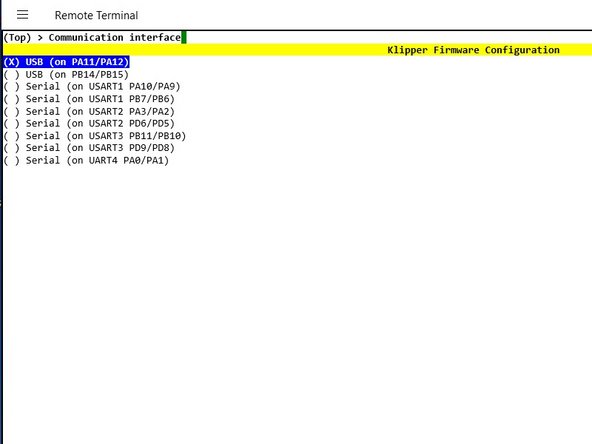
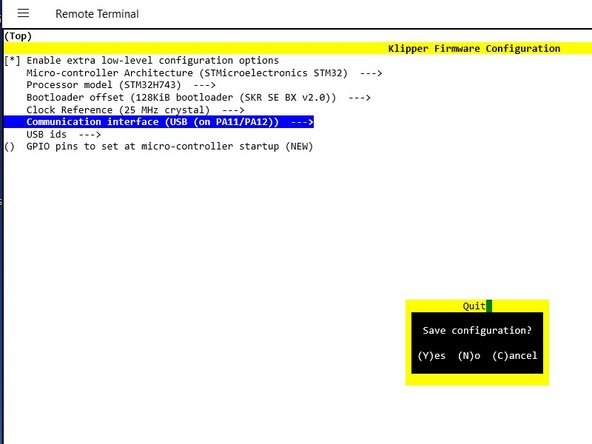
Communication interface (USB (on PA11/PA12)) --->
-
Press ESC key
-
Y to save configuration
Katkılarınız, açık kaynak Creative Commons lisansı altında lisanslanmaktadır.