Adım 10 çevriliyor
Adım 10


-
Release the reset button and the firmware will update. When the status LED goes out the firmware update is complete.
-
Remove the SD card and press the RESET button.
-
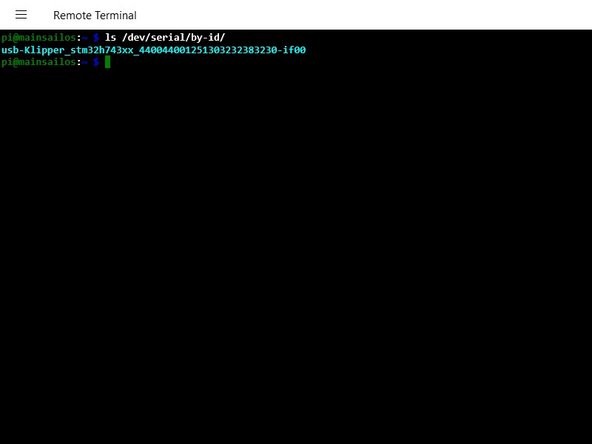
FOR USB CONNECTED ONLY
-
You need to get the boards ID. Run
-
ls /dev/serial/by-id/
-
Reboot the RPI
Katkılarınız, açık kaynak Creative Commons lisansı altında lisanslanmaktadır.