Ana içeriğe geç

Right Joy-Con Teardown

İngilizce
Flemenkçe
Adım 9
Right Joy-Con Teardown: adım 0, 3 resimden 1. Right Joy-Con Teardown: adım 0, 3 resimden 2. Right Joy-Con Teardown: adım 0, 3 resimden 3.
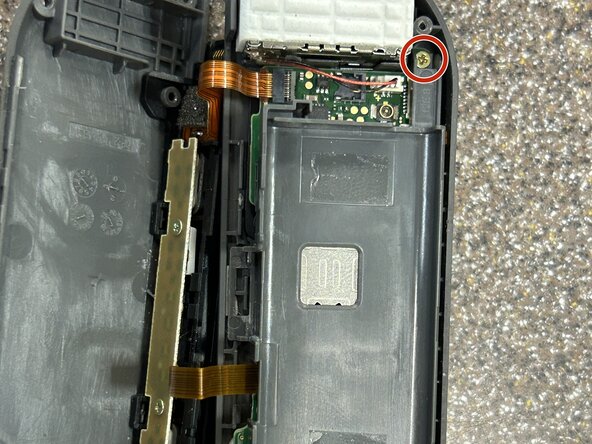
  • Remove the three Phillips PH000 screws holding down the upper bracket and pull the bracket off the motherboard

  • Make sure not to hurt the free ZR trigger button flex cable as you pull up the bracket

Çeviri buraya girin

Çeviri buraya girin

Katkılarınız, açık kaynak Creative Commons lisansı altında lisanslanmaktadır.