Uyarı: Ön koşul olan bir kılavuzu düzenliyorsunuz. Yapacağınız herhangi bir değişiklik bu adımın yer aldığı bütün 2 kılavuzları etkileyecektir.
Adım 2 çevriliyor
Adım 2


-
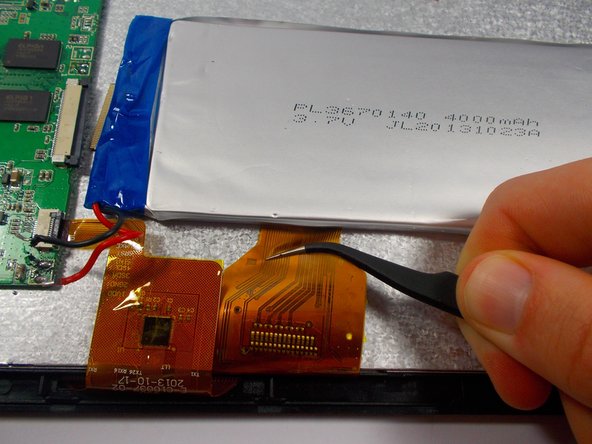
Disconnect the screen/digitizer connection. Use tweezers and pull each grey end of the connection until there is a small gap between the grey and white on the connector to the motherboard. The connection should be easily removable.
-
Pull the cable away and clear from under the battery to avoid damage to the connection.
| - | [* red] Disconnect the screen/digitizer connection. Use tweezers and pull each grey end of the connection until there is a small gap between the grey and white on the connector to the motherboard. The connection should be easily removable. |
|---|---|
| + | [* red] Disconnect the screen/digitizer connection. Use [product|IF145-020|tweezers] and pull each grey end of the connection until there is a small gap between the grey and white on the connector to the motherboard. The connection should be easily removable. |
| [* black] Pull the cable away and clear from under the battery to avoid damage to the connection. |
Katkılarınız, açık kaynak Creative Commons lisansı altında lisanslanmaktadır.