Ana içeriğe geç

Neye ihtiyacın var

Bu teardown bir tamir kılavuzu değildir. Palm Treo Pro cihazınızı onarmak için, servis kılavuzumuzu kullanın.

  1. Palm Treo Pro Teardown, Battery: adım 1, 3 resimden 1. Palm Treo Pro Teardown, Battery: adım 1, 3 resimden 2. Palm Treo Pro Teardown, Battery: adım 1, 3 resimden 3.
    • Press down on the back of the case and slide forward to remove it.

  2. Palm Treo Pro Teardown: adım 2, 1 resimden 1.
    • Remove the battery by pulling up on the tab near the camera lens.

    • Insert the new battery into the open slot. Make sure the battery is oriented so that the Palm logo is in the upper-left corner opposite the camera lens.

  3. Palm Treo Pro Teardown, Motherboard: adım 3, 3 resimden 1. Palm Treo Pro Teardown, Motherboard: adım 3, 3 resimden 2. Palm Treo Pro Teardown, Motherboard: adım 3, 3 resimden 3.
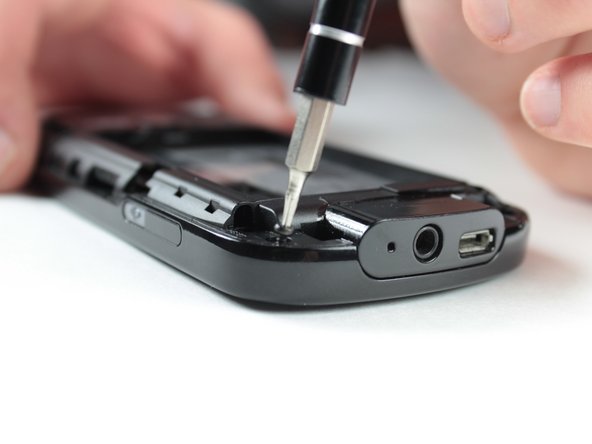
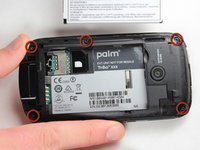
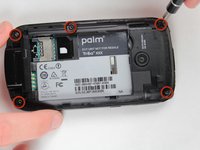
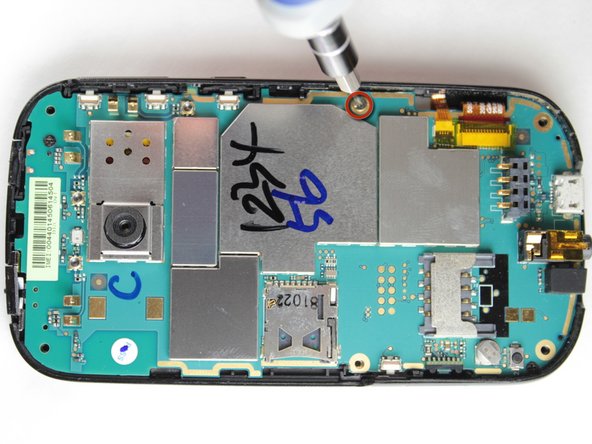
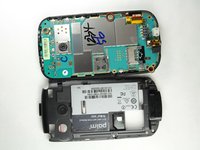
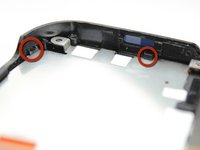
    • Use the Torx T5 screwdriver to remove the 5 visible 6mm screws on the back of the phone.

    • Be careful not to misplace these screws as they are very small and will be important during reassembly.

    • If the screws are stripped a flat head screw driver may be necessary.

  4. Palm Treo Pro Teardown: adım 4, 3 resimden 1. Palm Treo Pro Teardown: adım 4, 3 resimden 2. Palm Treo Pro Teardown: adım 4, 3 resimden 3.
    • Use a plastic opening tool to remove the small panel on the top of the phone by prying underneath the black plastic around the camera.

  5. Palm Treo Pro Teardown: adım 5, 3 resimden 1. Palm Treo Pro Teardown: adım 5, 3 resimden 2. Palm Treo Pro Teardown: adım 5, 3 resimden 3.
    • Remove the main plastic body

    • Insert the plastic opening tool into the slot on the top (indicated by the spudger) and pry the black part off phone.

    • The bottom piece around the headphone and USB port may get caught during this step. Simply carefully maneuver the case until it is released.

  6. Palm Treo Pro Teardown: adım 6, 3 resimden 1. Palm Treo Pro Teardown: adım 6, 3 resimden 2. Palm Treo Pro Teardown: adım 6, 3 resimden 3.
    • Use the Philips Head 00 screwdriver to unscrew the 3.5mm silver screw on the right hand side of the phone.

    • Use the Philips Head 00 screwdriver to unscrew the two 3mm black screws in the upper right and lower left corners of the motherboard.

  7. Palm Treo Pro Teardown: adım 7, 2 resimden 1. Palm Treo Pro Teardown: adım 7, 2 resimden 2.
    • Use tweezers to carefully remove the yellow piece of tape covering the two ribbon cables.

  8. Palm Treo Pro Teardown: adım 8, 3 resimden 1. Palm Treo Pro Teardown: adım 8, 3 resimden 2. Palm Treo Pro Teardown: adım 8, 3 resimden 3.
    • There are two ribbon cables under the yellow tape.

    • Use tweezers to safely unplug the small ribbon cable first and then the large ribbon cable.

    • To remove the cables there is a small black lock that needs to be in the up position as indicated in picture two.

  9. Palm Treo Pro Teardown: adım 9, 3 resimden 1. Palm Treo Pro Teardown: adım 9, 3 resimden 2. Palm Treo Pro Teardown: adım 9, 3 resimden 3.
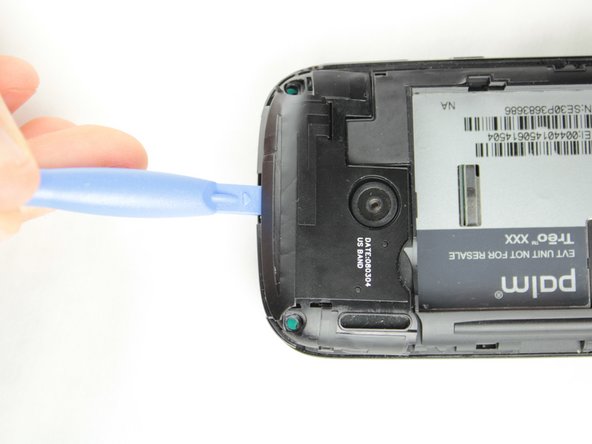
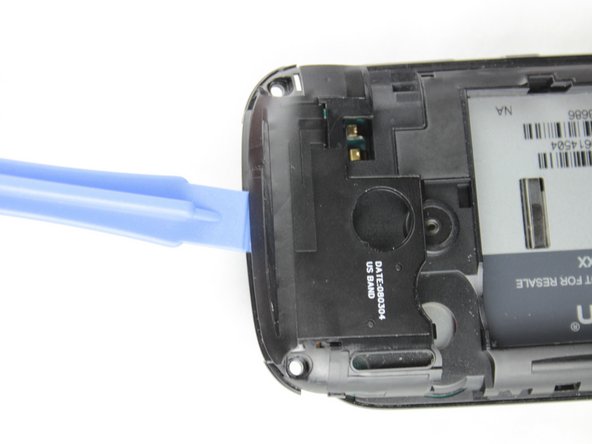
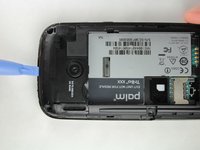
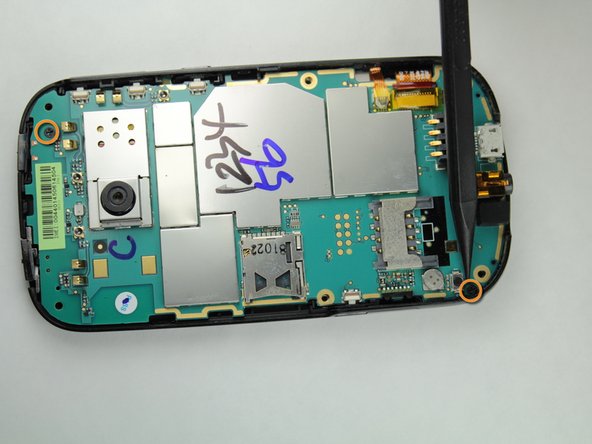
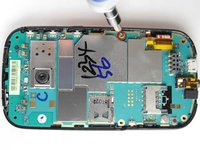
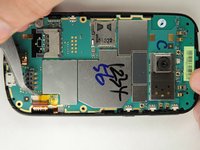
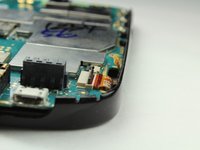
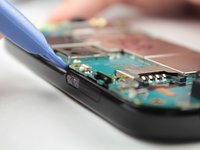
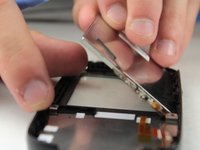
    • Use a plastic opening tool to lift the motherboard up and out of the phone case

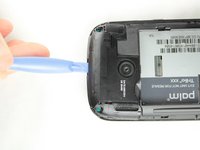
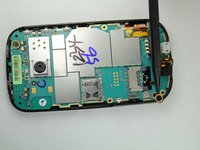
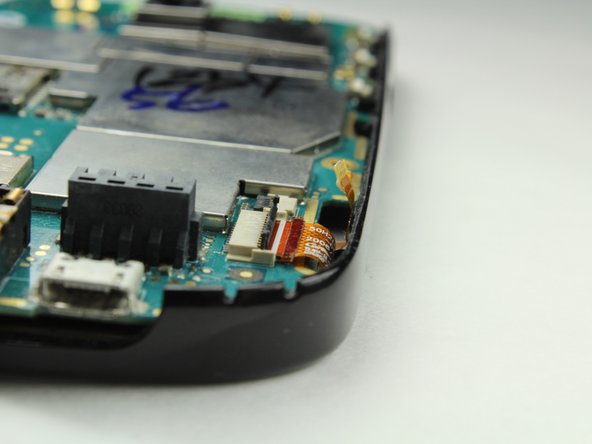
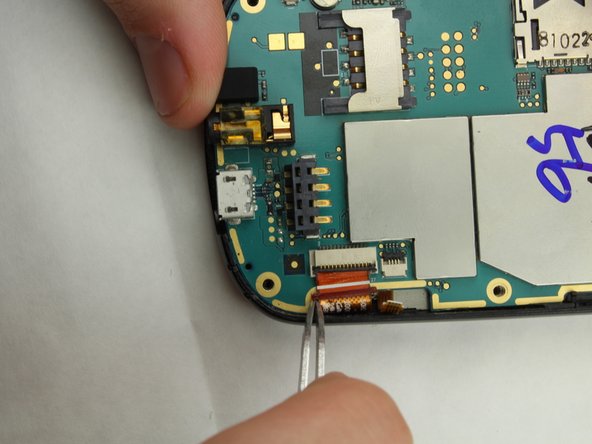
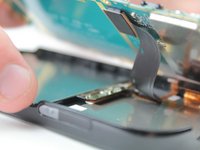
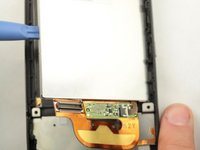
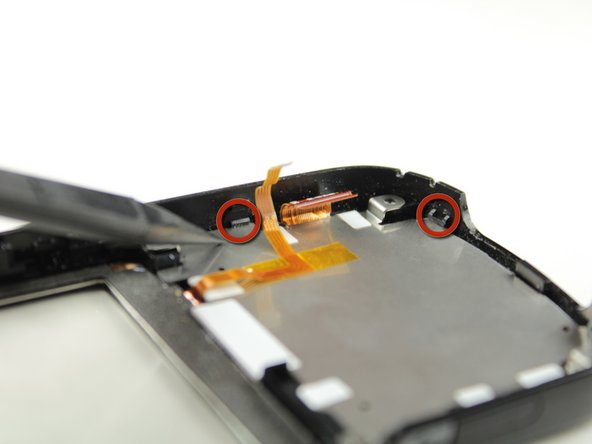
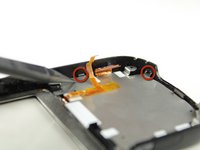
    • There is a black cable under the motherboard that must be disconnected while the motherboard is still in the phone

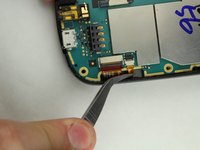
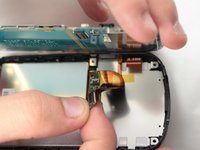
    • It can easily be disconnected with your fingers

    • Note: During this process the mute and power buttons may fall out of the phone. Do not panic this is completely normal. Set them aside in a safe place until reassembly.

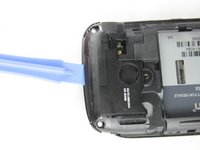
    • The motherboard has now been completely removed

  10. Palm Treo Pro Teardown, Speaker: adım 10, 1 resimden 1.
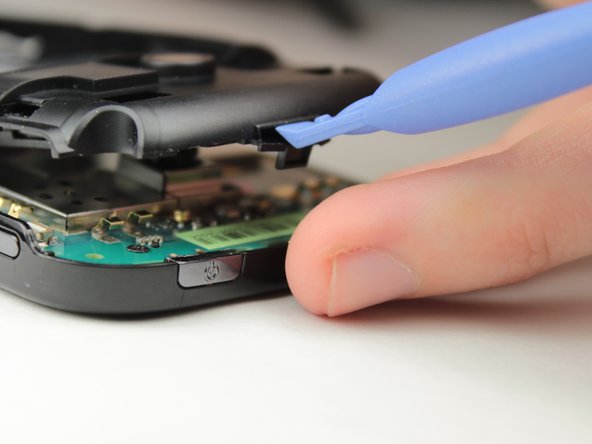
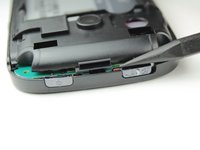
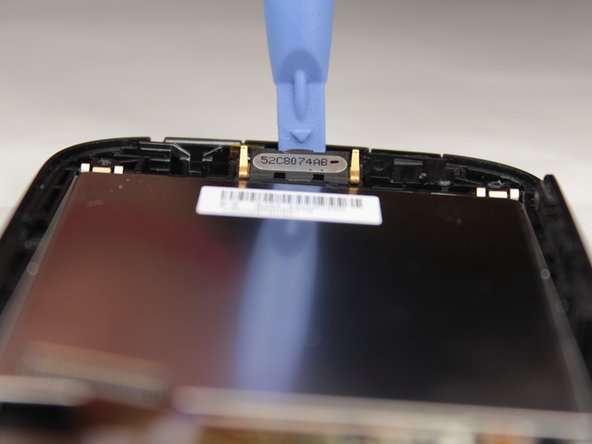
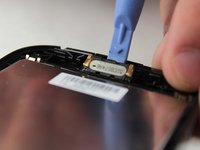
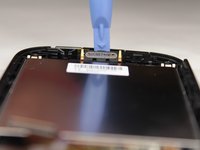
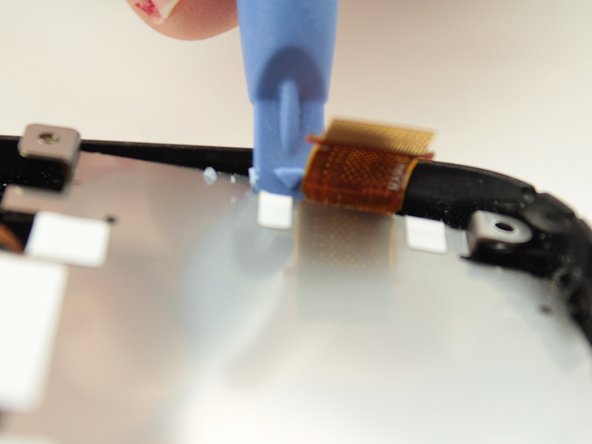
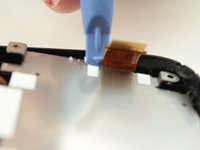
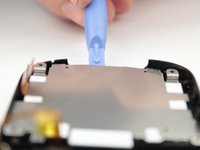
    • Insert your plastic pry in the gap at the top of the phone above the speaker.

  11. Palm Treo Pro Teardown: adım 11, 3 resimden 1. Palm Treo Pro Teardown: adım 11, 3 resimden 2. Palm Treo Pro Teardown: adım 11, 3 resimden 3.
    • Gently pry the speaker until it comes out of its holder. This should not take a lot of force to do.

  12. Palm Treo Pro Teardown: adım 12, 1 resimden 1.
    • The speaker can be gently lifted off the phone and set aside for cleaning, repair, or replacement.

  13. Palm Treo Pro Teardown, Display Glass: adım 13, 2 resimden 1. Palm Treo Pro Teardown, Display Glass: adım 13, 2 resimden 2.
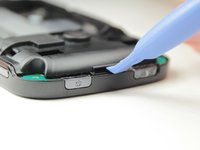
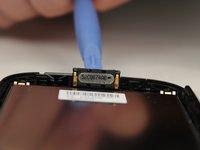
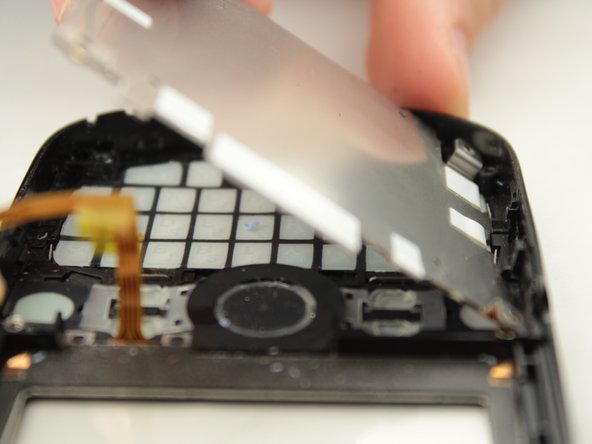
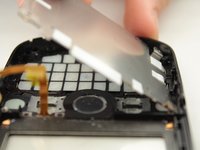
    • Use the plastic opening tool to pry the side of the display glass up so you can easily remove it with your hand.

    • Note: The display glass is the metallic rectangle with a orange ribbon cable attached to it.

  14. Palm Treo Pro Teardown, Keyboard: adım 14, 3 resimden 1. Palm Treo Pro Teardown, Keyboard: adım 14, 3 resimden 2. Palm Treo Pro Teardown, Keyboard: adım 14, 3 resimden 3.
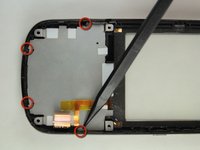
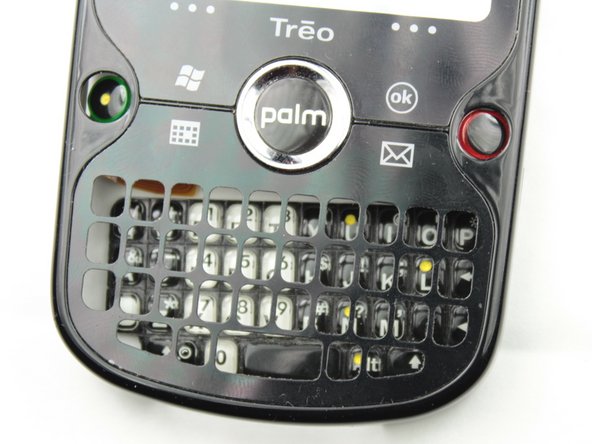
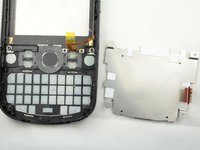
    • Locate the four tabs above the keyboard. The following steps will demonstrate how to remove the metal plate from the tabs, which will reveal the keyboard.

  15. Palm Treo Pro Teardown: adım 15, 1 resimden 1.
    • Insert plastic opening tool as shown and lift up to remove from tabs. You should hear a 'pop' and then feel the plate become loose.

  16. Palm Treo Pro Teardown: adım 16, 2 resimden 1. Palm Treo Pro Teardown: adım 16, 2 resimden 2.
    • Insert plastic opening tool as shown and lift up to dislodge plate from tab.

  17. Palm Treo Pro Teardown: adım 17, 1 resimden 1.
    • Insert the plastic opening tool between the metal plate and the bottom of the phone as shown. Note that for this step, inserting the plastic opening tool between the two circled tabs as shown will remove the plate from both of the tabs.

  18. Palm Treo Pro Teardown: adım 18, 2 resimden 1. Palm Treo Pro Teardown: adım 18, 2 resimden 2.
    • The metal plate should now be loose enough to where one can remove the metal plate with either the plastic opening tool or with one's hands. Remove the metal plate and the keyboard beneath it can be easily removed.

  19. Palm Treo Pro Teardown: adım 19, 2 resimden 1. Palm Treo Pro Teardown: adım 19, 2 resimden 2.
    • Rotate the phone cover so that the face of the cover is facing up as shown in picture two. The keyboard should fall out from the keyboard holes.

  20. Palm Treo Pro Teardown, Palm Treo Pro Teardown: adım 20, 1 resimden 1.
    • You have successfully torndown your device!

AJ Fite

Üyelik tarihi: 04/18/13

21 İtibar

2 adet Kılavuz yazıldı

Ekip

Cal Poly, Team 8-59, Johann Spring 2013 Cal Poly, Team 8-59, Johann Spring 2013 üyesi

CPSU-JOHANN-S13S8G59

4 Üyeler

12 adet Kılavuz yazıldı

0 Yorum

Yorum Ekle

İstatistikleri Görüntüle:

Son 24 Saat: 0

Son 7 gün: 1

Son 30 gün: 3

Her zaman: 1,305