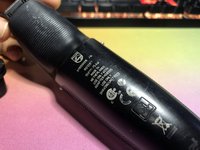
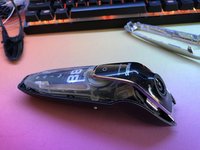
Ana içeriğe geç

Philips - Norelco RQ1280 SensoTouch 3D Shaver, series 9000.

Neye ihtiyacın var

iFixit bu bağlantılar üzerinden satın aldığınızda komisyon kazanır.

Bu teardown bir tamir kılavuzu değildir. Philips - Norelco RQ1280 SensoTouch 3D cihazınızı onarmak için, servis kılavuzumuzu kullanın.

  1. Philips - Norelco RQ1280 SensoTouch 3D Teardown, Introduction: adım 1, 3 resimden 1. Philips - Norelco RQ1280 SensoTouch 3D Teardown, Introduction: adım 1, 3 resimden 2. Philips - Norelco RQ1280 SensoTouch 3D Teardown, Introduction: adım 1, 3 resimden 3.
    • Philips - Norelco RQ1280 SensoTouch 3D

  2. Philips - Norelco RQ1280 SensoTouch 3D Teardown, Getting In: adım 2, 2 resimden 1. Philips - Norelco RQ1280 SensoTouch 3D Teardown, Getting In: adım 2, 2 resimden 2.
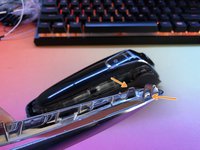
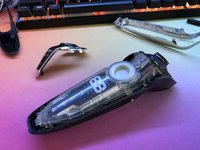
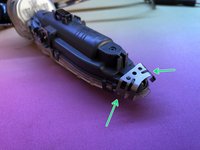
    • With no visible screws or clips, the only other method is to pry away at the seam.

    • The drain hole provided the necessary gap to insert the pick and begin prying.

  3. Philips - Norelco RQ1280 SensoTouch 3D Teardown, Frame: adım 3, 2 resimden 1. Philips - Norelco RQ1280 SensoTouch 3D Teardown, Frame: adım 3, 2 resimden 2.
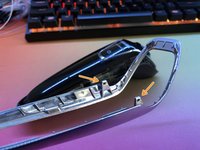
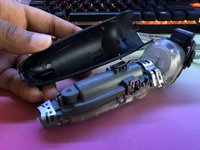
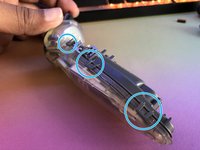
    • Once the pick is worked around the seam, the frame unclips.

    • There are 4 clips holding the frame to the shaver body.

    • The plastic clips are extremely fragile, due to them clipping onto metal tabs.

  4. Philips - Norelco RQ1280 SensoTouch 3D Teardown, Top Case and Button: adım 4, 3 resimden 1. Philips - Norelco RQ1280 SensoTouch 3D Teardown, Top Case and Button: adım 4, 3 resimden 2. Philips - Norelco RQ1280 SensoTouch 3D Teardown, Top Case and Button: adım 4, 3 resimden 3.
    • With the frame removed, the top case and button easily lift off.

  5. Philips - Norelco RQ1280 SensoTouch 3D Teardown, Rear Case: adım 5, 3 resimden 1. Philips - Norelco RQ1280 SensoTouch 3D Teardown, Rear Case: adım 5, 3 resimden 2. Philips - Norelco RQ1280 SensoTouch 3D Teardown, Rear Case: adım 5, 3 resimden 3.
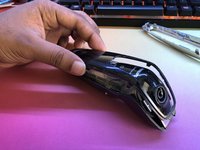
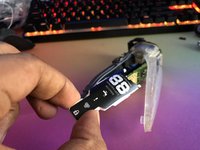
    • The rear case is removed by gently squeezing the metal tabs away from the case.

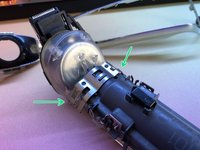
    • The metal tabs act like compression springs to hold against the rear case.

    • The metal tabs mentioned in Step 3 are better visualised here.

  6. Philips - Norelco RQ1280 SensoTouch 3D Teardown, Magnet: adım 6, 1 resimden 1.
    • The small magnet on the rear serves to hold the shaver in place on both the charging dock and cleaning station.

    • The South pole of the magnet should face outwards.

  7. Philips - Norelco RQ1280 SensoTouch 3D Teardown, Waterproof Enclosure: adım 7, 2 resimden 1. Philips - Norelco RQ1280 SensoTouch 3D Teardown, Waterproof Enclosure: adım 7, 2 resimden 2.
    • The main electronics are housed within a waterproof enclosure.

    • A series of 6 clips hold the enclosure together.

  8. Philips - Norelco RQ1280 SensoTouch 3D Teardown, Reviving: adım 8, 3 resimden 1. Philips - Norelco RQ1280 SensoTouch 3D Teardown, Reviving: adım 8, 3 resimden 2. Philips - Norelco RQ1280 SensoTouch 3D Teardown, Reviving: adım 8, 3 resimden 3.
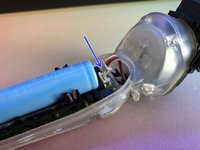
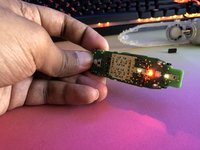
    • The motor is easily disconnected with a single plug.

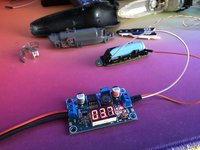
    • The board powers to life after holding the battery at 3.7V.

  9. Philips - Norelco RQ1280 SensoTouch 3D Teardown, Conclusion: adım 9, 2 resimden 1. Philips - Norelco RQ1280 SensoTouch 3D Teardown, Conclusion: adım 9, 2 resimden 2.
    • Follow the steps in reverse to assemble the shaver.

Rushil Kisoon

Üyelik tarihi: 02/18/18

655 İtibar

3 adet Kılavuz yazıldı

4 Yorum

Does the battery need to soldered to be able to replace it?

fitnessx - Yanıt

Yes, the batteries have the solder tabs on them.

Rushil Kisoon -

Hi please help me javadshoaleh@gmail.com

shaparak rohe - Yanıt

What are the battery specifications of this Philip model? Volts and amperes hours?

shaparak rohe - Yanıt

Yorum Ekle

İstatistikleri Görüntüle:

Son 24 Saat: 2

Son 7 gün: 17

Son 30 gün: 50

Her zaman: 1,475