Öğrenci Katkılı Viki
Bu vikiyi, eğitim programımızdan harika bir öğrenci ekibi yaptı.
Device Won't Turn On
You can't get your Chromebook to turn on, and it shows no signs of turning on.
First Step
Before undertaking significant repairs on your device, you must go through basic troubleshooting steps. These steps can often resolve issues without the need for extensive repairs. Please ensure you check the following.
Determine if the battery is charged
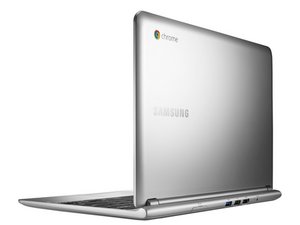
(The exact procedure depends on knowing your model's LED indicator. Here, a Samsung Chromebook 3 is used.)
1. Look at the LED to the left of the DC jack. Is it Off or Blue/Blue flashing?
-Black means the Chromebook is turned off. Go to step 2.
-Blue/Blue flashing means the Chromebook is turned on. Please turn it off.
2. Press the power button for 10 seconds. The LED should turn off.
- If not, press the power 2. button again and hold it for 15 seconds.
3. With the Chromebook off, close the cover.
4. Connect the Charger. An LED should indicate that the Charger is connected and charging.
5. Wait 5 minutes.
6. Look at the LED to the left of the DC jack. Is it Black, Red or Green
Determine if the Charger is working
Check the power cord connections at both ends, then try a known working power outlet. Either the Charger is not working.
- If red, the Chromebook battery may be discharged. Wait 15 minutes.
(Full charge takes several hours when the Chromebook is turned off. Keeping the Charger connected whenever possible is better than letting the battery run down. Keeping it charged will increase the battery life and maintain its capacity. Frequently discharging to the warning level will rapidly reduce the battery capacity and life. )
- If green, the battery is fully charged, proceed
7. Open the cover. Wait 10 seconds.
- Does the Power LED turn Blue / indicate that the Chromebook is running??
- Does the screen turn on? If not, the LED indicates that the Chromebook is running; if not, unplug the Charger and go to the section: "Reset your Chromebook hardware."
Reset your Chromebook hardware
To fix some Chromebook problems, you might need to reset your hardware, also called a hard reset.
Try a hard reset only after other ways to fix the problem have failed. It will restart your Chromebook hardware (like your keyboard and touchpad) and might delete some files in your Downloads folder.
Hard reset your Chromebook
For most Chromebooks, follow the steps below:
1. Eject any memory cards and unplug all USB devices.
2. Turn off your Chromebook by holding the Power button (above the [backspace] ) for 10 seconds.
3. Press and hold Refresh (above the [4} ) and Power buttons.
3. Release both keys after 10 seconds.
- The Chromebook should start up. If not, press Power once again.
Charger Is Broken
Your battery may have drained, and the Charger is not supplying Power to charge it back up. See the section on charger troubleshooting.
Battery Has Reached End Of Life
The rechargeable battery in your Chromebook has a limit to its lifetime. Eventually, the battery loses the ability to hold a charge and needs to be replaced due to its inability to hold a charge. If this is the case, look at iFixit's guide for replacing your battery on your Samsung Series 3 Chromebook.
Power Key Is Broken
The power key on your keyboard may not be registering a signal. See the section on keyboard troubleshooting.
Motherboard is Broken or Defective
The main board of your Chromebook may be broken and needs replacement. Note that when replacing the motherboard, you will lose any data saved on the Chromebook since it is stored on the old motherboard. Data held with Google, such as on Google Drive, will be retained if you sign in to your Google Account with the new motherboard.
Screen Is Too Dark Or Completely Black
Your screen is too dark or doesn't show anything, but you know your Chromebook is on because of the power light or sounds it makes.
First Steps
Before undertaking significant repairs on your device, you must go through basic troubleshooting steps. These steps can often resolve issues without the need for extensive repairs. Please ensure you check the following.
Powered on and charged
If your Chromebook's built-in display is not displaying any content:
- Try charging your device. This should wake it up from sleep mode and power it on.
- Check the charging indicator light on the side. Seeing a sign of life from your computer confirms you're dealing with a screen issue.
Screen brightness settings
- Adjust the display brightness using the physical keys available on most models. Sometimes, this functionality requires combining the function key (Fn) with the brightness key.
Select the internal display
- Switch between internal and external displays by pressing the Ctrl + Maximize (F4 or F5) keys. Use this key combination to ensure the internal display is selected for content output.
Disconnect all external USB devices connected to your Chromebook
- Disconnect any external devices; by doing so, you can eliminate them as potential sources of the issue.
Perform a power cycle on your device to resolve potential software-related issues
- Restarting your device can terminate any problematic programs causing the issue.
- You can perform a power cycle by simultaneously pressing and holding the Power and refresh keys.
If the issue remains, then proceed to the more in-depth tips below.
Brightness Setting Too Low
Your brightness settings may be set to low. Turn up the brightness by pressing the eighth key on the top row of the keyboard with the large sun symbol.
ChromeOS Detects an External Display
When using an external display with your Chromebook, it is typical for the operating system to keep trying to communicate with the external display even after it has been disconnected. This can result in display-related issues or errors.
- Connect your Chromebook to an external monitor or TV using the available outputs. This will allow you to test the functionality of ChromeOS on the external display.
- Switch from the main display to the external display. To switch the show from an external display back to the main screen, press the Ctrl + Maximize (F4 or F5) keys.
If you have verified that ChromeOS is working correctly with the external display but fails to switch back to the main screen, the primary display is likely defective or broken.
Potential Operating System Issue
To address any potential software issues causing your device to have trouble detecting the internal display, you can attempt to restore ChromeOS using a recovery disk. The instructions for creating a ChromeOS recovery disk are provided below, and an in-depth guide can be found here. An empty USB drive with at least 8 GB of storage is required.
- Install the Chromebook Recovery Utility Extension: Open Google Chrome and install the Chromebook Recovery Utility Extension from the Chrome Web Store. Click on the extension and follow the on-screen instructions.
- Prepare Chromebook for Recovery: Turn off your Chromebook and ensure it's connected to a power source. Press the Esc + Refresh (F3) keys simultaneously, then press the Power button. Release the Power button when the Chromebook starts, but continue holding Esc + Refresh until you see a screen prompting you to insert the recovery disk.
- Recover ChromeOS: Insert the previously created recovery disk into your Chromebook and follow the on-screen instructions to initiate the ChromeOS recovery process. This will reinstall the operating system and can resolve software-related problems that may be causing the black screen issue.
- Follow System Setup: After completing ChromeOS recovery, follow the on-screen instructions to set up your Chromebook as you would during the initial setup. Check if the black screen issue is resolved.
If the issue persists after restoring ChromeOS, proceed to the more in-depth troubleshooting steps below.
Faulty or Defective Battery
If your Chromebook is not powering on or showing signs of life, the issue may be related to the battery. Follow these steps to troubleshoot battery-related problems.
- Check Battery Level: Connect your Chromebook to the Charger and allow it to charge for at least 15 minutes. After that, check if the charging indicator light confirms that the device is charging.
- Reset the Battery: On this particular Chromebook, you will find a small pinhole reset button on the bottom or side of the device. You can reset the battery by inserting a paperclip or similar tool into the pinhole and pressing it gently. Afterward, attempt to power on the Chromebook and check if the issue is resolved.
- Replace the Battery: If resetting the battery hasn't worked, and you aren't seeing any signs of life from your device, it's probably not turning on due to a faulty or old battery. Try iFixit's Battery Replacement Guide for the Samsung Chromebook Series 3 Chromebook.
Screen Is Broken
If your Samsung Series 3 Chromebook works with an external display but not with the attached display, it suggests damage to the screen. To check if the display might be faulty, follow these steps.
- Power off your Chromebook. Be sure to remove any peripherals or power sources.
- Carefully inspect the internal display for physical damage. This includes any significant or small cracks or any liquid damage. Checking from different angles can help spot hairline cracks as they catch in the light.
If the screen is damaged, it is best to use iFixit's Samsung Chromebook Series 3 Screen Replacement Guide.
Keyboard Doesn't Work
Pressing the keys on your keyboard doesn't do anything.
Dirt Under Keys
If dirt is under your keys, it may prevent keys from triggering. Use a soft brush to clean out the dirt from under the keys.
Keyboard Connector Not Properly Seated
The ribbon cable that connects the keyboard to the motherboard may have been misconnected. Take apart your Chromebook and check that the connections have not become loose.
Keyboard Is Broken
Your keyboard may be broken and needs to be replaced.
Speakers Crackling or Not Working
First Steps
Before undertaking elaborate repair steps, try some basic troubleshooting steps before going deeper into the repair process.
Check to see if you have any External Audio Connections
If you're trying to use your device's internal speakers, then ensure you have no additional audio connections connected to your device. This includes any headphones, speakers, or USB headsets.
Ensure that your audio device is turned on and has Power
Some speakers might require more Power than what can be given through the built-in headphone jack. This means a power source is needed for the speaker to function normally. If you are using a speaker that needs to be plugged in, then make sure that the speaker is powered on or is connected to Power. Alternatively, if you use a Bluetooth speaker with a battery, you will want to ensure that your speaker is charged.
Check your device's Volume and Mute Settings
Ensure that your program or website is not muted or the volume is low. You should also ensure the volume on your Chromebook is turned up and not muted. Look for the volume icon in the system tray, adjust the volume level, and ensure that the mute option is not enabled.
Issues Caused by an External Audio Connection
If you frequently connect your Chromebook to an external speaker, there may be an issue with how your Chromebook connects to your speaker or a problem with the speaker itself. However, you can follow these tips to test the connection if the issue is with the built-in speakers.
- Check your device's sound output. You can check if your device uses the correct audio output by clicking the taskbar where the time is displayed and clicking the left-pointing arrow next to your audio slider to display the Audio settings menu. Once there, you will see a section of Audio Outputs usable for your device. Once there, ensure that the correct audio output is selected.
- Repair your Bluetooth Speakers or Headphones. If you use a set of Bluetooth headphones or a Bluetooth speaker, you can attempt to repair your Bluetooth headphones. You can check your device's Bluetooth settings by clicking the taskbar and toggling the Bluetooth Icon. Click the word 'Bluetooth' underneath the Bluetooth icon to get a list of Bluetooth devices ready to be paired, and select your Bluetooth device.
Issues with the Internal Speakers/Motherboard
If you're still experiencing issues with your audio, there might be a problem with the internal speakers or their connection. You can access the speakers by following iFixit's Samsung Chromebook Series 3 Speaker Replacement Guide.
- Remove any debris or liquid damage that would restrict the movement of the speakers. Laptop speakers produce sound by causing a thin diaphragm to vibrate and disrupt the air around it to form the intended sound. There may be something physically obstructing or touching the diaphragm, muffling, or making your speaker crackle. Follow our speaker replacement guide to remove your Chromebook's speakers and check the speakers for obstruction.
- Ensure that the internal speaker is correctly connected to the logic board. Follow the connection of your speaker to where it relates to the logic board. If this connection is not seated correctly, then no sound will play from the speakers.
- Look for any visible damage that would prevent the speaker from working. If the speaker has become damaged, then there is a good chance that you will need to replace the speaker.
- Perform a thorough visual inspection of the motherboard for any signs of burns or damaged components. If you observe any visible damage, such as burns or parts that appear to be physically damaged, the motherboard likely needs to be replaced.
Headphones/Headset Not Working
When plugged in, your headphones or headset aren't playing sound from your Chromebook.
Issue with Headphones/Headset
Please verify that your headphones or headset works with another device since it may not be the broken Chromebook. You might also need to ensure your device detects and plays audio through your headset.
Audio issues with the Application or Website
Some websites and programs have dedicated audio controls, allowing users to change the outputted audio from the application.
- Make sure the volume of the program is turned up. Look at settings that would allow you to adjust the application's audio.
- Check if the tab has been muted. Chrome allows the user to mute the sound coming from a tabbed webpage. If the tab is muted, sound will not play from that tab. You can unmute a tab by clicking the speaker icon that is displayed within the tab.
- Clear your browser's cached data. Open the Chrome browser and click the three-dot menu icon in the top-right corner, then go to Settings > Privacy and Security> Clear browsing data.
The issue caused by the Operating System
ChromeOS might be experiencing issues with the operating system that might be causing problems with your audio.
- Ensure that your Chromebook's operating system is up to date. Go to Settings > About Chrome OS > Check for Updates. Install any available updates.
- Recover your Operating System. If updating your device does not restore sound to your Chromebook, you can try to use a Recovery USB. You can create a recovery USB using the instructions here. This will factory reset your device and wipe any data on the device's internal storage, so be sure to move any data on the device to either an external USB storage device or to Google Drive.
Issues with the Internal Speakers/Motherboard
If you're still experiencing issues with your audio, there might be a problem with the internal speakers or their connection.
- Remove any debris or liquid damage that would restrict the movement of the speakers. Laptop speakers produce sound by causing a thin diaphragm to vibrate and disrupt the air around it to form the intended sound. If this diaphragm's movement is restricted, it won't produce sound.
- Ensure that the internal speaker is correctly connected to the logic board. Follow the connection of your speaker to where it relates to the logic board. If this connection is not seated correctly, then no sound will play from the speakers.
- Look for any visible damage that would prevent the speaker from working. If the speaker has become damaged, then there is a good chance that you will need to replace the speaker.
- Perform a thorough visual inspection of the motherboard for any signs of burns or damaged components. If you observe any visible damage, such as burns or parts that appear to be physically damaged, the motherboard likely needs to be replaced.
Charger Doesn't Work
Your Charger won't charge your Chromebook, and the charging light on the Chromebook does not light up.
Check the Power Connection
Ensure that your Chromebook is adequately connected to the included charging adapter. Verify that the charging cable is securely plugged into the device and that there is a functional power outlet.
Inspect the Charging Cable and Adapter
Examine the charging cable and adapter for any visible damage or frayed wires. If damaged, try another compatible charging cable or adapter.
Try a Different Power Outlet
Sometimes, the power outlet may be faulty. Plug your Chromebook into a different outlet to eliminate any issues with the original power source. You can test if the outlet works by plugging in a different device, like a lamp.
Verify Charging Indicator
When you plug in your Chromebook, observe if the charging indicator light (if present) lights up or changes color, indicating if the device is receiving Power.
Perform a Hard Reset
Perform a hard reset by performing the following steps:
- Disconnect the Charger from your Chromebook.
- Press and hold the power button for at least 10 seconds, then release it.
- Reconnect the Charger and check if the device starts charging.
If the above steps do not resolve the issue, proceed to the more detailed troubleshooting steps below.
Faulty Battery
If your Samsung Series 3 Chromebook is not charging, the battery might have an issue. Follow these steps to troubleshoot battery-related problems.
- Check battery level: Plug in your Chromebook for at least 15 minutes, and then check if the charging indicator lights up to show it's charging. If not, the battery might be dead or malfunctioning.
- Reset the battery: This Chromebook has a small pinhole reset button on the bottom or side of the device. Insert a paperclip or a similar tool into the pinhole and press gently to reset the battery.
- Check the battery's health: Unfortunately, no battery lasts forever. If you've had your Chromebook for a couple of years, there's a good chance the battery is aging. You can look at the in-depth guide for checking your Chromebook's battery health with CROSH, but the process has been outlined below.
- From your Chromebook's desktop, press Ctrl + Alt + T simultaneously.
- Enter the command battery_test [<Test Length>].
- The test length is measured in seconds. If no test length amount is entered, the default test length of 300 seconds will be used.
- Specific battery health will be given as soon as the command is entered, but additional information will be provided when the test is completed.
- Replace the battery: If it does not charge or hold a charge even after trying the above steps, the battery may need to be replaced. Follow the instructions on iFixit's guide for replacing the Samsung Series 3 Chromebook battery.
Charging Port is Broken or Defective
The port connecting the Charger to the motherboard may have a loose connection, a dirt buildup, or may be broken.
- Inspect the Device's Charging Port: Examine the charging port on your Chromebook for any physical damage, debris, or bent pins that may obstruct the charging process.
- Clean the Charging Port: If you notice any debris or dust in the charging port, use a dust blower or cotton swab with 90% rubbing alcohol to clean it carefully. Ensure that no foreign objects obstruct the connection between the charging cable and the port.
If the two steps above cannot get your device to charge correctly, follow our charging port replacement guide to check the connections and, if necessary, replace the port.
Internal Software Issue
If your Chromebook is still not charging, there may be an internal hardware or software issue.
- Use Google's Chromebook Recovery tool to restore your Chromebook. If your device is experiencing issues with the Charger, it may be an issue with the Chromebook's Operating System. If so, look at our guide for creating a ChromeOS recovery USB. Thankfully, the process is straightforward, and making the Recovery Drive shouldn't take longer than 5 minutes. You can download the tool from the Chrome Web Store.
Note: This will restore your device to the factory default and will delete all files saved to the internal storage, so ensure that any files you want to save are backed up to Google Drive or an external storage device.
Not Connecting to WiFi/Internet Issues
First Steps
Before diving into advanced troubleshooting, use these essential tips to ensure proper WiFi connectivity.
- Check WiFi Signal: Verify that your Chromebook is within a functioning WiFi network range. Ensure you are in the router's range and no physical obstructions are blocking the signal.
- Ensure WiFi is Enabled on your device: Press the WiFi key (usually represented by an antenna icon) on your Chromebook's keyboard to ensure WiFi is enabled. You can also check by clicking on the system tray in the bottom-right corner of the screen and ensuring the WiFi icon is turned on.
- Check for Airplane Mode: Make sure your Chromebook is not in Airplane Mode, which disables all wireless connections. Disable Airplane Mode by clicking on the system tray and turning off the Airplane Mode icon.
- Double-check WiFi Password: If you connect to a password-protected WiFi network, ensure you enter the correct password. Pay attention to uppercase and lowercase letters, special characters, and spaces.
- Test with Another Device: Verify if other devices can connect to the same WiFi network. If other devices are also experiencing connectivity issues, the problem may lie with the WiFi network itself.
- Restart your Chromebook and the Router: A simple restart can sometimes resolve temporary connectivity issues with both devices.
If the above steps don't resolve the issue, proceed to the more in-depth troubleshooting below.
Issues with Initial Automated WiFi Configuration
ChromeOS sometimes has issues connecting to a network if your device is automatically assigned an IP address. This issue can be resolved by forgetting the WiFi network and then reconnecting to it.
- Click on the WiFi Icon: Click on the WiFi icon in the system tray to open the network list.
- Find the Affected WiFi Network: Locate the WiFi network that your Chromebook is having trouble connecting to. Click on the network name to expand the connection options.
- Click on "Forget": Once the connection options are expanded, click the "Forget" button next to the network name. This will remove the network from your saved list.
- Reconnect to the Network: After forgetting the network, click the WiFi icon again and select the network from the list. Enter the correct password and attempt to connect.
- Check Connection: Once connected, check if your Chromebook can access the internet through the WiFi network.
Issue with Cached Data
If a cached file becomes corrupted, it can cause issues connecting to your network. Clearing the WiFi network data can help resolve issues with saved network settings. Follow these steps:
- Open Settings: Click on the system tray and the gear-shaped "Settings" icon to open the Chromebook settings.
- Expand "Advanced": Scroll down and click on the "Advanced" section to reveal additional settings.
- Click on "Privacy and Security": Under the Advanced section, click "Privacy and Security" to access related settings.
- Click on "Clear Browsing Data": In the Privacy and Security section, click "Clear Browsing Data" to open the data clearing options.
- Choose WiFi Networks: In the Clear Browsing Data settings, check the "Cookies and other site data" option. Uncheck any other options that you don't want to clear.
- Click on "Clear Data": Once the desired options are selected, click the "Clear Data" button to clear the WiFi network data.
- Reconnect to the Network: After clearing the data, attempt to reconnect to the WiFi network and check if the issue is resolved.
Software Related Issue
If the previous steps didn't resolve the WiFi connectivity issue, you can attempt to Powerwash your Chromebook. You can do this in a few ways, but the easiest way of Powerwashing your Chromebook is with the instructions below. This will factory reset your device, so back up all your data to either Google Drive or an external storage device.
- Sign out of your Chromebook by clicking on your profile picture in the bottom right corner of the screen and selecting "Sign out." (You'll need to be at the login screen)
- Press the following key combination on the login screen: Ctrl + Shift + Alt + R Twice.
- A dialog box will appear, asking you to confirm that you want to Powerwash your Chromebook. Click on the "Powerwash" button to continue.
- Follow the on-screen instructions to complete the Powerwash process. Your Chromebook will be factory reset.
- After the power wash, your Chromebook will start as if it were a new device. Follow the on-screen instructions to set up your Chromebook, including connecting to a WiFi network and signing in with your Google Account.
Alternatively, you can completely restore ChromeOS using Google's ChromeOS Recovery Tool. This tool can address any potential software issues causing your device to have trouble seeing your network. The instructions for creating a ChromeOS recovery disk are below, but an in-depth guide can be found here. An empty USB drive with at least 8 GB of storage is required.
- Install the Chromebook Recovery Utility Extension: Open Google Chrome and install the Chromebook Recovery Utility Extension from the Chrome Web Store. Click on the extension and follow the on-screen instructions.
- Prepare Chromebook for Recovery: Turn off your Chromebook and ensure it's connected to a power source. Press the Esc + Refresh (F3) keys simultaneously, then press the Power button. Release the Power button when the Chromebook starts, but continue holding Esc+ Refresh until you see a screen prompting you to insert the recovery disk.
- Recover ChromeOS: Insert the previously created recovery disk into your Chromebook and follow the on-screen instructions to initiate the ChromeOS recovery process. This will reinstall the operating system and can resolve software-related problems that may be causing the black screen issue.
- Follow System Setup: After completing ChromeOS recovery, follow the on-screen instructions to set up your Chromebook as you would during the initial setup. Check if the black screen issue is resolved.
If the issue persists after restoring ChromeOS, proceed to the more in-depth troubleshooting steps below.
Ekip

11 Yorum
my screen turns white when on turn it on how do i fix it
Elizabeth - Yanıt Paylaş
My question too ?!Same issue …white screen and no sound ?
Northern James Sr. - Yanıt Paylaş
when I move the screen or the device while using google chrome it returns to the previous webpage, can anyone help me?
andrecfrutuoso - Yanıt Paylaş
What about a bad HDMI port? I tried to connect my "school issued" Samsung Chromebook 3 to a Digital Lifestyles LCD TV, and after at least 30 min, the picture will blank out. The audio will still play, and and both the TV and the Chromebook will still recognize a good connection.
Fairy ball (Jeremy Jean) - Yanıt Paylaş
After replacing mother board how do I get new serial number?
Thelma Cruickshank - Yanıt Paylaş