
Asus Eee PC 1000HA Hard Drive Replacement
Giriş
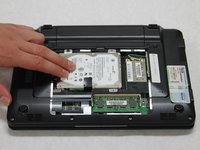
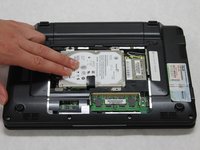
1. adıma gitThis guide will show you how to replace the hard drive. Please see the proper list of tools so you are prepared.
Neye ihtiyacın var
Parçalar
Aletler


Daha fazlasını göster…
-
-
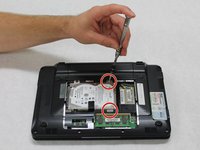
Remove the battery before working on your device. See this LINK for a step-by-step guide.
-
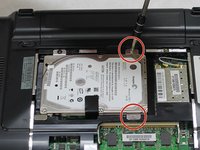
Gently turn the laptop up side down so that the battery is facing away from you. The battery is outlined by the red rectangle in the picture to the left.
-


To reassemble your device, follow these instructions in reverse order.
To reassemble your device, follow these instructions in reverse order.
İptal et: Bu kılavuzu tamamlamadım.
2 farklı kişi bu kılavuzu tamamladı.
Ekip

Sam Houston State, Team 1-1, Blackburne Fall 2015 Sam Houston State, Team 1-1, Blackburne Fall 2015 üyesi
SHSU-BLACKBURNE-F15S1G1
3 Üyeler
10 adet Kılavuz yazıldı