Giriş
If the motor of a turntable burns out, replacing the whole unit is expensive and wasteful. This guide provides a step-by-step process for replacing the drive motor on the Audio-Technica AT-LP60BK turntable, but could potentially apply to other similarly constructed turntables. This replacement guide involves a device that is powered by 120V, which poses an electrocution hazard unless the unit is unplugged. The guide also requires the use of a soldering iron, which poses a burn hazard, but this guide will provide an overview of soldering and safe soldering techniques.
Neye ihtiyacın var
-
-
Before starting, ensure the unit is not plugged into a wall outlet or output device.
-
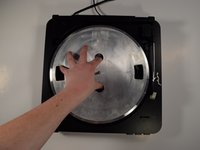
The hinges for the clear lid will slide vertically out of the case when the lid is in the open position.
-
-
-
-
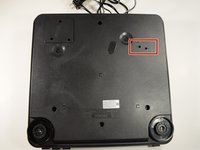
Flip the whole unit over, and remove the four screws indicated in red using the Phillips #2 screwdriver.
-
Remove the two feet indicated in orange using the Phillips #2 driver. The other two feet do not need to be unscrewed to remove the case.
-
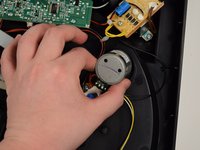
Remove the bottom lid by carefully lifting straight up. Do not force it, the lid should remove easily.
-
-
-
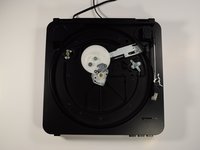
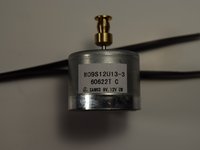
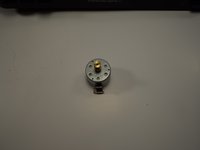
The drive motor will be on the right side and in the upper half of the unit. The drive motor within this unit is displayed as it was found in the unit in the first photo.
-
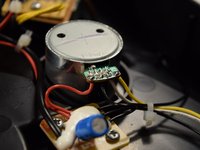
The motor in this unit was a SANKO 9V, 12V CW (clockwise) MO9S12U13-3 60622T C. Verify the motor model before ordering a replacement.
-
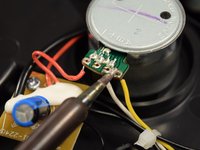
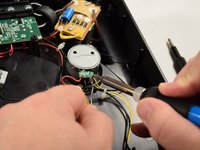
Note the polarity of the wires leading to the motor. This unit is wired as follows, according to the markings on the motor body: (NOTE: if the wiring varies on other units, use that wiring schematic.)
-
A - Yellow
-
B - White
-
'+' - Black
-
'-' - Red
-
-
-
Reassemble the unit by following Steps 1-4 in reverse order.
-
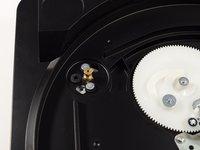
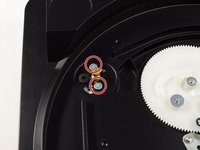
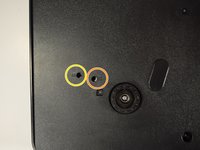
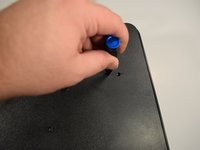
Note the indicated holes on the bottom of the case. These lead to the motor to adjust the speed at which the turntable spins.
-
The orange indicator leads to the 33 rpm speed control.
-
The yellow indicator leads to the 45 rpm speed control.
-
-
Bu adımda kullanılan alet:Flathead 1.5 mm Screwdriver$5.49
-
With the unit fully reassembled, test the speed of the motor by comparing the output of the turntable to a digital recording of the same song.
-
With the unit OFF and unplugged, adjust the speed by inserting the 1.5 mm Flathead screwdriver into the shown holes and carefully turning the screw in the motor housing. This step is very sensitive and will likely take multiple attempts to get the speed just right.
-
NOTE: do not adjust the speed of the unit while the motor is turning, as this is likely to damage the motor or cause injury.
-
Reinsert the lid and enjoy your repaired Audio Technica AT-LP60BK turntable.
Do you know the operating voltage of the unit. I need to change a failed transformer and cannot find it. I think it's 12vac secondary and that converted to 12vdc
-


İptal et: Bu kılavuzu tamamlamadım.
Bir başkası bu kılavuzu tamamladı.

Ekip

University of Memphis, Team S1-G8, Willis Fall 2019 University of Memphis, Team S1-G8, Willis Fall 2019 üyesi
UM-WILLIS-F19S1G8
1 Üye
1 Kılavuz yazıldı
Bir Yorum
Hey! Thanks a lot for this guide. There's nothing like this on the internet.
Unfortunately though, the issue I'm trying to fix with my LP60 is that of a fuse replacement. One day I'd plugged in my American model without using a voltage converter and I ruined. So could you please help me out? I've opened the thing but I can't seem to spot the fuse. Any guidance would be appreciated.
Thanks