Giriş
This guide will aid you in replacing your Dell Chromebook 5190 battery.
The Dell Chromebook 5190 was released alongside its sister model Dell Chromebook 5190 2-in-1. This guide will focus on the 5190 model that lacks a touchscreen.
A battery's purpose is to keep your laptop powered on. If your laptop battery is not holding a charge or is not charging after the battery is drained, try the Dell Chromebook 5190 troubleshooting page for possible solutions before replacing the battery. If you are still experiencing these issues after troubleshooting, you may need a battery replacement.
Before starting please take caution and look for signs of a swollen battery. Handling a swollen battery can be a fire hazard, please refer to this page for further information on how to identify a swollen battery and how to handle it.
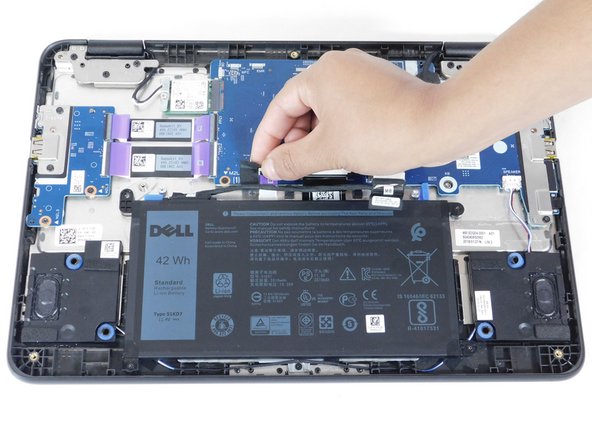
Please make sure your laptop is off before beginning and remove all cables or devices populating your laptop ports.
Neye ihtiyacın var


To reassemble your device, follow these instructions in reverse order.
To reassemble your device, follow these instructions in reverse order.
Ekip

Gateway, Team 1-3, Pee Spring 2022 Gateway, Team 1-3, Pee Spring 2022 üyesi
GCC-PEE-S22S1G3
3 Üyeler
5 adet Kılavuz yazıldı