Ana içeriğe geç

Dell XPS 15 9510 Heat Sink Replacement

Neye ihtiyacın var

  1. Dell XPS 15 9510 Heat Sink Replacement, Lower Case: adım 1, 1 resimden 1.
    • Make sure the laptop is powered off and unplug all cables before beginning any repair.

    • Remove eight 3 mm screws from the underside of the case using a T5 Torx screwdriver.

  2. Dell XPS 15 9510 Heat Sink Replacement: adım 2, 1 resimden 1.
    • The metal case of the XPS 15 9510 is extremely sharp, so be careful not to run your fingers along the edge when disassembling the laptop.

    • Wedge the case apart with a nylon spudger.

    • If the plastic one isn't possible to insert, use the metal spudger to carefully create a small gap first.

    • Slide spudger along each side of the laptop

  3. Dell XPS 15 9510 Heat Sink Replacement: adım 3, 1 resimden 1.
    • The metal case of the XPS 15 9510 is extremely sharp, so be careful not to run your fingers along the edge when disassembling the laptop.

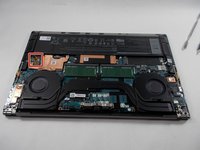
    • Lift the back panel of the laptop off and set it aside.

  4. Dell XPS 15 9510 Heat Sink Replacement, Battery: adım 4, 2 resimden 1. Dell XPS 15 9510 Heat Sink Replacement, Battery: adım 4, 2 resimden 2.
    • Using the small battery pull tab, disconnect the battery connector from the motherboard.

  5. Dell XPS 15 9510 Heat Sink Replacement: adım 5, 1 resimden 1.
    • Remove eight 2.5 mm from around the perimeter of the battery using a Phillips #0 screwdriver.

  6. Dell XPS 15 9510 Heat Sink Replacement: adım 6, 2 resimden 1. Dell XPS 15 9510 Heat Sink Replacement: adım 6, 2 resimden 2.
    • There are many delicate components in the vicinity of the battery, so be extremely careful removing it

    • Remove the old battery from the laptop.

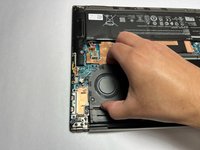
  7. Dell XPS 15 9510 Heat Sink Replacement, Fan: adım 7, 2 resimden 1. Dell XPS 15 9510 Heat Sink Replacement, Fan: adım 7, 2 resimden 2.
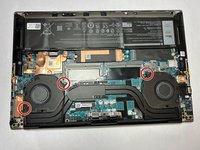
    • Remove two 4.3 mm screws from the left fan and one 4.3 mm screw from the right fan using a JIS #000 screwdriver.

  8. Dell XPS 15 9510 Heat Sink Replacement: adım 8, 2 resimden 1. Dell XPS 15 9510 Heat Sink Replacement: adım 8, 2 resimden 2.
    Bu adımda kullanılan alet:
    Tweezers
    $4.99
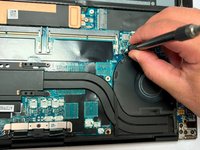
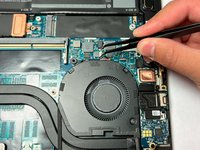
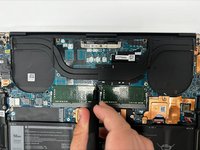
    • Gently unplug the motherboard fan connector using a pair of tweezers.

  9. Dell XPS 15 9510 Heat Sink Replacement: adım 9, 1 resimden 1.
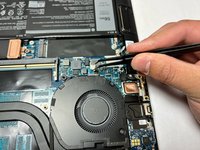
    • Unplug the motherboard connector on the other fan using a pair of tweezers.

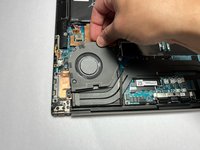
  10. Dell XPS 15 9510 Heat Sink Replacement: adım 10, 2 resimden 1. Dell XPS 15 9510 Heat Sink Replacement: adım 10, 2 resimden 2.
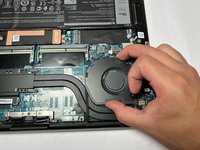
    • Gently slide and then lift the fans out of their positions.

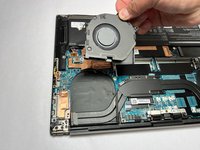
  11. Dell XPS 15 9510 Heat Sink Replacement: adım 11, 3 resimden 1. Dell XPS 15 9510 Heat Sink Replacement: adım 11, 3 resimden 2. Dell XPS 15 9510 Heat Sink Replacement: adım 11, 3 resimden 3.
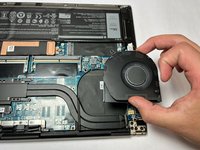
    • Repeat the previous step and remove the other fan.

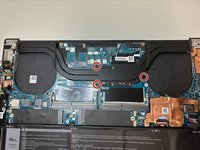
  12. Dell XPS 15 9510 Heat Sink Replacement, Heat Sink: adım 12, 2 resimden 1. Dell XPS 15 9510 Heat Sink Replacement, Heat Sink: adım 12, 2 resimden 2.
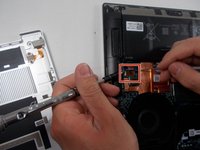
    • Remove the three 4.6 mm screws that secure the heat sink with a Phillips #00 screwdriver.

  13. Dell XPS 15 9510 Heat Sink Replacement: adım 13, 1 resimden 1.
Sonuç

To reassemble your device, follow the above steps in reverse order.
Take your e-waste to an R2 or e-Stewards certified recycler.
Repair didn’t go as planned? Try some basic troubleshooting or ask our Answers community for help.

Liz Huynh

Üyelik tarihi: 09/23/24

85 İtibar

1 Kılavuz yazıldı

0Kılavuz Yorumları

Yorum Ekle

İstatistikleri Görüntüle:

Son 24 Saat: 0

Son 7 gün: 3

Son 30 gün: 44

Her zaman: 122