
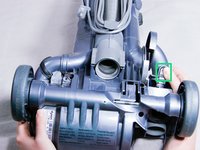
Dyson DC14 Motor Replacement
Giriş
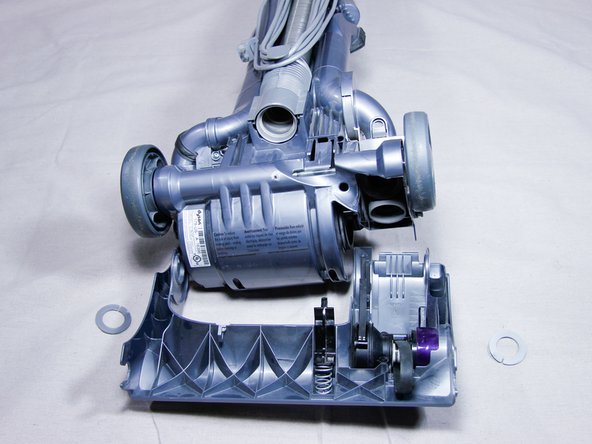
1. adıma gitThis guide will show you the necessary steps to replace the motor in your Dyson DC14 Vacuum. This is a lengthy process; you should set aside a good amount of time to finish this guide in one attempt.
Neye ihtiyacın var
Parçalar

Aletler


Daha fazlasını göster…
-
-
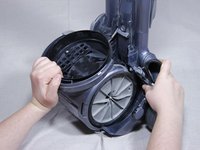
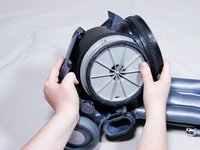
Turn down the squared tabs on the brushbar so that they face outward.
-
Use a screwdriver to pry the belt up from the brushbar.
-
While holding the belt, pull the brushbar to the left and remove it from the vacuum.
Some models don't have the clutch mechanism, but are driven directly from the motor (and the belt cover which is shown as the clutch cover is now part of the soleplate); in that case, it may be simpler to just remove the belt from the motor spindle.
If you've had the vacuum cleaner more than 2 or 3 years, consider changing the belt at the same time, they are not expensive
-
-
-
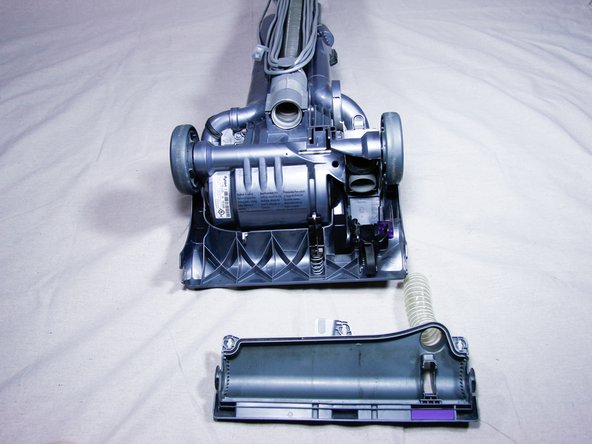
Place vacuum upright, with the canister facing you.
-
Remove the canister, setting the canister aside.
-
-
-
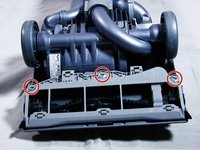
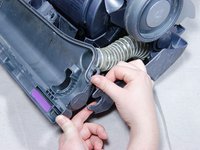
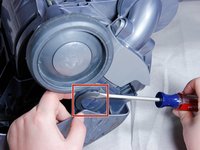
Remove the three T15 torx screws that secure the cover to the brush clutch belt.
Some DC14 units don't have the clutch mechanism (the motor drives the rotating brush directly with the rubber belt), and the "cover" is now part of the soleplate (removed in step 2), so just skip this bit....
-
-
-
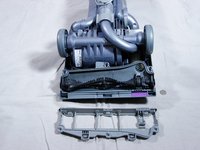
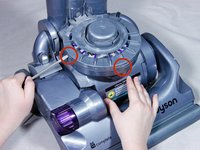
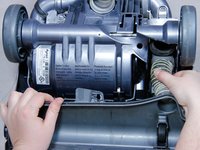
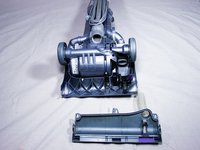
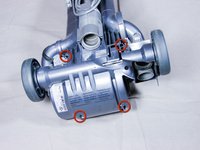
Remove the four T15 torx screws that secure the motor housing to the vacuum.
-
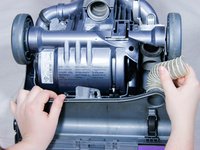
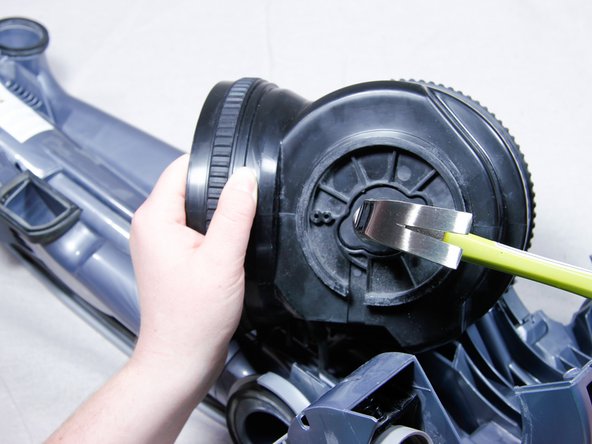
Remove the elbow-bend pipe on the right-side of the vacuum.
-
Press the two release latches on either side of the elbow-bend pipe. Pull it out and away from the vacuum.
Don't confuse the top left screw with the (non-recessed) screw that holds on the small piece of pipe.... the one you are looking for is recessed like the top right one.
-
-
-
Place the vacuum right-side up and leave it standing up.
-
Remove the right side cover by pushing the release latch down while lifting the cover towards you.
On my dc14 blitz it, not sure where the releasing latch was on this step. I used a flat blade to gently pry back the tab at the very bottom of the cover. That stays disengaged on its own ok. Then flat blade in tab on mid point. The gently pull cover out. I guess there is a lighter grey part which could be the latch at the top edge of the cover. In the photos here that has an arrow on, but mine was a different shape with no arrow. Not obvious where you would press to release.
-
-
-
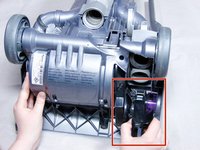
Set vacuum the on its back.
-
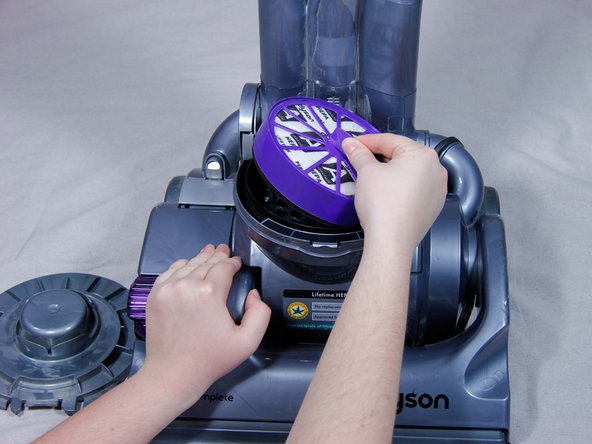
Pull away the plastic cover of the motor housing.
I found a 5th Torx 15 to the rear of the Right Hand side, holding the Motor Housing cover on. Once this was removed the Housing came off easily
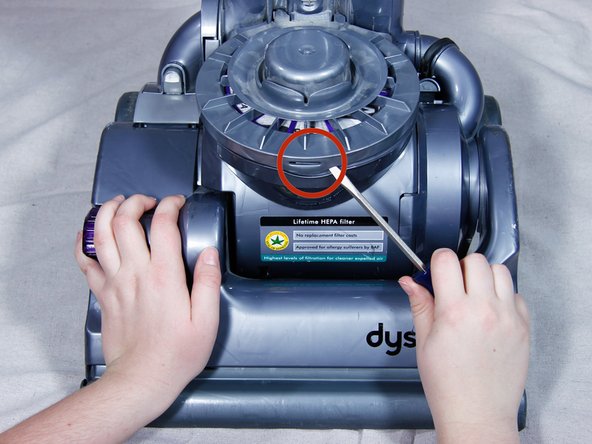
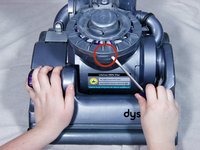
Step 11. Remove the colored knob. There are two tabs. See https://youtu.be/MrGcT6CnIEs for details.
-
-
-
Insert flat head screwdriver between gray motor housing and black motor.
-
Pry motor cover housing away.
On some models, the motor cover is white
-
-
-
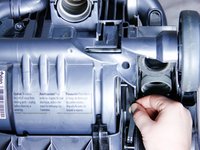
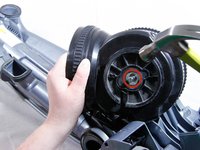
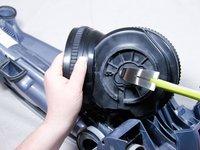
Release the motor assembly from its housing by strongly hitting the brush clutch axle with a hammer.
-
-
-
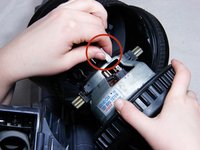
Remove the power terminals from both sides of the motor.
-
Remove the motor from the housing completely.
A tip I saw elsewhere was to disconnect wire from handle switch and feed wire through so that the motor assembly can be pulled out of the machine as a whole. Not hard to do and may make things a bit easier. My wiring was connected with a push connector on live on the switch and an uninsulated spade connector inside a black plastic cover on neutral.
-
-
-
Remove the two rubber grommets from your old motor, then transfer them to your new motor.
The larger piece of rubber is the motor fan case seal. It has a lip which grips the motor. So work around that largest circumference easing the lip back from the motor, then the seal will pull away from the motor ok. For the smaller seal on the other end, make a note/photos of how it attachs to the motor as you remove it to make installation on the new motor easier. In the pictures here it’s fairly obvious, but on mine there was more than one set of holes.
For that smaller rubber piece, take pictures and note that it goes on one way only. The two lobes are not the same size and if you get it the wrong way round, it won’t fit properly back into outer casing when you put the motor back in. It will go in, but not be seated properly and likely won’t seal correctly.
Stuart B -
-


To reassemble your device, follow these instructions in reverse order.
To reassemble your device, follow these instructions in reverse order.
İptal et: Bu kılavuzu tamamlamadım.
22 farklı kişi bu kılavuzu tamamladı.
Ekip

Cal Poly, Team 3-22, Amido Fall 2012 Cal Poly, Team 3-22, Amido Fall 2012 üyesi
CPSU-AMIDO-F12S3G22
4 Üyeler
8 adet Kılavuz yazıldı
12Kılavuz Yorumları
Rather than use a screwdriver for belt removal & risk injury or machine damage, why not use the proper belt tool ?. It saves time & possible injury and is available for not much more than the cost of a decent quality flat head screwdriver.
Motor works beater bar does not turn
What if its not the motor
Great guide! A useful tip for getting the motor (or specifically the rubber cover) into the motor case: smear some washing up liquid or liquid soap around the inside of the motor case, and the rubber will slip in a lot easier. Keep an eye nf the rotational position of the motor (so that it fits the hole at the axle end correctly), and make sure you don't trap the 2 power wires.
Great tutorial, replacement motor cost £12, Dyson now back up and working. Only issue I had was that when replacing the motor housing in the Hoover, make sure it fits into the bottom groove or else the screw hole on the brush clutch cover won't line up. You'll know it's not in the groove if you're having trouble with the screw. Just go back and under the four screws, lift out the motor housing and seat it in again, that'll sort it out.
Belt not broken but brush bar not rotating is the pulley spindle worn or has the belt slipped off the pulley spindle the motor is still in working order.
Any suggestions to diagnose the fault.
dismantled all the bits and then ordered a new motor. I must say it went back together a bit easier than taking apart. Proper tools helped. As a female I found the instructions very easy to follow! My husband sat and watched and gave the usual male comments. Would know what to do next time. New dyson motor 52.00. Lynda Richards 4th July
Thanks for the guide, Dyson (Australia) didn’t want to know said the unit was too old and they wouldn’t supply parts anymore (this is our 2nd replacement motor in 10 years) so rather than drop another $1,000 on a new model, I thought I’d have a go myself after sourcing the genuine parts from the UK.
My m14 makes a grinding noise from time to time. It sounds like a battery powered drill clutch when it hits max tourqe. Any ideas and how can dyi. Pix w/instructions would help please..
There appears to be a 5th screw holding the motor cover on. It is accessed from the back. More than “a bit of force “ is required to remove the motor cover if this screw is not removed. All in all this was a well documented how to.
Robert Turner 3/30/18