
Gateway LT2514u Wireless Card Replacement

Giriş
1. adıma gitThis guide will walk you through the process of replacing the wireless card in a Gateway LT2514u.
Neye ihtiyacın var
Aletler


Daha fazlasını göster…
-
-
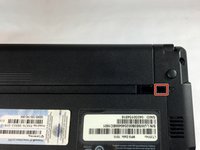
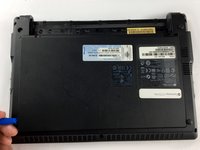
With the netbook's lid closed, flip it over and slide the latch on the upper left hand side of the netbook to the left.
-
-
-
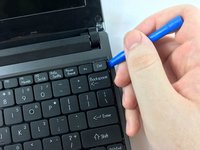
Open the netbook screen all the way and, using a plastic opening tool, pry the upper right-hand corner of the keyboard tray up.
-
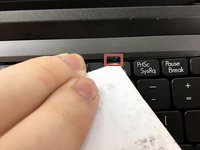
With the plastic opening tool still in place at the corner, use a credit card (or something similar) to press the release tab at the upper right-hand corner of the keyboard tray. It is located right above the Del key.
-
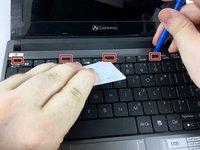
With the credit card pushed up against the tab, slide the plastic opening tool along the top edge of the keyboard towards the credit card. Continue with this method until you have gotten to all tabs. There are 5 total across the top.
-
-
-
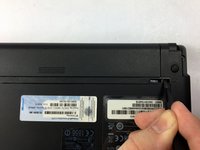
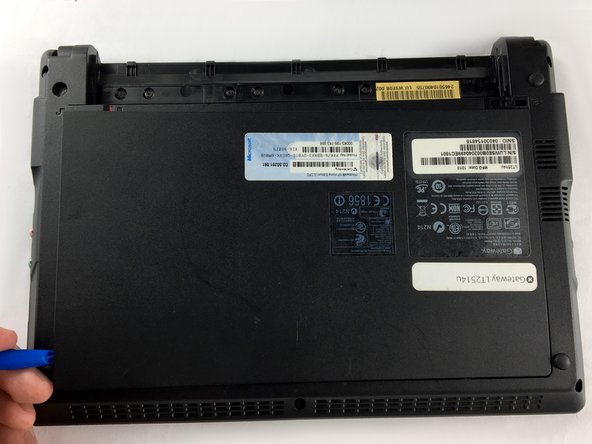
Using a Phillips #0 screwdriver, remove the four 6mm screws that secure the back access panel.
-
-
-
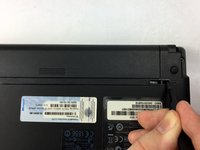
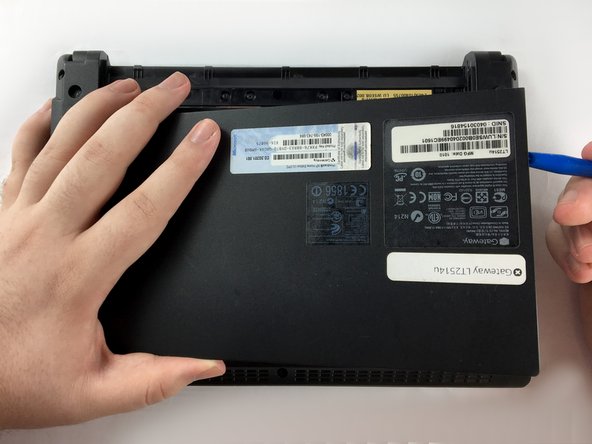
With the netbook lid closed, flip it over on its top. Work the head of a plastic opening tool into a corner of the back access panel until the corner pops up.
-
Keeping the head of the the plastic opening tool underneath the back access panel, work the tool in a sliding manner around the perimeter until all clips have popped.
-
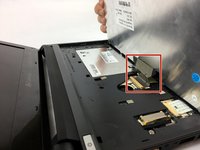
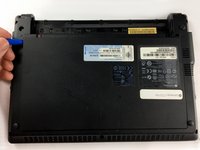
Once all the clips have been released, pull the plate up and off.
-
-
-
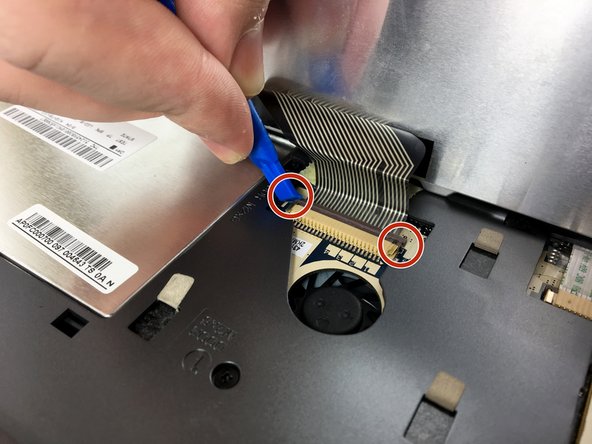
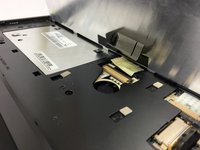
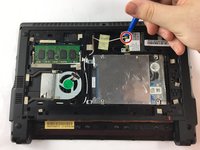
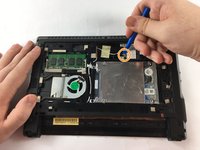
Using a plastic opening tool (or something similar) pop the end of the white wire off of the wireless card.
-
Next, pop the end of the black wire off of the wireless card.
-


To reassemble your device, follow these instructions in reverse order.
To reassemble your device, follow these instructions in reverse order.

Ekip

USF Tampa, Team 3-2, Sullivan Fall 2016 USF Tampa, Team 3-2, Sullivan Fall 2016 üyesi
USFT-SULLIVAN-F16S3G2
3 Üyeler
12 adet Kılavuz yazıldı