Ana içeriğe geç
Onarım Topluluğuna Katılın - Hesap Oluşturun

Google Stadia Controller Buttons Replacement

Neye ihtiyacın var

  1. Google Stadia Controller Buttons Replacement, Loosen the screw cover adhesive: adım 1, 1 resimden 1.
    • Apply a heated iOpener to the rear side of the Stadia controller where the screw cover is located to loosen the adhesive underneath. Apply the iOpener for at least two minutes.

    FixBot'a Sor

    Yorum Ekle

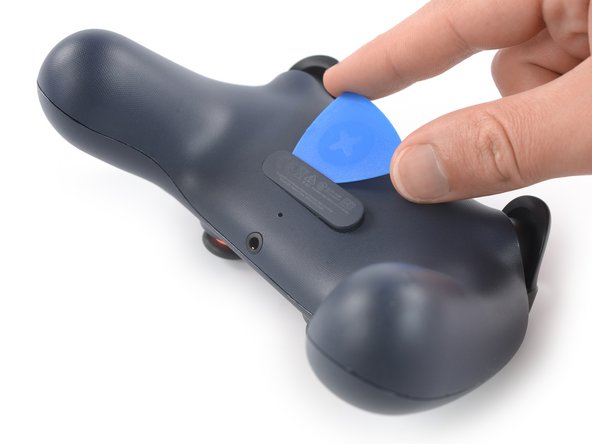
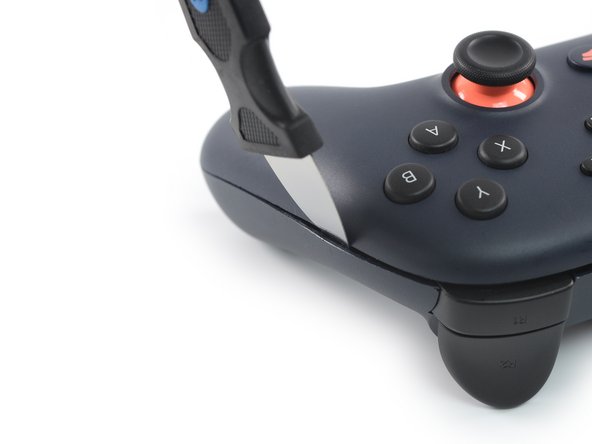
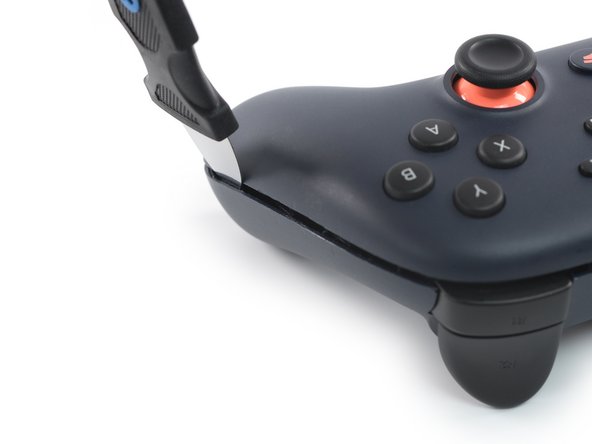
  2. Google Stadia Controller Buttons Replacement, Insert an opening pick: adım 2, 2 resimden 1. Google Stadia Controller Buttons Replacement, Insert an opening pick: adım 2, 2 resimden 2.
    • Insert the tip of an opening pick into the gap between the plastic screw cover and the rear case of the controller.

    FixBot'a Sor

    Yorum Ekle

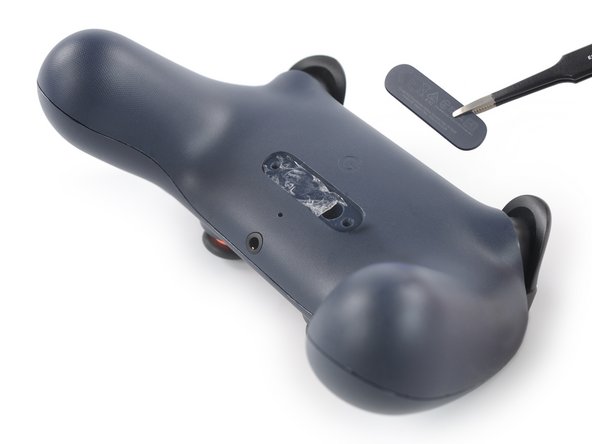
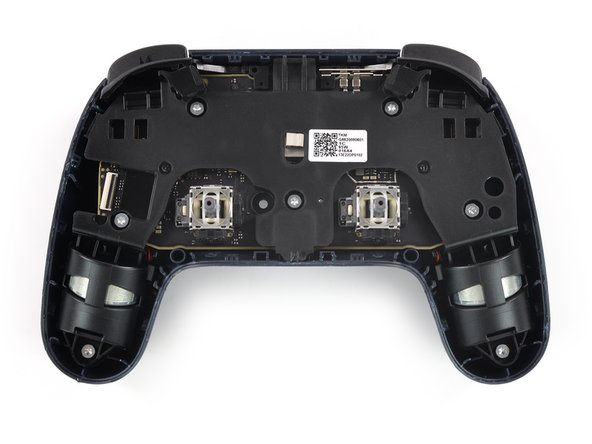
  3. Google Stadia Controller Buttons Replacement, Remove the screw cover: adım 3, 3 resimden 1. Google Stadia Controller Buttons Replacement, Remove the screw cover: adım 3, 3 resimden 2. Google Stadia Controller Buttons Replacement, Remove the screw cover: adım 3, 3 resimden 3.
    Bu adımda kullanılan alet:
    Tweezers
    $4.99
    • Slide the opening pick along the screw cover to slice the adhesive.

    • Use a pair of tweezers or your fingers to remove the screw cover.

    • You might want to replace the screw cover adhesive during reassembly. Apply a bit of high-concentration isopropyl alcohol (>90%) to a Q-tip or use a cleaning pad to gently remove the leftover adhesive on the rear cover of the controller before installing new adhesive.

    FixBot'a Sor

    Yorum Ekle

  4. Google Stadia Controller Buttons Replacement, Unfasten the rear case screw: adım 4, 1 resimden 1.
    • Use a Torx T8 screwdriver to remove the 9.6 mm-long screw securing the rear case.

    FixBot'a Sor

    Yorum Ekle

  5. Google Stadia Controller Buttons Replacement, Disassembly information: adım 5, 2 resimden 1. Google Stadia Controller Buttons Replacement, Disassembly information: adım 5, 2 resimden 2.
    • The front cover assembly of the Stadia controller is held in place by various tight plastic clamps. They are very hard to open and snap back in place easily.

    • The opening procedure requires some force, however, try to avoid damaging your controller case along the way.

    FixBot'a Sor

    Yorum Ekle

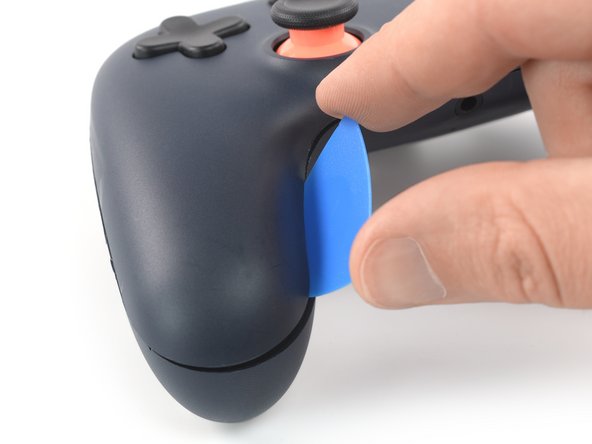
  6. Google Stadia Controller Buttons Replacement, Pry open the stadia controller: adım 6, 3 resimden 1. Google Stadia Controller Buttons Replacement, Pry open the stadia controller: adım 6, 3 resimden 2. Google Stadia Controller Buttons Replacement, Pry open the stadia controller: adım 6, 3 resimden 3.
    • Insert a Jimmy into the gap between the front and back cover assembly at the inside of the left controller handle.

    • To make sure you insert the Jimmy at the correct position where the clamps are located, you can use this photo.

    • Tilt the Jimmy upwards and push it into the gap between the covers at the same time to pry open the plastic clamp. You should hear a clack noise once the clamp pops open.

    • Once the clamp is completely open, the gap between the two controller covers should be about 2-3 mm wide.

    FixBot'a Sor

    Yorum Ekle

  7. Google Stadia Controller Buttons Replacement, Insert an opening pick: adım 7, 2 resimden 1. Google Stadia Controller Buttons Replacement, Insert an opening pick: adım 7, 2 resimden 2.
    • Insert an opening pick in a steep angle into the gap you created to prevent the first clamp from popping back into its closed position.

    FixBot'a Sor

    Yorum Ekle

  8. Google Stadia Controller Buttons Replacement, Pry open the Stadia controller: adım 8, 3 resimden 1. Google Stadia Controller Buttons Replacement, Pry open the Stadia controller: adım 8, 3 resimden 2. Google Stadia Controller Buttons Replacement, Pry open the Stadia controller: adım 8, 3 resimden 3.
    • To make sure you insert the Jimmy at the correct position where the clamps are located, you can use this photo.

    • Insert a Jimmy into the gap between the front and back cover assembly at the outside of the left bottom end of the controller handle.

    • Repeat the previous opening procedure to open the three plastic clamps at the outside of the left controller handle.

    FixBot'a Sor

    Yorum Ekle

  9. Google Stadia Controller Buttons Replacement: adım 9, 3 resimden 1. Google Stadia Controller Buttons Replacement: adım 9, 3 resimden 2. Google Stadia Controller Buttons Replacement: adım 9, 3 resimden 3.
    • Insert a Jimmy into the gap between the front and back cover assembly between the left shoulder button and the charging port at the top edge of the Stadia controller.

    • Tilt the Jimmy upwards and push it into the gap between the covers at the same time to pry open the plastic clamp. You should hear a clack noise once the clamp pops open.

    • Repeat the previous procedure at the clamp between the right shoulder button and the charging port.

    FixBot'a Sor

    Yorum Ekle

  10. Google Stadia Controller Buttons Replacement: adım 10, 3 resimden 1. Google Stadia Controller Buttons Replacement: adım 10, 3 resimden 2. Google Stadia Controller Buttons Replacement: adım 10, 3 resimden 3.
    • Insert a Jimmy into the gap between the front and back cover assembly at the right edge of the right controller handle.

    • Repeat the previous opening procedure to open the three plastic clamps at the outside of the right controller handle.

    FixBot'a Sor

    Yorum Ekle

  11. Google Stadia Controller Buttons Replacement: adım 11, 2 resimden 1. Google Stadia Controller Buttons Replacement: adım 11, 2 resimden 2.
    • Insert a Jimmy into the gap between the front and back cover assembly at the inside of the right controller handle.

    • Repeat the previous opening procedure to open plastic clamps at the inside of the left controller handle.

    FixBot'a Sor

    Yorum Ekle

  12. Google Stadia Controller Buttons Replacement: adım 12, 3 resimden 1. Google Stadia Controller Buttons Replacement: adım 12, 3 resimden 2. Google Stadia Controller Buttons Replacement: adım 12, 3 resimden 3.
    • Insert a Jimmy into the gap between the front and back cover assembly at the bottom edge of the Stadia controller right to the headphone jack.

    • Tilt the Jimmy upwards and push it into the gap between the covers at the same time to pry open the plastic clamp.

    • Repeat the previous procedure at the clamp left to the headphone jack.

    • Do not try to remove the front cover assembly all the way yet. It's still connected to the rear cover assembly.

    FixBot'a Sor

    Yorum Ekle

  13. Google Stadia Controller Buttons Replacement, Unfold the front cover assembly: adım 13, 3 resimden 1. Google Stadia Controller Buttons Replacement, Unfold the front cover assembly: adım 13, 3 resimden 2. Google Stadia Controller Buttons Replacement, Unfold the front cover assembly: adım 13, 3 resimden 3.
    • Avoid straining the front cover assembly cable during this step.

    • Carefully lift the front cover assembly and fold it to the left side of the Google Stadia controller.

    FixBot'a Sor

    Yorum Ekle

  14. Google Stadia Controller Buttons Replacement, Remove the adhesive tape: adım 14, 2 resimden 1. Google Stadia Controller Buttons Replacement, Remove the adhesive tape: adım 14, 2 resimden 2.
    Bu adımda kullanılan alet:
    Tweezers
    $4.99
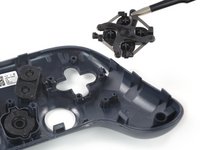
    • Use a pair of tweezers to peel the clear protective tape off the ZIF connector on the left side of the rear case.

    FixBot'a Sor

    Yorum Ekle

  15. Google Stadia Controller Buttons Replacement, Open the ZIF connector: adım 15, 2 resimden 1. Google Stadia Controller Buttons Replacement, Open the ZIF connector: adım 15, 2 resimden 2.
    • Use the pointed end of a spudger to open the ZIF connector holding the button contact board cable in place.

    FixBot'a Sor

    Yorum Ekle

  16. Google Stadia Controller Buttons Replacement, Disconnect the flex cable: adım 16, 3 resimden 1. Google Stadia Controller Buttons Replacement, Disconnect the flex cable: adım 16, 3 resimden 2. Google Stadia Controller Buttons Replacement, Disconnect the flex cable: adım 16, 3 resimden 3.
    • Use a pair of tweezers to carefully disconnect the flex cable of the button unit by pulling it out of the ZIF connector in a flat angle.

    • Separate the front from the rear assembly.

    • Remove the thumbsticks by pulling them straight upwards for an easier handling in case you want to do further disassembly.

    FixBot'a Sor

    Yorum Ekle

  17. Google Stadia Controller Buttons Replacement, Unfasten the screws: adım 17, 1 resimden 1.
    • Use a Torx T6 screwdriver to remove the three 6.2 mm-long screws securing the front button contact board.

    FixBot'a Sor

    Yorum Ekle

  18. Google Stadia Controller Buttons Replacement, Remove the front button contact board: adım 18, 2 resimden 1. Google Stadia Controller Buttons Replacement, Remove the front button contact board: adım 18, 2 resimden 2.
    FixBot'a Sor

    Yorum Ekle

  19. Google Stadia Controller Buttons Replacement, Remove the rubber gasket: adım 19, 2 resimden 1. Google Stadia Controller Buttons Replacement, Remove the rubber gasket: adım 19, 2 resimden 2.
    Bu adımda kullanılan alet:
    Tweezers
    $4.99
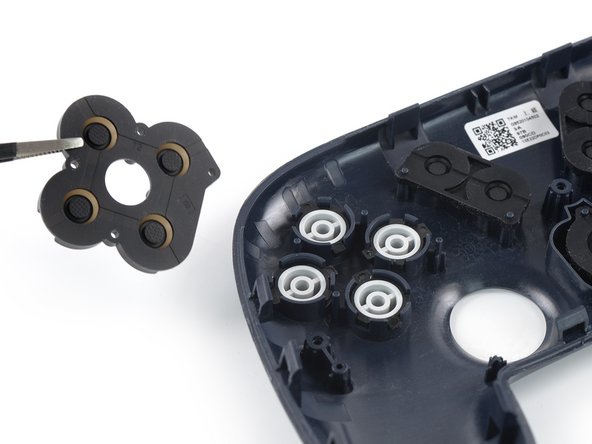
    • Use a pair of tweezers or your fingers to remove the rubber gasket on the A, B, X and Y buttons.

    FixBot'a Sor

    Yorum Ekle

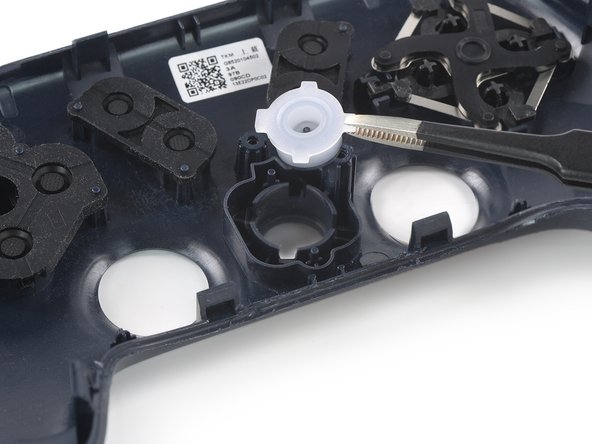
  20. Google Stadia Controller Buttons Replacement, Remove the buttons: adım 20, 3 resimden 1. Google Stadia Controller Buttons Replacement, Remove the buttons: adım 20, 3 resimden 2. Google Stadia Controller Buttons Replacement, Remove the buttons: adım 20, 3 resimden 3.
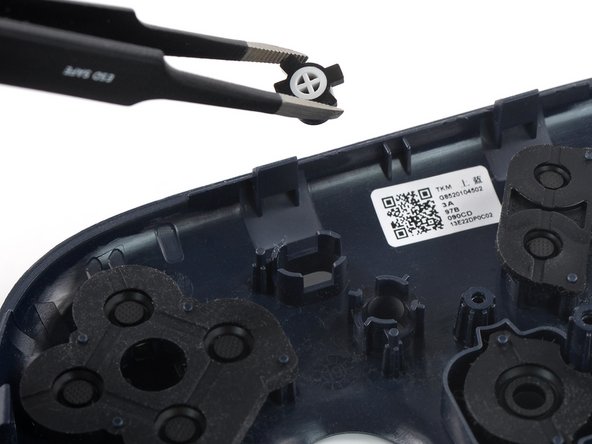
    • Use a pair of tweezers to remove the A, B, X and Y buttons.

    • Since the buttons are equipped with little plastic nibs for orientation, there isn't a risk of inserting them in the wrong position during reassembly.

    FixBot'a Sor

    Yorum Ekle

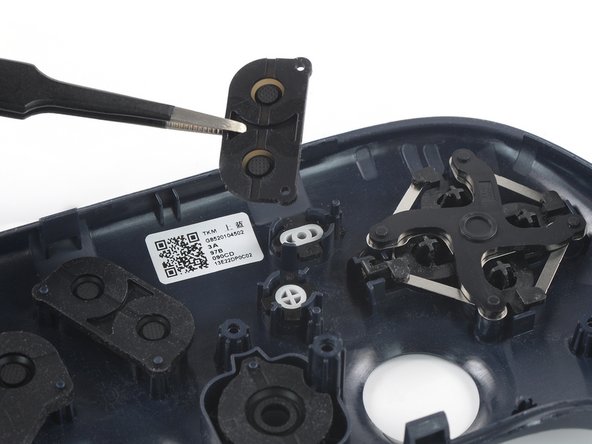
  21. Google Stadia Controller Buttons Replacement, Remove the rubber gasket: adım 21, 2 resimden 1. Google Stadia Controller Buttons Replacement, Remove the rubber gasket: adım 21, 2 resimden 2.
    • Use a pair of tweezers or your fingers to remove the rubber gasket on the menu and the capture button.

    FixBot'a Sor

    Yorum Ekle

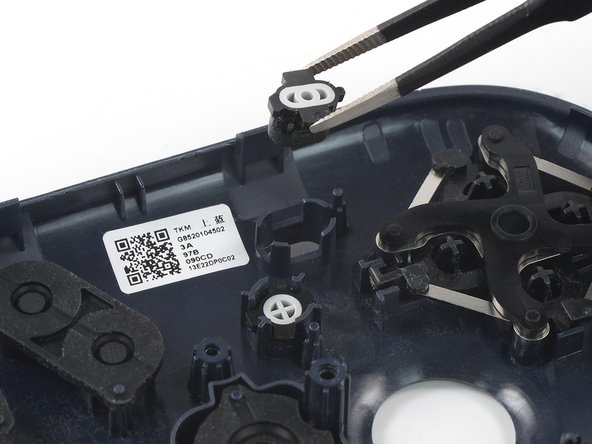
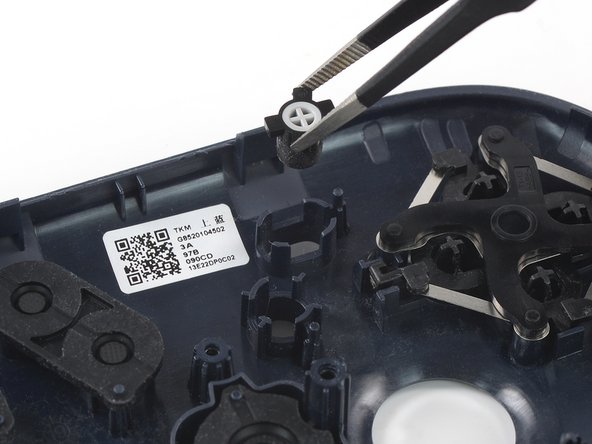
  22. Google Stadia Controller Buttons Replacement, Remove the buttons: adım 22, 3 resimden 1. Google Stadia Controller Buttons Replacement, Remove the buttons: adım 22, 3 resimden 2. Google Stadia Controller Buttons Replacement, Remove the buttons: adım 22, 3 resimden 3.
    • Use a pair of tweezers to remove the menu and capture button.

    FixBot'a Sor

    Yorum Ekle

  23. Google Stadia Controller Buttons Replacement, Remove the rubber gasket: adım 23, 2 resimden 1. Google Stadia Controller Buttons Replacement, Remove the rubber gasket: adım 23, 2 resimden 2.
    • Use a pair of tweezers or your fingers to remove the rubber gasket on the Stadia button.

    FixBot'a Sor

    Yorum Ekle

  24. Google Stadia Controller Buttons Replacement, Remove the button: adım 24, 2 resimden 1. Google Stadia Controller Buttons Replacement, Remove the button: adım 24, 2 resimden 2.
    • Use a pair of tweezers to remove the Stadia button.

    FixBot'a Sor

    Yorum Ekle

  25. Google Stadia Controller Buttons Replacement, Remove the rubber gasket: adım 25, 2 resimden 1. Google Stadia Controller Buttons Replacement, Remove the rubber gasket: adım 25, 2 resimden 2.
    • Use a pair of tweezers or your fingers to remove the rubber gasket on the Google assistant and option button.

    FixBot'a Sor

    Yorum Ekle

  26. Google Stadia Controller Buttons Replacement, Remove the buttons: adım 26, 3 resimden 1. Google Stadia Controller Buttons Replacement, Remove the buttons: adım 26, 3 resimden 2. Google Stadia Controller Buttons Replacement, Remove the buttons: adım 26, 3 resimden 3.
    • Use a pair of tweezers to remove the Google assistant and option button.

    FixBot'a Sor

    Yorum Ekle

  27. Google Stadia Controller Buttons Replacement, Remove the direction pad: adım 27, 3 resimden 1. Google Stadia Controller Buttons Replacement, Remove the direction pad: adım 27, 3 resimden 2. Google Stadia Controller Buttons Replacement, Remove the direction pad: adım 27, 3 resimden 3.
    • Use a pair of tweezers or your fingers to remove the direction pad.

    FixBot'a Sor

    Yorum Ekle

Sonuç

To reassemble your device, follow these instructions in reverse order.

Take your e-waste to an R2 or e-Stewards certified recycler.

Repair didn’t go as planned? Check out our Answers community for troubleshooting help.

İptal et: Bu kılavuzu tamamlamadım.

Bir başkası bu kılavuzu tamamladı.

Dominik Schnabelrauch

Üyelik tarihi: 11/23/16

261.060 İtibar

682 adet Kılavuz yazıldı

Ekip

iFixit iFixit üyesi

Staff

123 Üyeler

28.230 adet Kılavuz yazıldı

0Kılavuz Yorumları

Yorum Ekle

İstatistikleri Görüntüle:

Son 24 Saat: 1

Son 7 gün: 16

Son 30 gün: 83

Her zaman: 3,043