
Lenovo ThinkPad T480 LCD Screen Replacement

Giriş
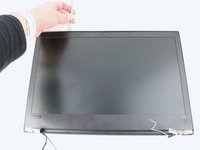
1. adıma gitIf you need to replace the LCD screen of your Lenovo ThinkPad T480, follow this guide. The LCD screen or liquid crystal display is a type of flat-panel display. It uses liquid crystal film between glass plates that when voltage is applied its optical properties change and images are displayed or hidden.
If damage or failure occurs you may notice missing pixels, the color could be off, or the screen could crack if it is dropped or sustains a fall.
Prior to starting this repair, be sure to disable the internal battery, turn off the device, and unplug it from the charging cable.
Neye ihtiyacın var
Parçalar

Aletler


Daha fazlasını göster…
-
-
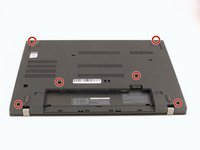
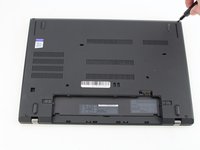
Insert the blue plastic opening tool into the space between the lower case and the chassis.
-
Slide the opening tool around the perimeter of the case to release the clips holding the case and the chassis together.
-
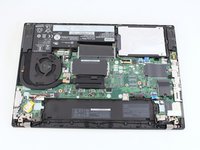
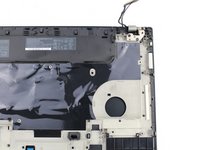
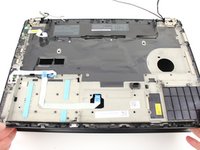
Remove the back case.
I found a tough spudger (or even better a plectrum) is best here as the clips, although easy to separate, hold the case firmly leaving a tight gap which a soft spudger may fail to enter.
Hi Benjamin, thanks for the tip!
You also have to pry the near the battery. I experienced that you can't pry the front side.
I used a credit card to pry the clips loose, it worked great. Added 2nd RAM stick easily.
-
-
-
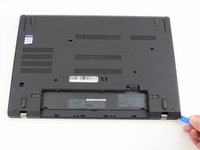
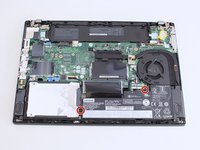
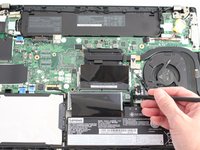
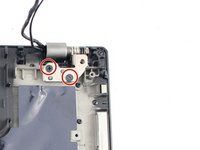
Use a Phillips #1 screwdriver to remove the two 4.6 mm screws that secure the internal battery to the frame.
-
-
-
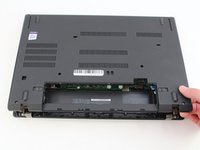
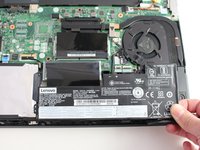
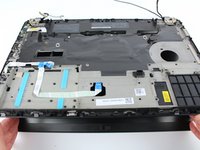
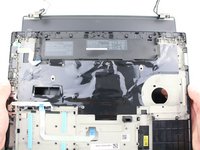
Lift the battery straight out of its recess and remove it.
DO NOT wedge out the battery - T480 has two screws that hold down a plastic battery tray which easily lifts out after the two frame screws are removed. Wedging out will ruin the battery and could damage the cell and cause a fire.
The guide says to remove those two screws. They are "lifting" with the wedge. Probably more of a way to promote their tools than out of necessity, but idk
-
-
-
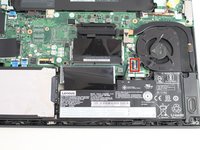
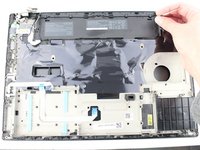
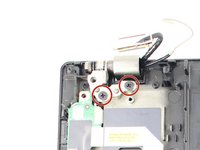
Using the Phillips #1 screwdriver, remove two 4.3 mm screws from each hinge (four total).
These screws were tricky for me. Be careful not to strip. I had success with a Phillips #2 and needed to apply a decent amount of vertical force into the screw before turning.
-
-
-
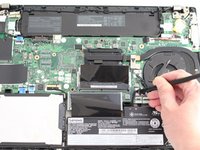
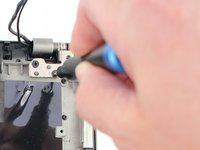
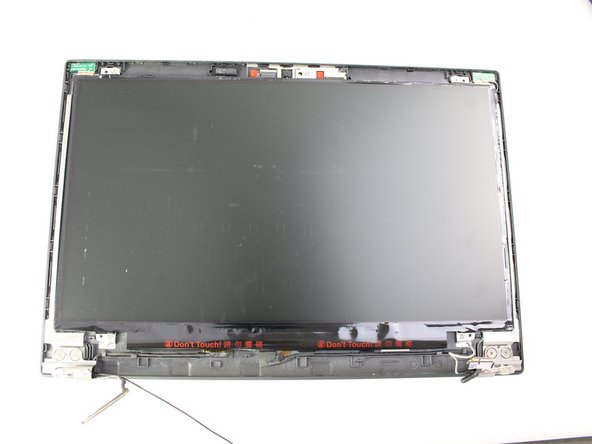
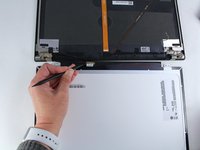
Use the metal spudger to create a space between the bezel and lid and carefully undo the clips around the perimeter of the bezel.
-
-
-
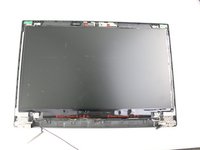
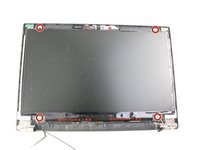
Remove the four 3.0 mm Phillips #1 screws from the four corners of the LCD screen.
-
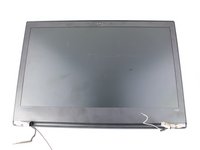
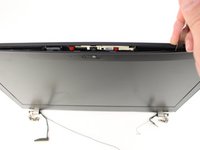
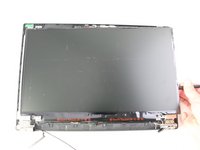
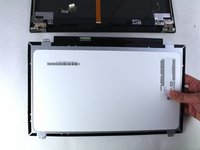
Lift it up using the spudger and flip it over gently towards you.
-


To reassemble your device, follow the above steps in reverse order.
Take your e-waste to an R2 or e-Stewards certified recycler.
Repair didn’t go as planned? Try some basic troubleshooting, or ask our Answers community for help.
To reassemble your device, follow the above steps in reverse order.
Take your e-waste to an R2 or e-Stewards certified recycler.
Repair didn’t go as planned? Try some basic troubleshooting, or ask our Answers community for help.
İptal et: Bu kılavuzu tamamlamadım.
3 farklı kişi bu kılavuzu tamamladı.


10 Yorum
If the internal battery is disabled why do you need to remove it?
Hi Dan, if you disconnect the internal battery from the motherboard, (Step 12), you should be fine. We just want to make sure that there is no power to the system and the step to remove the battery is included as a precaution. Thanks!
@sarahw thank you but my question was more about why do you need to physically disconnect the battery if it is already disabled in BIOS?
Hi Dan, the software disconnection is a stopgap to ensure nothing goes wrong while the device is being opened, but the only way to 100% ensure that the motherboard won't accidentally draw power and short a connection is to physically disconnect the battery.
I'm on Batnert on this. Sarah just making everything a hassle when it can be done in under 30 minutes even for the meticulous person. Its like showing people how to cook an instant noodles but instead of showing them the 2 minutes in hot water guide, you're telling people to cut some meat, veggies, mushroom, couple of onion, fried it all a little bit & use some salt or some other seasoning for taste without even telling the person that you can just boiled it in hot water but it might not taste that great without the other ingredients guide. I can just say to follow Batnert but I am following Sarah steps in explaining, so...
Hi Openterminal and Batnert, thank you both for the suggestions. I am sorry I didn't address this sooner. I will work on updating the guide to eliminate the steps you suggested.
You really don't need to disassemble the whole upper lid just to get to the LCD. All you really need is disable the internal battery and then take a spudger to the bezel. The lower part is a bit annoying and might require a bit more force and something like a credit card (there also actually are two more plastic clips to take care of). Then it's just 4 screws and the connector. Still very helpful!
Thanks Jan! I appreciate the tip and info.