Ana içeriğe geç

Lenovo Yoga 900-13ISK Display Replacement

Neye ihtiyacın var

  1. Lenovo Yoga 900-13ISK Display Replacement, Back Cover: adım 1, 2 resimden 1. Lenovo Yoga 900-13ISK Display Replacement, Back Cover: adım 1, 2 resimden 2.
    • Using a T5 Torx screwdriver, remove the ten 5.5 mm screws from the back case of the laptop.

  2. Lenovo Yoga 900-13ISK Display Replacement: adım 2, 3 resimden 1. Lenovo Yoga 900-13ISK Display Replacement: adım 2, 3 resimden 2. Lenovo Yoga 900-13ISK Display Replacement: adım 2, 3 resimden 3.
    • Use a spudger to pry open the back case at the hinges of the laptop.

    • There are plastic clips around the perimeter of the case holding down the back cover. These will need to be popped off as the cover is removed.

    • Use your fingers to completely pop off the back cover.

  3. Lenovo Yoga 900-13ISK Display Replacement, Battery: adım 3, 3 resimden 1. Lenovo Yoga 900-13ISK Display Replacement, Battery: adım 3, 3 resimden 2. Lenovo Yoga 900-13ISK Display Replacement, Battery: adım 3, 3 resimden 3.
    • Remove the five 3.6 mm screws from the battery with a Phillips #00 screwdriver.

  4. Lenovo Yoga 900-13ISK Display Replacement: adım 4, 3 resimden 1. Lenovo Yoga 900-13ISK Display Replacement: adım 4, 3 resimden 2. Lenovo Yoga 900-13ISK Display Replacement: adım 4, 3 resimden 3.
    • Grab the bottom corners of the battery and gently pull the battery until the cable disconnects from the connector on the motherboard.

    • While reassembling, use a plastic spudger to push the battery cable into the connector on the underside of the motherboard. This will be easier to do before the screws are replaced.

  5. Lenovo Yoga 900-13ISK Display Replacement, Display Assembly: adım 5, 3 resimden 1. Lenovo Yoga 900-13ISK Display Replacement, Display Assembly: adım 5, 3 resimden 2. Lenovo Yoga 900-13ISK Display Replacement, Display Assembly: adım 5, 3 resimden 3.
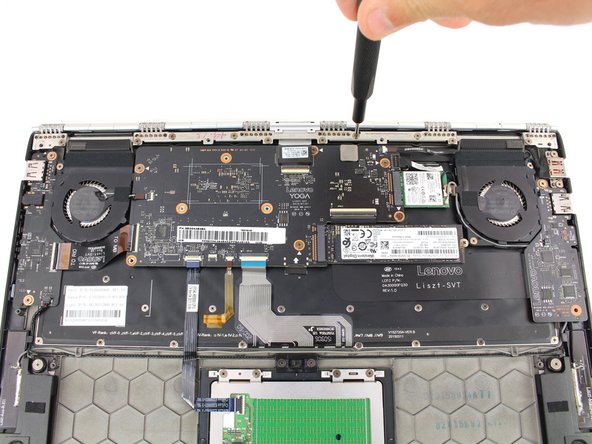
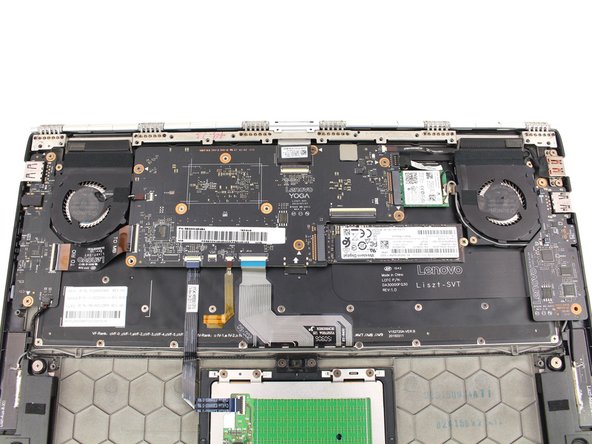
    • Remove the ten 3.6 mm screws from the hinge bracket with a Phillips #00 screwdriver.

  6. Lenovo Yoga 900-13ISK Display Replacement: adım 6, 3 resimden 1. Lenovo Yoga 900-13ISK Display Replacement: adım 6, 3 resimden 2. Lenovo Yoga 900-13ISK Display Replacement: adım 6, 3 resimden 3.
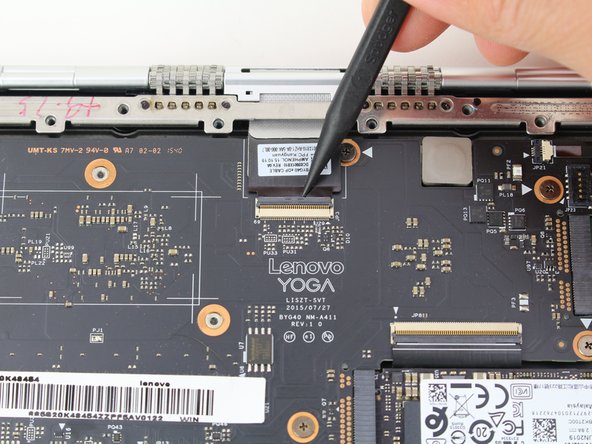
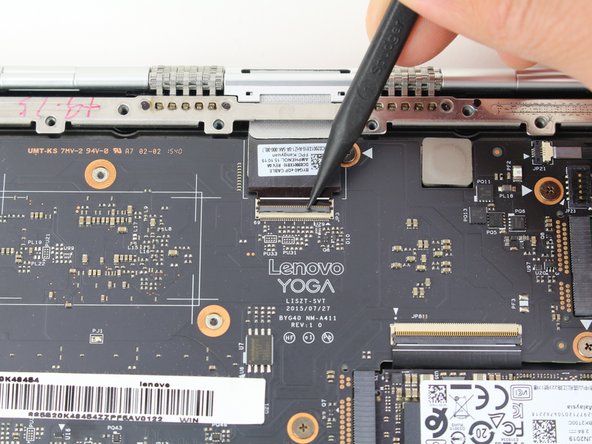
    • Use the pointed end of a spudger to lift the hinged locking flap of the display ZIF connector.

  7. Lenovo Yoga 900-13ISK Display Replacement: adım 7, 2 resimden 1. Lenovo Yoga 900-13ISK Display Replacement: adım 7, 2 resimden 2.
    • Pull out the display cable with a pair of blunt nose tweezers.

  8. Lenovo Yoga 900-13ISK Display Replacement: adım 8, 3 resimden 1. Lenovo Yoga 900-13ISK Display Replacement: adım 8, 3 resimden 2. Lenovo Yoga 900-13ISK Display Replacement: adım 8, 3 resimden 3.
    • Open the laptop to a 45° angle, then close the laptop.

    • This raises the hinge, which will stay open as the bottom case is lowered.

  9. Lenovo Yoga 900-13ISK Display Replacement: adım 9, 3 resimden 1. Lenovo Yoga 900-13ISK Display Replacement: adım 9, 3 resimden 2. Lenovo Yoga 900-13ISK Display Replacement: adım 9, 3 resimden 3.
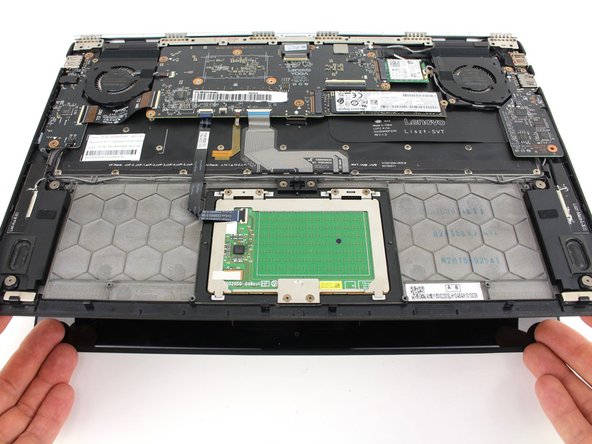
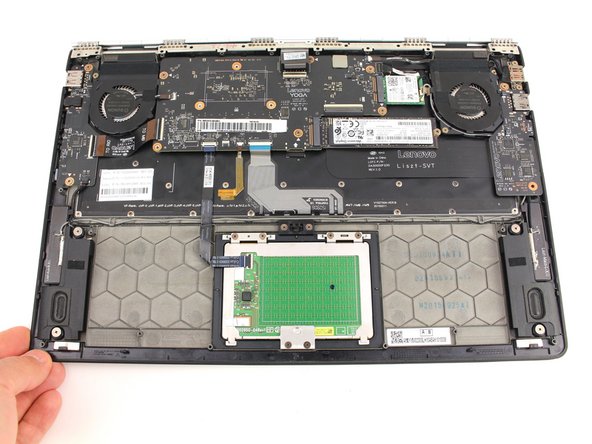
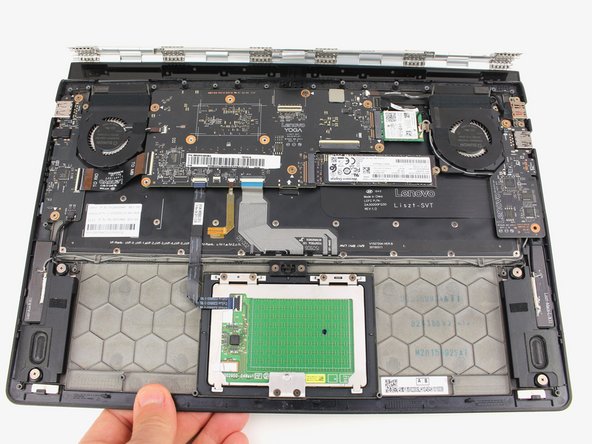
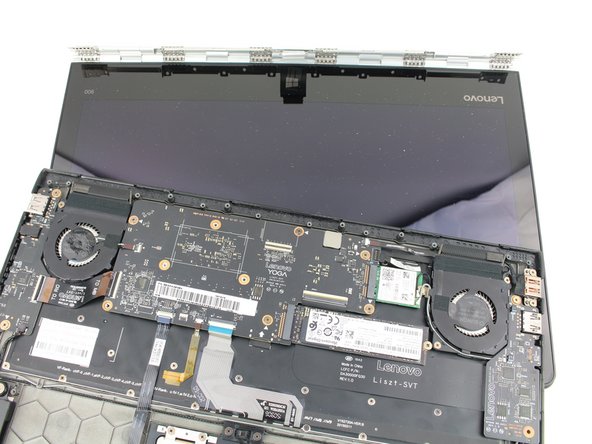
    • Slide the bottom case away from the hinge.

    • If the hinge is catching on the case, either go back to the previous step and open the case a bit more, or manually open the hinge with your fingers.

  10. Dikkatli ol: adımlar 10-16 yapım altında olarak işaretlenen bir kılavuzdan alınmıştır.

    Lenovo Yoga 900-13ISK Display Replacement, Display Opening Prereq: adım 10, 1 resimden 1.
    • Apply heat along the bottom and left edges of the screen, either with a heat gun or iOpener.

    • Check out our iOpener Instructions if you need help!

  11. Lenovo Yoga 900-13ISK Display Replacement: adım 11, 2 resimden 1. Lenovo Yoga 900-13ISK Display Replacement: adım 11, 2 resimden 2.
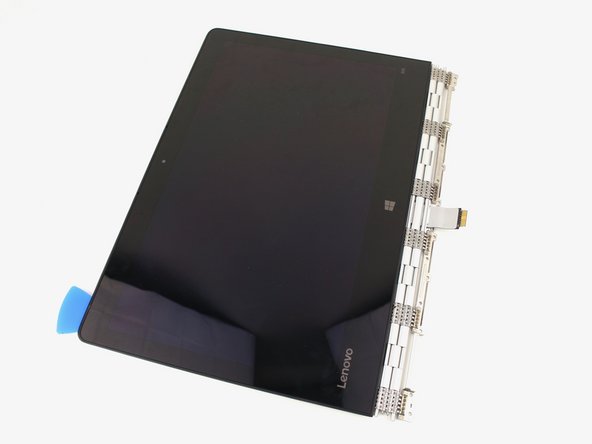
    • Insert an opening pick into the corner of the screen and slide it around slightly to create an opening.

  12. Lenovo Yoga 900-13ISK Display Replacement: adım 12, 3 resimden 1. Lenovo Yoga 900-13ISK Display Replacement: adım 12, 3 resimden 2. Lenovo Yoga 900-13ISK Display Replacement: adım 12, 3 resimden 3.
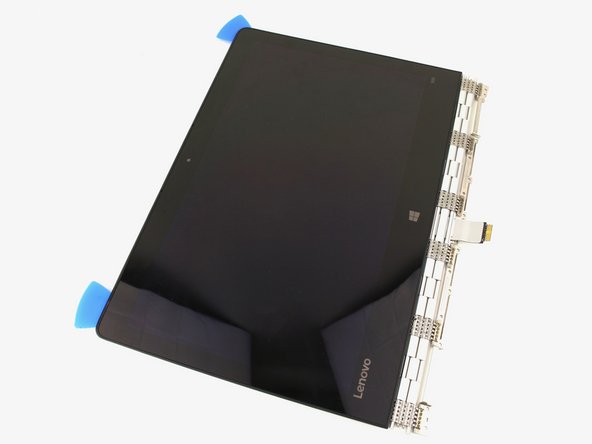
    • Insert a second opening pick and slide it along the side of the display, cutting away the adhesive.

  13. Lenovo Yoga 900-13ISK Display Replacement: adım 13, 1 resimden 1.
    • Use a heat gun or iOpener to apply heat to the top and side edge that have not yet been opened.

  14. Lenovo Yoga 900-13ISK Display Replacement: adım 14, 3 resimden 1. Lenovo Yoga 900-13ISK Display Replacement: adım 14, 3 resimden 2. Lenovo Yoga 900-13ISK Display Replacement: adım 14, 3 resimden 3.
    • Continue cutting away the adhesive on the top and side edges of the display.

  15. Lenovo Yoga 900-13ISK Display Replacement: adım 15, 3 resimden 1. Lenovo Yoga 900-13ISK Display Replacement: adım 15, 3 resimden 2. Lenovo Yoga 900-13ISK Display Replacement: adım 15, 3 resimden 3.
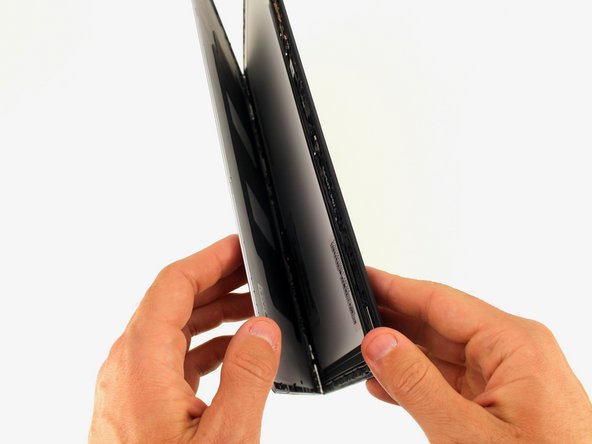
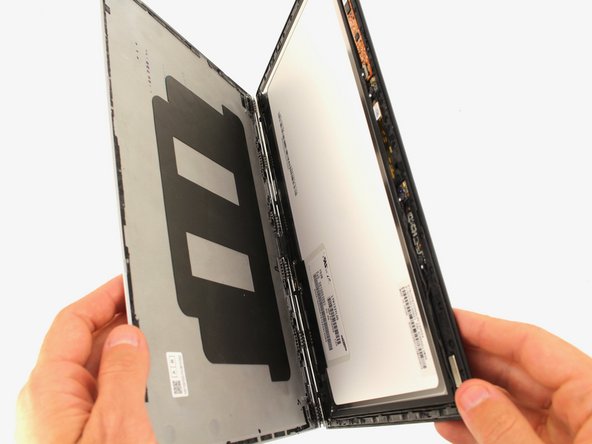
    • Open the display casing along the top edge.

  16. Lenovo Yoga 900-13ISK Display Replacement: adım 16, 3 resimden 1. Lenovo Yoga 900-13ISK Display Replacement: adım 16, 3 resimden 2. Lenovo Yoga 900-13ISK Display Replacement: adım 16, 3 resimden 3.
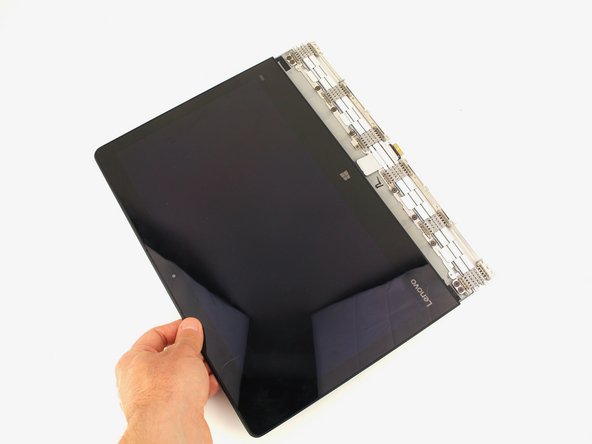
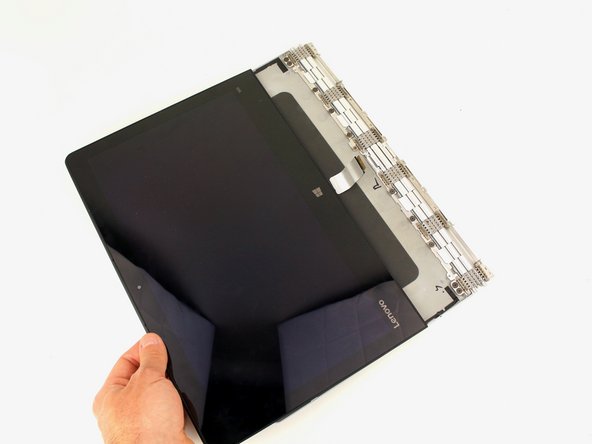
    • Pull the display cable out from the hinge mechanism.

  17. Lenovo Yoga 900-13ISK Display Replacement, Display: adım 17, 3 resimden 1. Lenovo Yoga 900-13ISK Display Replacement, Display: adım 17, 3 resimden 2. Lenovo Yoga 900-13ISK Display Replacement, Display: adım 17, 3 resimden 3.
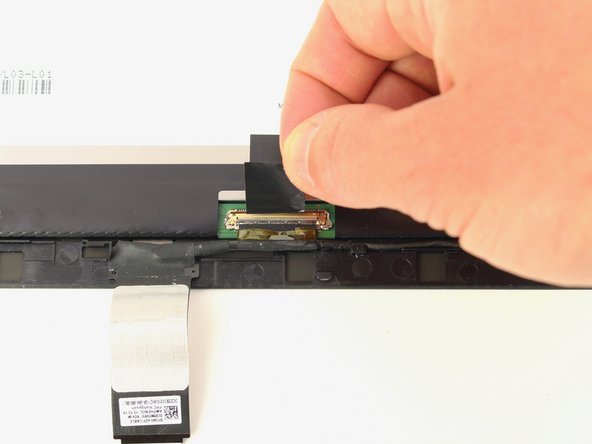
    • Peel up the small strip of tape wrapped around the locking bar of the display cable connector.

  18. Lenovo Yoga 900-13ISK Display Replacement: adım 18, 2 resimden 1. Lenovo Yoga 900-13ISK Display Replacement: adım 18, 2 resimden 2.
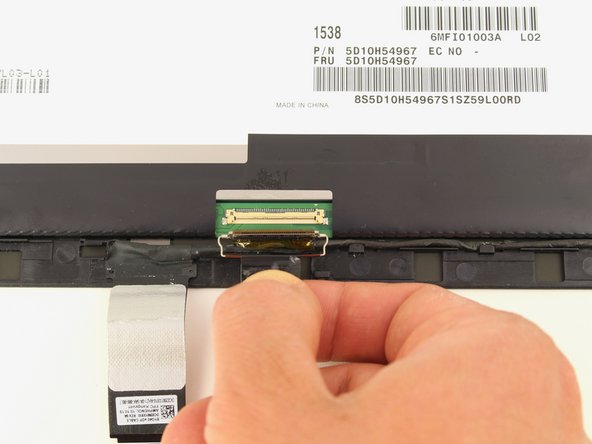
    • Pull the tape downward to unplug the display cable.

  19. Lenovo Yoga 900-13ISK Display Replacement: adım 19, 3 resimden 1. Lenovo Yoga 900-13ISK Display Replacement: adım 19, 3 resimden 2. Lenovo Yoga 900-13ISK Display Replacement: adım 19, 3 resimden 3.
    • Gently pull the cable out from the routing to free it from the hooks along the edge of the screen.

  20. Lenovo Yoga 900-13ISK Display Replacement: adım 20, 3 resimden 1. Lenovo Yoga 900-13ISK Display Replacement: adım 20, 3 resimden 2. Lenovo Yoga 900-13ISK Display Replacement: adım 20, 3 resimden 3.
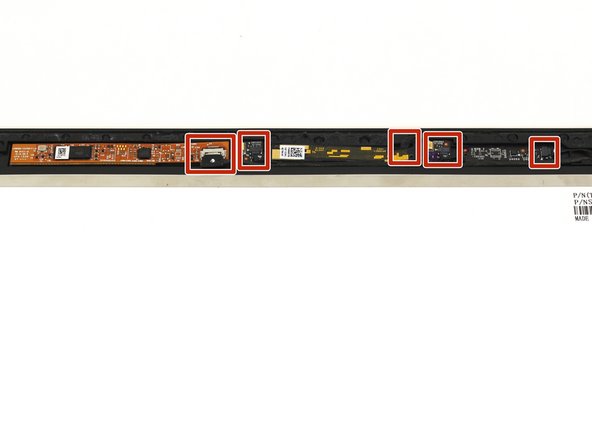
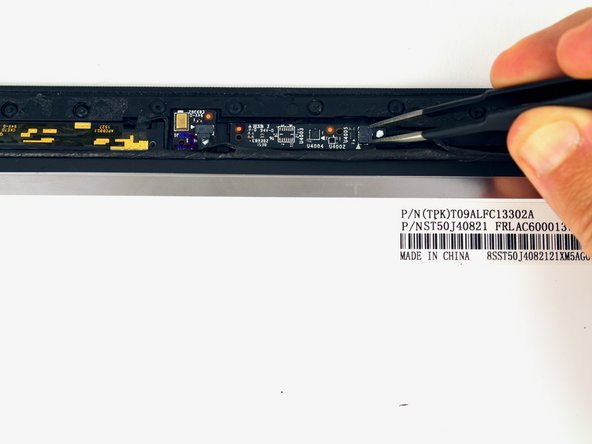
    • Gently unplug the five cables on the control boards on the top edge of the display with a pair of blunt nose tweezers.

    • Be extremely cautious as you handle these cables, as they are easily broken. If the pair of tweezers doesn't work for you, you can gently wiggle the cables back and forth with your fingers to ease them out from the connectors.

    • Remove the display cable.

  21. Lenovo Yoga 900-13ISK Display Replacement: adım 21, 3 resimden 1. Lenovo Yoga 900-13ISK Display Replacement: adım 21, 3 resimden 2. Lenovo Yoga 900-13ISK Display Replacement: adım 21, 3 resimden 3.
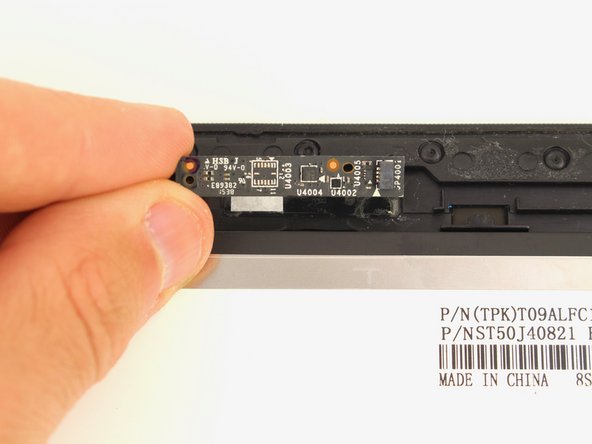
    • Gently pry up any of the boards that are missing from your new display with a nylon spudger and put them in the same place on the new display.

    • Emphasis on the 'gently'—we had two of these boards snap or bend significantly while trying to get them off. Be particularly cautious when prying up the yellow-accented webcam board in the center, as the adhesive is quite strong.

    • The touch control board on the far left is wired into the digitizer and cannot be removed. Your new display should come with this board already in place.

Sonuç

To reassemble your device, follow these instructions in reverse order.

Bir başkası bu kılavuzu tamamladı.

Austin Blakely

Üyelik tarihi: 03/11/19

19.506 İtibar

53 adet Kılavuz yazıldı

Ekip

iFixit iFixit üyesi

Staff

135 Üyeler

16.820 adet Kılavuz yazıldı

0 Yorum

Yorum Ekle

İstatistikleri Görüntüle:

Son 24 Saat: 0

Son 7 gün: 10

Son 30 gün: 51

Her zaman: 2,552