Ana içeriğe geç

Logitech MX Anywhere 2S Battery Replacement

Neye ihtiyacın var

  1. Logitech MX Anywhere 2S Battery Replacement, Heat the mouse feet: adım 1, 1 resimden 1.
    • Flip the mouse's power switch into the OFF position, unplug any cables, and flip it over so the feet are facing up.

    • The unique shape of some mice can prevent them from laying flat. If you need to, lay your mouse on a soft towel to prevent wobble.

    • If you're planning to reuse your existing mouse feet, note that the adhesive needs to be thoroughly heated for them to be cleanly removed.

    • Heat an iOpener and apply it to the mouse feet for about two minutes.

    • Alternatively, you can use a hair dryer to soften the mouse feet adhesive.

    • When using a hair dryer, don't heat the feet for more than a couple seconds at a time—anything hotter than just warm to the touch risks melting or warping the plastic lower case.

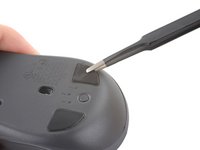
  2. Logitech MX Anywhere 2S Battery Replacement, Separate the mouse foot adhesive: adım 2, 3 resimden 1. Logitech MX Anywhere 2S Battery Replacement, Separate the mouse foot adhesive: adım 2, 3 resimden 2. Logitech MX Anywhere 2S Battery Replacement, Separate the mouse foot adhesive: adım 2, 3 resimden 3.
    • Insert an opening pick between a mouse foot and the lower case.

    • Go slowly, and make sure the pick slides underneath both the foot and its adhesive pad. These layers separate easily.

    • If you plan on reusing your mouse feet, be careful not to crease them or separate them from their adhesive pads.

    • Slide your pick under the foot to separate its adhesive until you can grab it with your fingers.

    • If the pick feels stuck, apply more heat before continuing.

  3. Logitech MX Anywhere 2S Battery Replacement, Remove the mouse foot: adım 3, 2 resimden 1. Logitech MX Anywhere 2S Battery Replacement, Remove the mouse foot: adım 3, 2 resimden 2.
    • Peel up and remove the mouse foot.

  4. Logitech MX Anywhere 2S Battery Replacement, Remove the remaining feet: adım 4, 3 resimden 1. Logitech MX Anywhere 2S Battery Replacement, Remove the remaining feet: adım 4, 3 resimden 2. Logitech MX Anywhere 2S Battery Replacement, Remove the remaining feet: adım 4, 3 resimden 3.
    • Repeat the previous two steps to remove the remaining mouse feet.

  5. Logitech MX Anywhere 2S Battery Replacement, Reassembly information: adım 5, 3 resimden 1. Logitech MX Anywhere 2S Battery Replacement, Reassembly information: adım 5, 3 resimden 2. Logitech MX Anywhere 2S Battery Replacement, Reassembly information: adım 5, 3 resimden 3.
    • For installing new mouse feet or reusing your old ones:

    • Use a pair of tweezers or a spudger to remove any large chunks of leftover adhesive.

    • Thoroughly clean the bottom of the mouse with isopropyl alcohol and a lint-free of microfiber cloth. Allow the surface to dry completely.

    • Peel your new mouse feet away from their adhesive liners and press them firmly into place.

  6. Logitech MX Anywhere 2S Battery Replacement, Unfasten the lower case: adım 6, 1 resimden 1.
    • Use a Phillips screwdriver to remove the four 5.9 mm-long screws securing the lower case to the upper shell.

  7. Logitech MX Anywhere 2S Battery Replacement, Remove the upper shell: adım 7, 3 resimden 1. Logitech MX Anywhere 2S Battery Replacement, Remove the upper shell: adım 7, 3 resimden 2. Logitech MX Anywhere 2S Battery Replacement, Remove the upper shell: adım 7, 3 resimden 3.
    • Flip your mouse over and grab the upper shell.

    • Lift the front edge of the upper shell upwards.

    • Lift the upper shell straight off of the mouse.

    • During reassembly, lay the front edge of the upper shell into place, then press down to engage the rear clip.

  8. Logitech MX Anywhere 2S Battery Replacement, Free the battery cables: adım 8, 3 resimden 1. Logitech MX Anywhere 2S Battery Replacement, Free the battery cables: adım 8, 3 resimden 2. Logitech MX Anywhere 2S Battery Replacement, Free the battery cables: adım 8, 3 resimden 3.
    • Use the point of your spudger to pull the battery cables out from under the cable guide on the battery housing.

  9. Logitech MX Anywhere 2S Battery Replacement, Disconnect the battery: adım 9, 2 resimden 1. Logitech MX Anywhere 2S Battery Replacement, Disconnect the battery: adım 9, 2 resimden 2.
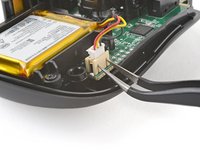
    • Use a pair of tweezers or your fingers to grip the top of the battery connector.

    • Always pull cables by their connectors and not the wires themselves.

    • Gently rock the connector side to side and pull it out of its socket.

    • The connector is held tightly within its socket. If it feels stuck, try a different grip—use the protrusions around the neck of the connector if you need more leverage.

    • If the connector won't budge, skip to the next step for an alternate method.

  10. Logitech MX Anywhere 2S Battery Replacement, Disconnect the battery with tweezers: adım 10, 3 resimden 1. Logitech MX Anywhere 2S Battery Replacement, Disconnect the battery with tweezers: adım 10, 3 resimden 2. Logitech MX Anywhere 2S Battery Replacement, Disconnect the battery with tweezers: adım 10, 3 resimden 3.
    • If your battery connector still feels stuck:

    • Insert each arm of a pair of pointed tweezers into the cutouts on the side of the battery connector's motherboard socket.

    • Push the connector up, just enough to grip the top of the connector with another pair of tweezers or your fingers.

    • Pull the battery connector completely out of its socket to disconnect it.

  11. Logitech MX Anywhere 2S Battery Replacement, Unfasten the battery housing: adım 11, 1 resimden 1.
    • Use a Philips screwdriver to remove the three 4.7 mm-long screws securing the battery housing.

  12. Logitech MX Anywhere 2S Battery Replacement, Remove the battery housing: adım 12, 2 resimden 1. Logitech MX Anywhere 2S Battery Replacement, Remove the battery housing: adım 12, 2 resimden 2.
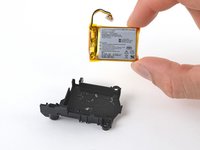
    • Remove the battery housing.

  13. Logitech MX Anywhere 2S Battery Replacement, Soften the battery adhesive: adım 13, 2 resimden 1. Logitech MX Anywhere 2S Battery Replacement, Soften the battery adhesive: adım 13, 2 resimden 2.
    • The battery is secured within its housing by some light adhesive.

    • Flip the battery housing over so the battery is facing down.

    • Apply a heated iOpener to the battery housing for about 2 minutes to soften the battery adhesive.

  14. Logitech MX Anywhere 2S Battery Replacement, Separate the battery adhesive: adım 14, 3 resimden 1. Logitech MX Anywhere 2S Battery Replacement, Separate the battery adhesive: adım 14, 3 resimden 2. Logitech MX Anywhere 2S Battery Replacement, Separate the battery adhesive: adım 14, 3 resimden 3.
    • Try not to bend, crease, deform, poke, or puncture the battery with your tool—a damaged battery is a potential fire hazard.

    • Insert your opening pick between the short edge of the battery and its housing, opposite the cable.

    • Slide your pick under the battery to slice the adhesive.

    • If the battery feels stuck, slide your pick around the perimeter to slice any remaining adhesive.

    • Pull up to peel the battery away from the adhesive.

  15. Logitech MX Anywhere 2S Battery Replacement, Remove the battery: adım 15, 3 resimden 1. Logitech MX Anywhere 2S Battery Replacement, Remove the battery: adım 15, 3 resimden 2. Logitech MX Anywhere 2S Battery Replacement, Remove the battery: adım 15, 3 resimden 3.
    Bu adımda kullanılan alet:
    Tesa 61395 Tape
    $5.99
    Satın Al
    • Remove the battery.

    • To install a new battery:

    • Use a spudger or your fingers to peel any old adhesive off of the battery housing. The old adhesive shouldn't leave any residue.

    • If your new battery doesn't come with preinstalled adhesive, place a couple strips of double-sided tape into the battery housing.

    • Orient your new battery so its cables route through the cutout in the corner of the housing. Press the battery firmly into place to secure it.

Sonuç

Compare your new replacement part to the original part—you may need to transfer remaining components or remove adhesive backings from the new part before you install it.

To reassemble your device, follow these instructions in reverse order.

For optimal performance, calibrate your newly installed battery after completing this guide.

Take your e-waste to an R2 or e-Stewards certified recycler.

Repair didn’t go as planned? Try some basic troubleshooting, or ask our Answers community for help.

Clay Eickemeyer

Üyelik tarihi: 09/19/22

66.700 İtibar

453 adet Kılavuz yazıldı

Ekip

iFixit iFixit üyesi

Staff

135 Üyeler

17.147 adet Kılavuz yazıldı

Bir Yorum

Whats the battery dimensions? That 600mAh battery is exorbitantly high in price when you can get the same 3.7v LiPo for around 6 USD

Jay G - Yanıt

Yorum Ekle

İstatistikleri Görüntüle:

Son 24 Saat: 6

Son 7 gün: 33

Son 30 gün: 230

Her zaman: 3,162