Bu sürüm, hatalı düzenlemeler içerebilir. En son doğrulanmış bellek kopyası dönün.
Neye ihtiyacın var
-
Bu adım çevrilmemiş. Çevrilmesine yardım edin
-
If your MacBook is running Big Sur v11.1 or later, disabling Auto Boot may not work. You can proceed normally, but make sure to disconnect the battery as soon as you're inside.
-
Use a P5 driver to remove the following screws:
-
Two 7.9 mm screws
-
Two 7.1 mm screws
-
Six 2.6 mm screws
-
-
Bu adım çevrilmemiş. Çevrilmesine yardım edin
-
Wedge your fingers between the display and the lower case and pull upward to pop the lower case off the Air.
-
Remove the lower case.
-
Set it in place and press firmly to engage the two hidden clips underneath. You should feel and hear them snap into place.
-
-
Bu adım çevrilmemiş. Çevrilmesine yardım edin
-
Peel back the tape covering the battery connector enough to reveal the connector underneath.
-
-
Bu adım çevrilmemiş. Çevrilmesine yardım edin
-
Use a spudger to slide the battery connector parallel to the logic board and out of its socket on the logic board.
-
-
Bu adım çevrilmemiş. Çevrilmesine yardım edin
-
Use a T4 Torx driver to remove the two 1.4 mm screws securing the trackpad cable cover.
-
Remove the trackpad cable cover.
-
-
Bu adım çevrilmemiş. Çevrilmesine yardım edin
-
Use the flat end of a spudger to pry the trackpad cable connector up and out of its socket.
-
-
Bu adım çevrilmemiş. Çevrilmesine yardım edin
-
Slide the pointed end of a spudger underneath the left speaker cable and pry straight up to disconnect it from the logic board.
-
With the connector disconnected, slide the flat end of a spudger under the cable to separate the adhesive securing the cable to the logic board.
-
-
-
Bu adım çevrilmemiş. Çevrilmesine yardım edin
-
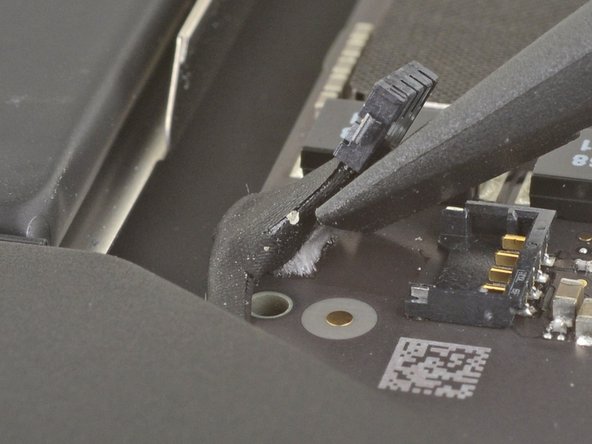
Use a pair of tweezers to peel back any tape covering the microphone cable connector.
-
Use the pointed end of a spudger to lift up the small locking flap on the microphone cable's ZIF connector.
-
Slide the microphone cable out of its connector.
-
-
Bu adım çevrilmemiş. Çevrilmesine yardım edin
-
Use a T4 Torx driver to remove the two 1.4 mm screws securing the USB-C connector cover.
-
Remove the USB-C connector cover.
-
-
Bu adım çevrilmemiş. Çevrilmesine yardım edin
-
Use the flat end of a spudger to pry the USB-C cable connector up and out of its socket on the logic board.
-
-
Bu adım çevrilmemiş. Çevrilmesine yardım edin
-
Use a spudger to lift up the small locking flap on the sound board cable's ZIF connector.
-
Slide the sound board cable out of the ZIF connector.
-
-
Bu adım çevrilmemiş. Çevrilmesine yardım edin
-
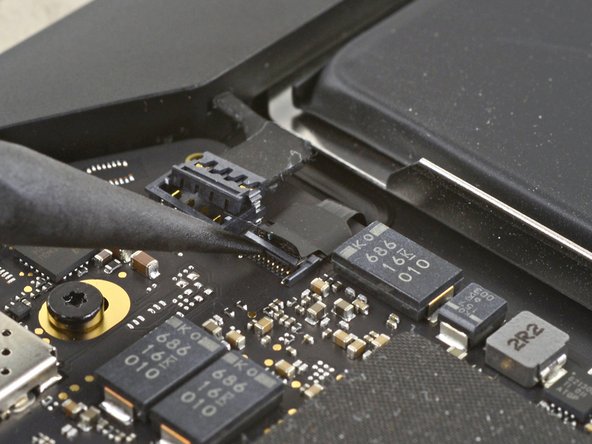
Peel back the black tape covering the fan cable connector.
-
-
Bu adım çevrilmemiş. Çevrilmesine yardım edin
-
Use the tip of a spudger to lift up the locking flap on the fan cable's ZIF connector.
-
Slide the fan cable out of the ZIF connector.
-
-
Bu adım çevrilmemiş. Çevrilmesine yardım edin
-
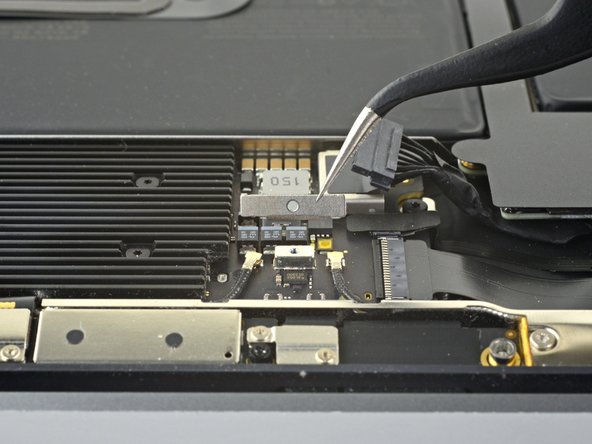
Use a T4 Torx driver to remove the 1.4 mm screw securing the antenna cable cover.
-
Remove the antenna cable cover.
-
-
Bu adım çevrilmemiş. Çevrilmesine yardım edin
-
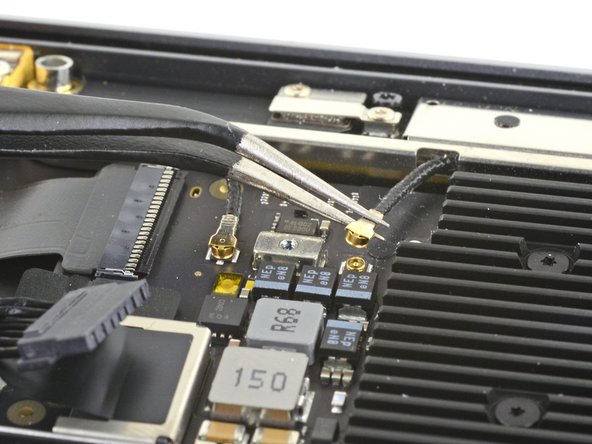
Use a pair of tweezers to grip the antenna connector close to its base.
-
Pull straight up to disconnect the cable.
-
Repeat for the second antenna cable.
-
-
Bu adım çevrilmemiş. Çevrilmesine yardım edin
-
Use a T4 Torx driver to remove the two 1.5 mm screws securing the display cable connector cover.
-
Remove the display cable connector cover.
-
-
Bu adım çevrilmemiş. Çevrilmesine yardım edin
-
Use the flat end of a spudger to pry the display cable connector straight off of the antenna board to disconnect it.
-
-
Bu adım çevrilmemiş. Çevrilmesine yardım edin
-
Use a T5 Torx driver to remove the six screws securing the logic board to the upper case:
-
Three 3.5 mm screws
-
One 5.8 mm cushioned screw
-
Two 2.0 mm screws
-
-
Bu adım çevrilmemiş. Çevrilmesine yardım edin
-
Battery cable
-
Fan cable
-
Audio board cable
-
USB-C board cable
-
Antenna bar cables
-
Trackpad cable
-
Left speaker and microphone cables
-


İptal et: Bu kılavuzu tamamlamadım.
10 farklı kişi bu kılavuzu tamamladı.


Bir Yorum
donde se ubica disco duro , ya que ledi opcion borrar mac y maraca error desde recovery