Ana içeriğe geç
MacBook Pro 13" Retina Display Early 2015 SSD Replacement

MacBook Pro 13" Retina Display Early 2015 SSD Replacement

Andrew Optimus Goldheart

Andrew Optimus Goldheart ve 4 diğer katkıda bulunanlar

En son July 29, 2021 tarihinde güncellendi

35 dakika
Orta

Use this guide to upgrade or replace the solid-state drive in a MacBook Pro 13” Early 2015. This MacBook Pro uses a proprietary storage drive connector, and is therefore not compatible with common M.2 drives without the use of an adapter.

Before you perform this repair, if at all possible, back up your existing SSD. Then, either familiarize yourself with internet recovery or create a bootable external drive so you’ll be ready to install macOS onto your new drive and migrate your data to the new SSD.

Finally, we strongly recommend installing macOS 10.13 High Sierra (or a later macOS) before replacing the original SSD from your MacBook Pro. Most new SSDs require updated storage drivers not found in versions of macOS prior to High Sierra.

Neye ihtiyacın var

Tamir Seti

Bu kit, bu kılavuzu tamamlamak için gereken tüm parçaları ve araçları içerir.

Parçalar

Aletler

Daha fazlasını göster…

  1. MacBook Pro 13" Retina Display Early 2015 SSD Replacement, Lower Case: adım 1, 1 resimden 1.
    Bu adımda kullanılan alet:
    Magnetic Project Mat
    $19.95
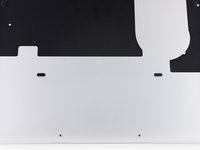
    • Remove the following ten screws securing the lower case to the upper case:

    • Two 2.3 mm P5 Pentalobe screws

    • Eight 3.0 mm P5 Pentalobe screws

    • Throughout this repair, keep track of each screw and make sure it goes back exactly where it came from to avoid damaging your device.

  2. MacBook Pro 13" Retina Display Early 2015 SSD Replacement: adım 2, 1 resimden 1.
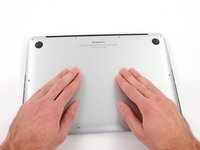
    • Wedge your fingers between the upper case and the lower case.

    • Gently pull the lower case away from the upper case to remove it.

  3. MacBook Pro 13" Retina Display Early 2015 SSD Replacement: adım 3, 2 resimden 1. MacBook Pro 13" Retina Display Early 2015 SSD Replacement: adım 3, 2 resimden 2.
    • The lower case is connected to the upper case with two plastic clips near its center.

    • During reassembly, gently push down the center of the lower case to reattach the two plastic clips.

  4. MacBook Pro 13" Retina Display Early 2015 SSD Replacement, Battery Connector: adım 4, 1 resimden 1.
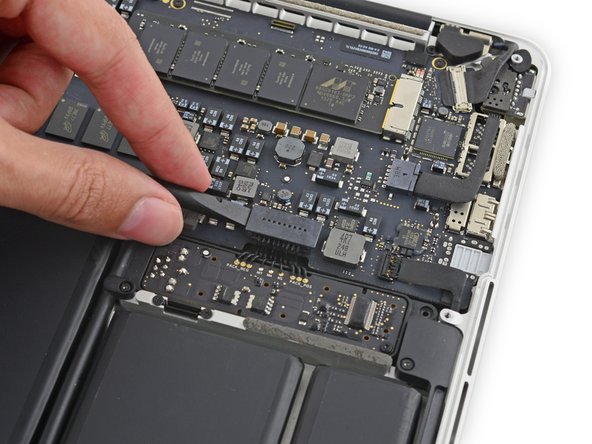
    • If necessary, remove the plastic cover adhered to the battery contact board.

  5. MacBook Pro 13" Retina Display Early 2015 SSD Replacement: adım 5, 2 resimden 1. MacBook Pro 13" Retina Display Early 2015 SSD Replacement: adım 5, 2 resimden 2.
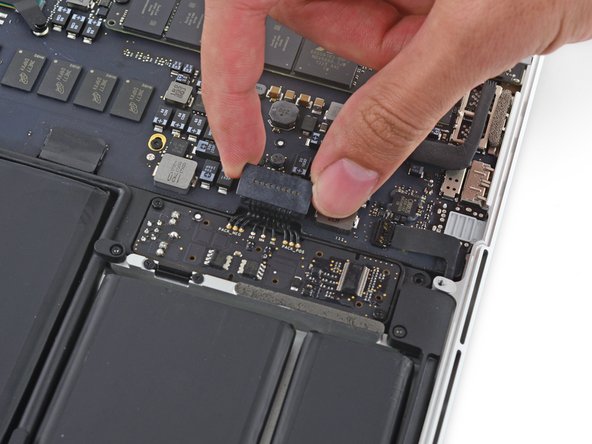
    • Use the flat end of a spudger to lift the battery connector straight up out of its socket on the logic board.

    • Be sure you lift up only on the connector itself, not the socket, or you risk permanent damage to the logic board.

  6. MacBook Pro 13" Retina Display Early 2015 SSD Replacement: adım 6, 1 resimden 1.
    • Bend the battery connector up out of the way to prevent accidental contact with its socket during your repair.

  7. MacBook Pro 13" Retina Display Early 2015 SSD Replacement, SSD: adım 7, 1 resimden 1.
    • Remove the single 2.9 mm T5 Torx screw securing the SSD to the logic board.

  8. MacBook Pro 13" Retina Display Early 2015 SSD Replacement: adım 8, 3 resimden 1. MacBook Pro 13" Retina Display Early 2015 SSD Replacement: adım 8, 3 resimden 2. MacBook Pro 13" Retina Display Early 2015 SSD Replacement: adım 8, 3 resimden 3.
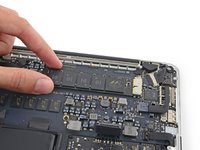
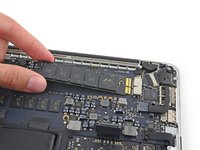
    • Lift the free end of the SSD up slightly and pull the SSD straight out of its socket on the logic board.

    • Only lift the end of the SSD enough to allow you to pull it out—about 1/4".

Sonuç

To reassemble your device, follow these instructions in reverse order.

431 farklı kişi bu kılavuzu tamamladı.

Andrew Optimus Goldheart

Üyelik tarihi: 10/17/09

508.952 İtibar

407 adet Kılavuz yazıldı

Ekip

iFixit iFixit üyesi

Staff

118 Üyeler

19.581 adet Kılavuz yazıldı

100 Yorum

If not disconnecting battery before replacement of ssd, will ssd be damaged for sure, or is it just a precaution and not likely?

Chris - Yanıt

This is recommendation. I never disconnect battery and no issues occur so far.

Oleg -

Yes, damage can occur. Always disconnect any kind of power before removing different boards. After removing battery connector, it can be a good idea to discharge capacitors by pressing the power button on your mac. This ensures theres no latent current passing through the circuits.

andrehedegaard -

I know this is an old comment but it is the top one, so this is a note for other people :)

You don’t only risk the SSD, you also risk damaging the rest of the computer.

Also please only use a plastic tool to lift off the battery connector, shorting out the pins can damage your SMC!

Slot1gamer -

Which SSD can i use for upgrade? Can it be a normal like from Samung or else? Or has it to be from Apple?

karimi1993 - Yanıt

Yorum Ekle

İstatistikleri Görüntüle:

Son 24 Saat: 47

Son 7 gün: 472

Son 30 gün: 2,393

Her zaman: 838,752