Giriş
Use this guide to replace the Trackpad. This procedure involves using adhesive remover to remove the battery. Do not reuse the battery after it has been removed, as doing so is a potential safety hazard. Replace it with a new battery.
iFixit adhesive remover is highly flammable. Perform this procedure in a well-ventilated area. Do not smoke or work near an open flame during this procedure.
To minimize risk of damage, turn on your MacBook and allow the battery to fully discharge before starting this procedure. A charged lithium-ion battery can create a dangerous and uncontrollable fire if accidentally punctured. If your battery is swollen, take extra precautions.
Neye ihtiyacın var
-
Bu adımda kullanılan alet:Magnetic Project Mat$16.96
-
Remove the following ten screws securing the lower case to the upper case:
-
Two 2.3 mm P5 Pentalobe screws
-
Eight 3.0 mm P5 Pentalobe screws
-
-
-
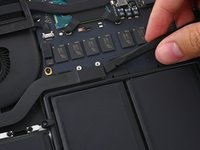
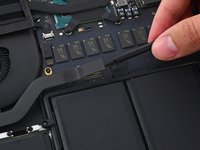
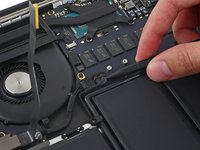
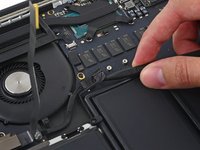
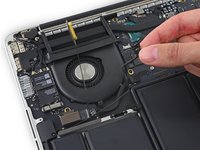
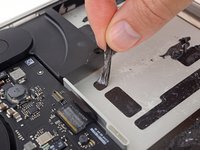
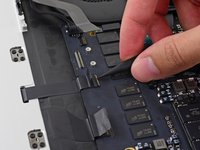
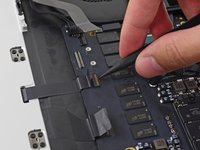
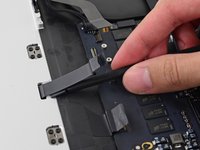
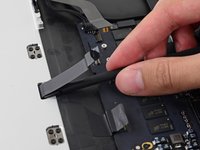
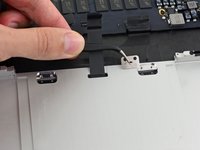
Remove the two 2.1 mm T5 Torx screws securing the logic board end of the I/O board cable bracket.
-
-
-
-
Fill a pot or pan with enough water to fully submerge an iOpener.
-
Heat the water to a boil. Turn off the heat.
-
Place an iOpener into the hot water for 2-3 minutes. Make sure the iOpener is fully submerged in the water.
-
Use tongs to extract the heated iOpener from the hot water.
-
Thoroughly dry the iOpener with a towel.
-
Your iOpener is ready for use! If you need to reheat the iOpener, heat the water to a boil, turn off the heat, and place the iOpener in the water for 2-3 minutes.
-
-
-
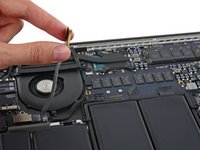
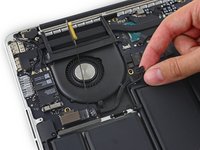
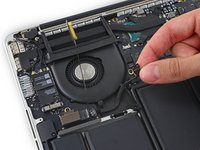
Remove the five 3.7 mm T5 Torx screws securing the battery to the upper case.
-
-
-
Alternatively, if you are using the hot iOpener method, skip the following three steps.
-
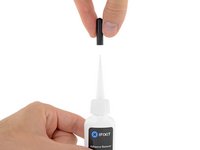
Wear eye protection when handling and applying the adhesive remover. (Eye protection is included in your kit.)
-
Do not wear contact lenses without eye protection.
-
Protective gloves are also included in your kit. If you are concerned about skin irritation, put your gloves on now.
-
-
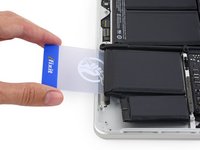
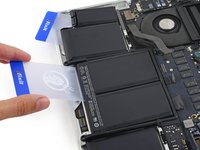
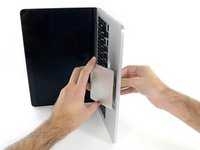
Bu adımda kullanılan alet:Plastic Cards$2.99
-
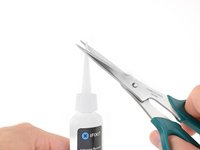
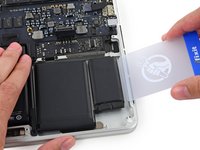
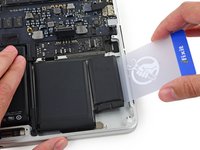
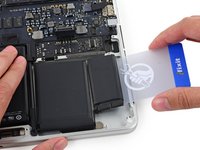
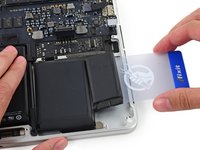
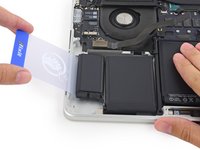
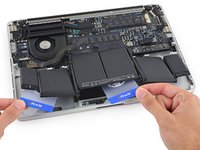
Push a plastic card between the right-most battery cell and the upper case, cutting the adhesive between the two.
-
When using the hot iOpener method, if you encounter significant resistance to prying, stop and use the iOpener to reheat the section you're working on.
-
-
-
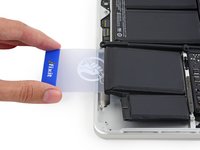
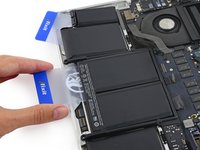
Repeat this procedure with the adjacent battery cell:
-
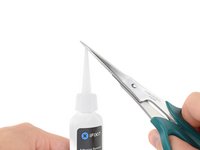
Apply a small amount of liquid adhesive remover under the battery cell, and wait 2-3 minutes for it to penetrate and soften the adhesive.
-
Alternatively, re-heat this section with your iOpener if needed.
-
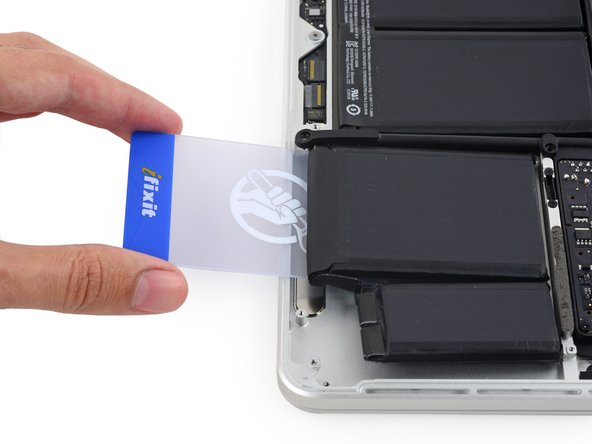
Push a plastic card about an inch between the battery cell and the upper case, and slowly pry the cell up to separate all of the adhesive.
-
-
-
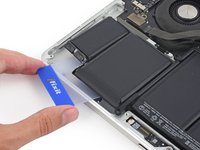
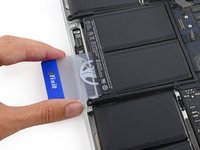
Repeat the above procedure to separate the two leftmost battery cells from the upper case.
-
Remember to apply a small amount of adhesive remover to each battery cell, and wait 2-3 minutes for it to penetrate and soften the adhesive.
-
Use a second plastic card to separate the two leftmost battery cells from the upper case.
-
-
-
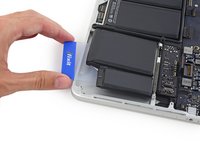
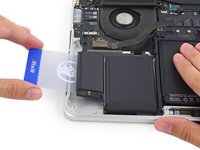
To separate the adhesive securing the final two, middle battery cells, apply a few more drops of liquid adhesive remover (or your iOpener) to each cell.
-
It may help to elevate one side of your MacBook Pro a few inches so that the adhesive remover flows in the correct direction, underneath the battery cells. You can use a sturdy book or foam block to prop up one side of your MacBook Pro while you work.
-
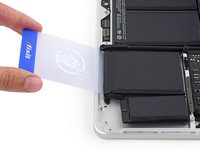
Insert the card about an inch between the left-center battery cell and the upper case, separating the adhesive between the cell and the case.
-
-
-
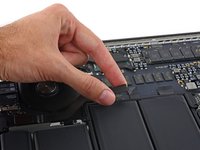
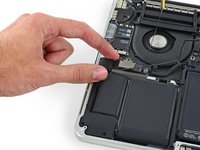
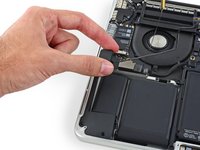
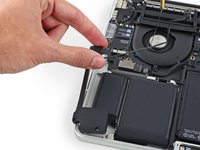
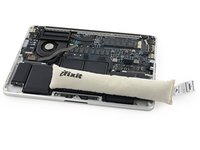
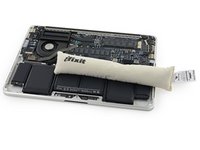
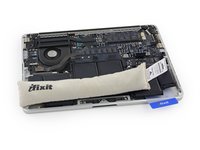
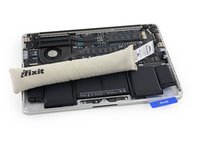
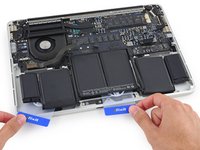
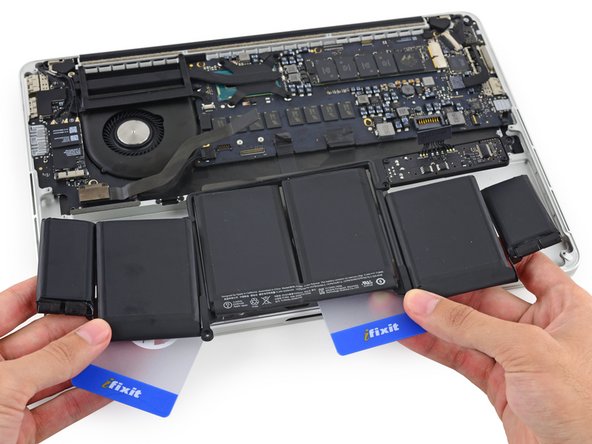
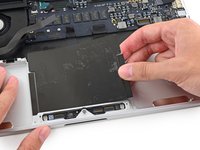
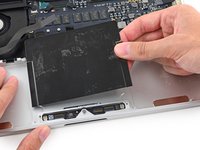
Remove the battery.
-
With a little luck, you can slowly pull out each strip of adhesive with your fingers.
-
Otherwise, soak each section of adhesive with a bit of adhesive remover for 2-3 minutes, and then scrape it out with an opening pick or one of the other tools in your kit. This can take quite a bit of work, so be patient.
-
Mop up any remaining adhesive remover and give your MacBook Pro a few minutes to air dry.
-
Calibrate your newly installed battery: charge it to 100%, and keep charging it for at least 2 more hours. Unplug and use it normally to drain the battery. When you see the low battery warning, save your work, and keep your laptop on until it goes to sleep due to low battery. Wait at least 5 hours, then charge your laptop uninterrupted to 100%.
-
-
-
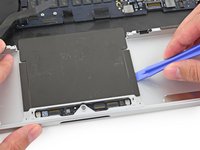
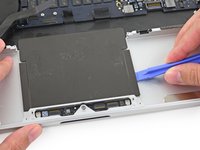
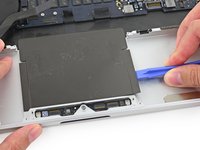
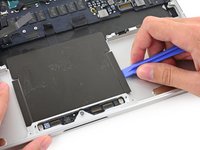
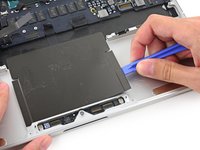
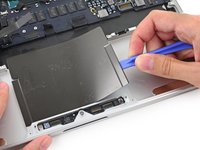
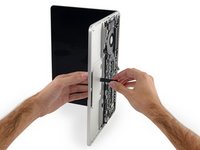
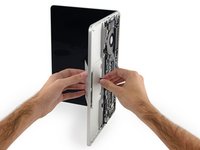
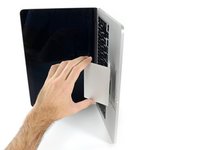
Place a reheated iOpener over the trackpad cover plate to soften the adhesive securing it to the upper case.
-


To reassemble your device, follow these instructions in reverse order.
İptal et: Bu kılavuzu tamamlamadım.
46 farklı kişi bu kılavuzu tamamladı.


16Kılavuz Yorumları
I have a non clicking trackpad in a mid 2014 chassis, i brought it to the mac store and they say they found liquid damage throughout the computer. weather i believe them is besides the point it is a backup machine and I am not going to spend $700 to clean it out. There doesn't seam to be any trackpads for sale on here. Are they available?
Just replaced the trackpad on a Macbook Pro A1502. The customer had used the item very little and the trackpad had just failed completely. I found a seller on ebay with a brand new part and went about replacing it. The pentolope screws should have been no problem but one was cross threaded and would not come out. We had to drill it out. Big pain in the butt. Having swapped trackpads in Macbooks before this by comparison was much harder. The battery is glued in but upon further inspection it looks to have been designed to screw in and even has screw holes in the chassis and covered screw holes in the battery. This design seems to go along with the throw away mentality of apple. Apple store said water damage but there was none at all. They wanted 400$. The previous Macbook model they year before had recalled Trackpad issues but not this one???. Really crappy Apple dropped the ball on this one accusing customers of damage and doing nothing to replace a defective part. Thank You for the great fix it!!
7/7/2016. I took my 15" retina to the Genius Bar at the Grove where I bought it 3 years ago, as the pointer was jumping around. It would settle down sometimes, then would act up again. A readout showed that the extreme rhs of the pad was not functioning. Had to leave it. Could not open and fix it at home. Was told this was a unibody, and the entire top of the case needs to be replaced. Will cost me $310 plus tax, and 4 days. They sure don't want us to fool with it!
I've a question. At first I want to say, my English is not the best but I hope you understand me and anyone can answer my question. I've also a problem with the trackpad and I studied this guide a lot. I will start in a few days to try to fix this by replacing the trackpad. The only question I have is, that when I have replaced the trackpad, does I have to use some new glue to stick the battery back in the macbook. Or will the glue which is already on the battery be enough ? I found some glue on amazon which u can use for iPhone displays or something like this and I'm probably going to use this one. Has anybody replaced his trackpad and could give me an answer ? Thanks in advance.. :)
Hello!! I have a Macbook Pro retina 13"(mid 2014) (model:A1502). Yesterday I took my mac to the technical service because the mouse is not working well, and I did'nt know if the problem was software or the trackpad.
They say it's the trackpad, but they should change the whole topcase, and it would cost me almost $ 700 to repair. They say that in this model can not be changed only the trackpad!!! From what I'm seeing here they did not tell me the truth.
How or where can I get a trackpad of this model to solve my problem? Amazon? How do I look for it and how much can it cost? Thanks a lot!!