
MacBook Pro 13" Touch Bar Late 2016 Lower Case Replacement

Giriş
1. adıma gitThis serves as the starting point for every repair on your MacBook Pro: remove the lower case for access to internal components.
For your safety, drain your MacBook Pro's battery below 25% before you begin this procedure. A charged lithium-ion battery can create a dangerous and uncontrollable fire if accidentally punctured.
Neye ihtiyacın var


-
-
Power on your Mac and launch Terminal.
-
Copy and paste the following command (or type it exactly) into Terminal:
-
sudo nvram AutoBoot=%00
-
Press [return]. If prompted, enter your administrator password and press [return] again. Note: Your return key may also be labeled ⏎ or "enter."
-
sudo nvram AutoBoot=%03
-
-
Bu adımda kullanılan alet:Magnetic Project Mat$19.95
-
Use a P5 Pentalobe driver to remove the six screws securing the lower case:
-
Two 6.2 mm screws
-
Four 3.4 mm screws
-
-
-
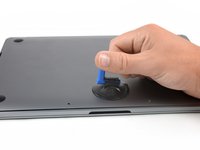
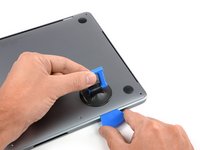
Apply a suction handle to the lower case near the front-center area of the MacBook Pro.
-
Lift the suction handle to create a slight gap between the lower case and the chassis.
-
-
-
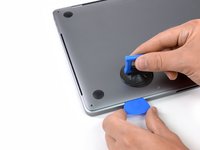
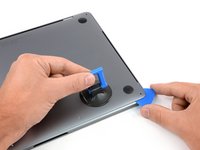
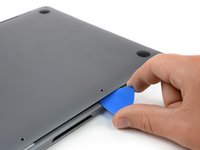
Insert one corner of an opening pick into the space between the lower case and the chassis.
-
Slide the opening pick around the nearest corner and halfway up the side of the case.
-
-
-
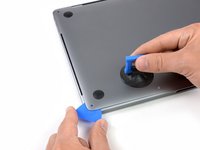
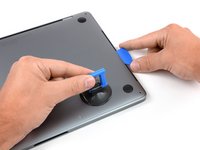
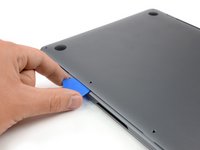
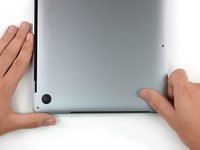
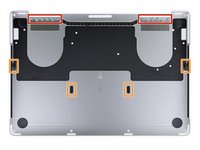
Insert your opening pick once again under the front edge of the lower case, near one of the two centermost screw holes.
-
Give the pick a firm twist to pop free the third clip securing the lower case to the chassis.
-
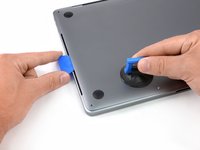
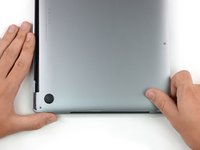
Repeat this procedure near the other of the two centermost screw holes, popping the fourth clip free.
-
-
-
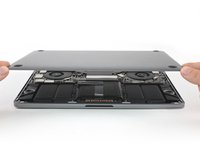
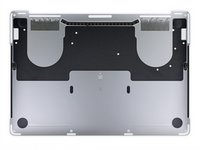
Remove the lower case.
-
Set it in place and align the sliding clips near the display hinge. Press down and slide the cover toward the hinge. It should stop sliding as the clips engage.
-
When the sliding clips are fully engaged and the lower case looks correctly aligned, press down firmly on the lower case to engage the four hidden clips underneath. You should feel and hear them snap into place.
-


To reassemble your device, follow these instructions in reverse order.
To reassemble your device, follow these instructions in reverse order.
İptal et: Bu kılavuzu tamamlamadım.
12 farklı kişi bu kılavuzu tamamladı.

Ekip

Tobias Isakeit - Repairability Engineer Tobias Isakeit - Repairability Engineer üyesi
Business
1 Üye
1.131 adet Kılavuz yazıldı
3 Yorum
Yeah, Ifixit is SOOOOO great except for explaining reassembly steps that don’t just involve ‘reverse order’ like this %#*@ bottom case. I did a whole display (yay me!) and am now stumped as to the last step of reassembly. If you just put it back on and put the screws back in, there’s an increasing gap from the rear 2 screws to where the display hinge begins (that sits flush before taking it off). There seems to be no ‘popping’ it in place and the pegs on the underside of the cover are in the middle.
@jseliger You’re both right, that was an oversight! It really is pretty much reverse of disassembly, but it can take a little practice. See the final step for some new reassembly tips. Hope this helps!