Giriş
Use this guide to replace your bare logic board. This requires removal of every component attached to the logic board.
Neye ihtiyacın var
-
-
Remove the following ten screws securing the lower case to the upper case:
-
Three 13.5 mm (14.1 mm) Phillips screws.
-
Seven 3 mm Phillips screws.
-
-
-
Use the edge of a spudger to pry the battery connector upwards from its socket on the logic board.
-
-
-
Remove the two 7.4 mm Tri-point screws securing the battery to the upper case.
-
-
-
Use the attached plastic pull tab to remove the battery from the upper case.
-
Charge it to 100%, and then keep charging it for at least 2 more hours. Next, unplug and use it normally to drain the battery. When you see the low battery warning, save your work, and keep your laptop on until it goes to sleep due to low battery. Wait at least 5 hours, then charge your laptop uninterrupted to 100%.
-
If you notice any unusual behavior or problems after installing your new battery, you may need to reset your MacBook's SMC.
-
-
-
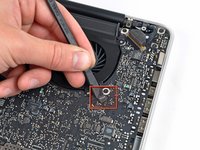
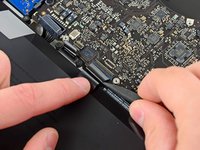
Remove the three 3.4 mm T6 Torx screws securing the left fan to the logic board.
-
-
-
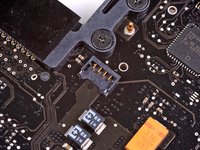
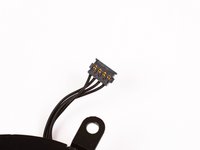
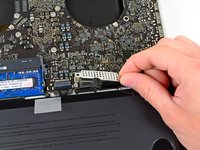
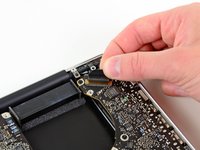
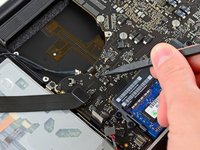
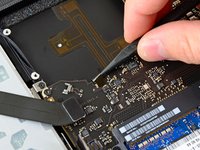
Use the flat end of a spudger to lift the right fan connector out of its socket on the logic board.
-
-
-
-
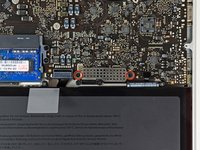
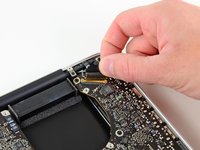
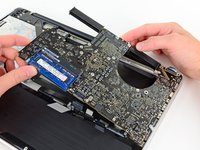
Carefully lift the logic board assembly from its left side and work it out of the upper case, minding the optical drive cable and the I/O ports that may get caught during removal.
-
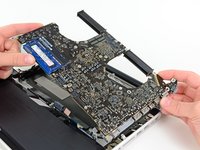
If necessary, use the flat end of a spudger to separate the microphone from the upper case.
-
Pull the I/O port side of the logic board away from the side of the upper case and remove the logic board assembly.
-
-
-
Remove the six #1 Phillips screws securing the heat sink to the logic board.
-
-
-
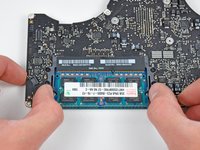
Release the tabs on each side of the RAM chip by simultaneously pushing each tab away from the RAM.
-
After the RAM chip has popped up, pull it straight out of its socket.
-
Logic board remains.
-
If you need to mount the heat sink back onto the logic board, we have a thermal paste guide that makes replacing the thermal compound easy.
-


To reassemble your device, follow these instructions in reverse order.
To reassemble your device, follow these instructions in reverse order.
İptal et: Bu kılavuzu tamamlamadım.
73 farklı kişi bu kılavuzu tamamladı.

11Kılavuz Yorumları
i need the screws which go on the lid of the back of the mac what are those screws called and how much they are i really really need them my mac screws have all been removed ever since i changed hdd and i need screws for the back lid lower case to upper case screws
Does anyone ever respond to these post? Why come here for help if no is here to help?
Thank you Miroslav! My computer blew up last week and I felt all hope was lost until I found your guide. I used to repair laptops 10 years ago but never worked on a mac. this is exactly what I needed to see to know what to do!
Apple had a replacement service for late 2011 15inch MBPs which cured a mysterious fault which rendered it un-usable. I had mine fixed at a Genius Bar but my mate who also bought one has missed the program and has a completely dead MBP. Am I right in assuming that following your procedure above and using one of your logic boards would fix this?