Ana içeriğe geç

Microsoft Surface Pro 7 Screen Replacement

Neye ihtiyacın var

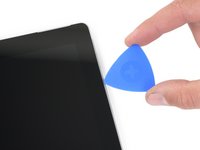
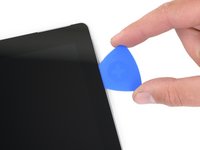
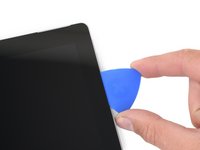
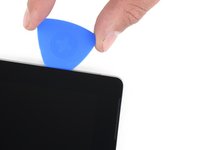
  1. Microsoft Surface Pro 7 Screen Replacement, Tape the screen: adım 1, 3 resimden 1. Microsoft Surface Pro 7 Screen Replacement, Tape the screen: adım 1, 3 resimden 2. Microsoft Surface Pro 7 Screen Replacement, Tape the screen: adım 1, 3 resimden 3.
    • Wear safety glasses to protect your eyes, and be careful not to damage the LCD screen.

    • If your display glass is cracked, keep further breakage contained and prevent bodily harm during your repair by taping the glass.

    • Lay overlapping strips of clear packing tape over the Surface’s display until the whole face is covered.

    • This will keep glass shards contained and provide structural integrity when prying and lifting the display.

    • Do your best to follow the rest of the guide as described. However, once the glass is broken, it will likely continue to crack as you work, and you may need to use a metal prying tool to scoop the glass out.

  2. Microsoft Surface Pro 7 Screen Replacement, Heat the right edge of the screen: adım 2, 1 resimden 1.
    • Completely power off the Surface before you begin disassembly.

    • Heat an iOpener and apply it to the right edge of the Surface's screen for two minutes.

    • You may need to reheat and reapply the iOpener several times to get the tablet warm enough. Follow the iOpener instructions to avoid overheating.

    • A hair dryer or heat gun may also be used for more heat, but be careful not to overheat the Surface—the screen and internal battery are susceptible to heat damage.

  3. Microsoft Surface Pro 7 Screen Replacement, Take note of the adhesive layout: adım 3, 1 resimden 1.
    • Take note of the screen adhesive layout before continuing:

    • These areas only contain adhesive and are safe to cut.

    • The display board and flex cables sit here close to the edge. Cut carefully and do not insert the pick more than 1/8 inch (3 mm).

    • Fragile antenna cables lie under this part of the screen. Carefully follow the procedure in step 13 to avoid damaging them. The adhesive is also the thickest here.

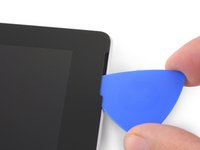
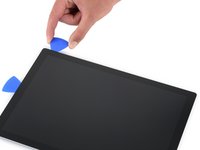
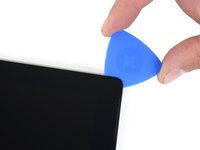
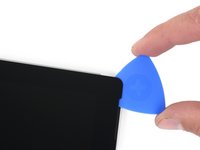
  4. Microsoft Surface Pro 7 Screen Replacement, Insert an opening pick into the speaker opening: adım 4, 2 resimden 1. Microsoft Surface Pro 7 Screen Replacement, Insert an opening pick into the speaker opening: adım 4, 2 resimden 2.
    • Insert an opening pick into the speaker opening on the screen and slide the pick between the glass and speaker grille.

    • Don't insert the opening pick any deeper than the black bezel on the edge of the screen. Inserting the pick too far may damage the LCD.

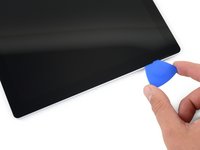
  5. Microsoft Surface Pro 7 Screen Replacement, Slide the opening pick under the screen: adım 5, 2 resimden 1. Microsoft Surface Pro 7 Screen Replacement, Slide the opening pick under the screen: adım 5, 2 resimden 2.
    • Rotate the pick toward the bottom of the Surface to slide it underneath the lower edge of the speaker cutout.

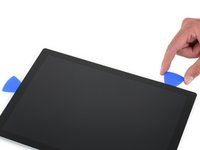
  6. Microsoft Surface Pro 7 Screen Replacement, Cut through the screen adhesive: adım 6, 2 resimden 1. Microsoft Surface Pro 7 Screen Replacement, Cut through the screen adhesive: adım 6, 2 resimden 2.
    • Slide the pick down the right edge of the Surface to slice through the adhesive under the screen.

    • Throughout the rest of the procedure, if you encounter significant resistance while sliding the pick, stop and reheat the section you're working on. Applying too much pressure with the pick can crack the glass.

    • Leave this opening pick in the right edge to prevent the adhesive from resealing.

  7. Microsoft Surface Pro 7 Screen Replacement: adım 7, 1 resimden 1.
    • Reheat your iOpener and apply it to the bottom edge of the Surface's screen for two minutes.

    • You may need to reheat and reapply the iOpener several times to get the tablet warm enough. Follow the iOpener instructions to avoid overheating.

    • A hair dryer or heat gun may also be used for more heat, but be careful not to overheat the Surface—the screen and internal battery are susceptible to heat damage.

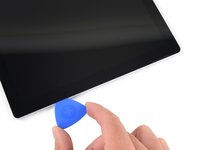
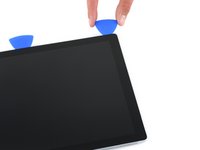
  8. Microsoft Surface Pro 7 Screen Replacement: adım 8, 3 resimden 1. Microsoft Surface Pro 7 Screen Replacement: adım 8, 3 resimden 2. Microsoft Surface Pro 7 Screen Replacement: adım 8, 3 resimden 3.
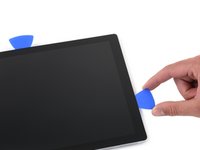
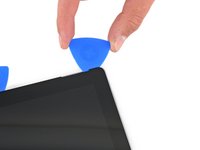
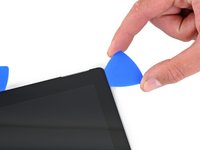
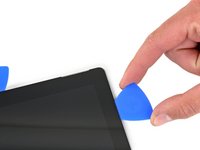
    • Insert a new opening pick into the bottom right corner and slide it around the corner toward the bottom edge.

    • Don't insert the opening pick any deeper than the black bezel on the side of the screen. Inserting the pick too far may damage the LCD.

    • Slide the pick along the bottom edge of the Surface to cut through the screen adhesive.

    • Leave this pick in the bottom edge to prevent the adhesive from resealing.

  9. Microsoft Surface Pro 7 Screen Replacement: adım 9, 1 resimden 1.
    • Reheat your iOpener and apply it to the left edge of the Surface's screen for two minutes.

    • You may need to reheat and reapply the iOpener several times to get the tablet warm enough. Follow the iOpener instructions to avoid overheating.

    • A hair dryer or heat gun may also be used for more heat, but be careful not to overheat the Surface—the screen and internal battery are susceptible to heat damage.

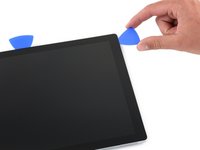
  10. Microsoft Surface Pro 7 Screen Replacement: adım 10, 3 resimden 1. Microsoft Surface Pro 7 Screen Replacement: adım 10, 3 resimden 2. Microsoft Surface Pro 7 Screen Replacement: adım 10, 3 resimden 3.
    • Insert a new opening pick into the bottom left corner and slide it around the corner toward the left edge.

    • Be careful cutting under the lower 2.5 inches (65 mm) of the left edge. Do not insert the opening pick more than 1/8 inch (3 mm) here. The display cables sit near this part of the bezel and are easily damaged. Once past the display cable area, do not insert the pick past the bezel.

    • Slide the pick along the left edge of the Surface to cut through the screen adhesive.

    • Leave this pick in the left edge to prevent the adhesive from resealing.

  11. Microsoft Surface Pro 7 Screen Replacement: adım 11, 1 resimden 1.
    • Reheat your iOpener and apply it to the left edge of the Surface's screen for two minutes.

    • The adhesive is thickest along this edge, and you may need to reheat and reapply the iOpener several times to get the tablet warm enough. Follow the iOpener instructions to avoid overheating.

    • A hair dryer or heat gun may also be used for more heat, but be careful not to overheat the Surface—the screen and internal battery are susceptible to heat damage.

  12. Microsoft Surface Pro 7 Screen Replacement: adım 12, 3 resimden 1. Microsoft Surface Pro 7 Screen Replacement: adım 12, 3 resimden 2. Microsoft Surface Pro 7 Screen Replacement: adım 12, 3 resimden 3.
    • Round the left corner with the opening pick and slide it along the top edge of the Surface. Stop when the pick is 2.75 inches (70 mm) away from the left edge.

    • The next 6 inches (15 cm) of the top edge of the case is covered by the left and right antennas, which sit between the case and the screen bezel. Follow the next steps carefully to avoid damaging the antennas.

  13. Microsoft Surface Pro 7 Screen Replacement: adım 13, 3 resimden 1. Microsoft Surface Pro 7 Screen Replacement: adım 13, 3 resimden 2. Microsoft Surface Pro 7 Screen Replacement: adım 13, 3 resimden 3.
    • Fragile antenna cables lie under the top edge of the screen. Carefully follow the procedure to avoid damaging them.

    • Insert the point of a pick under the display where you just stopped cutting. Do not insert the pick deeper than the edge of the bezel.

    • Carefully roll the pick to the right, pressing the long edge of the pick into the screen adhesive underneath the bezel, cutting the adhesive as you go. Do not slide the pick along the edge of the Surface.

    • Repeat this motion of inserting the point of the pick where you just cut, and rolling to the right all along the top edge of the Surface, until the pick is 2.5 inches (64 mm) from the right edge of the Surface.

  14. Microsoft Surface Pro 7 Screen Replacement: adım 14, 3 resimden 1. Microsoft Surface Pro 7 Screen Replacement: adım 14, 3 resimden 2. Microsoft Surface Pro 7 Screen Replacement: adım 14, 3 resimden 3.
    • Once you cut the adhesive over the antennas (8.5 inches, or 22 cm, from the left edge), slide the pick the rest of the way along the top edge of the surface and round the top right corner to slice through any remaining adhesive.

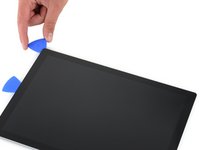
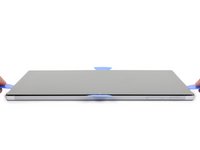
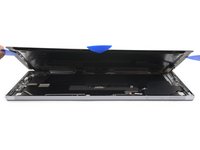
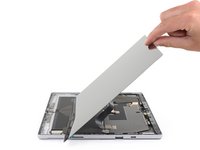
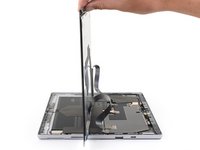
  15. Microsoft Surface Pro 7 Screen Replacement, Open the Surface: adım 15, 2 resimden 1. Microsoft Surface Pro 7 Screen Replacement, Open the Surface: adım 15, 2 resimden 2.
    • Very slowly lift the screen assembly away from the Surface case. If you encounter any resistance, stop and check that all the adhesive is separated.

    • Do not remove the screen yet. It is still connected to the motherboard by two cables.

    • Use an opening pick to cut through any remaining adhesive.

    • The flash lens may fall out of the Surface case. Keep track of the lens and return it to its cutout in the case during reassembly.

  16. Microsoft Surface Pro 7 Screen Replacement: adım 16, 2 resimden 1. Microsoft Surface Pro 7 Screen Replacement: adım 16, 2 resimden 2.
    • Make sure you have your tweezers and spudger within reach.

    • Lift the top of the screen assembly away from the case while sliding the bottom of the screen closer to the motherboard display connectors.

    • Do not put any tension on the display ribbon cables.

    • Use one hand to hold the screen still.

  17. Microsoft Surface Pro 7 Screen Replacement, Disconnect the battery: adım 17, 3 resimden 1. Microsoft Surface Pro 7 Screen Replacement, Disconnect the battery: adım 17, 3 resimden 2. Microsoft Surface Pro 7 Screen Replacement, Disconnect the battery: adım 17, 3 resimden 3.
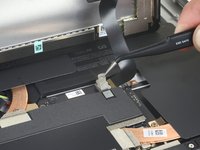
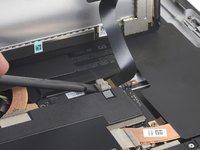
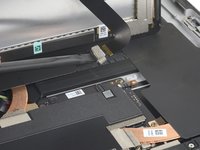
    • Use the pointed tip of a spudger to carefully push on each side of the battery connector.

    • Alternating from one side to the other, gently “walk” the connector out of its socket.

  18. Microsoft Surface Pro 7 Screen Replacement, Disconnect the display cables: adım 18, 3 resimden 1. Microsoft Surface Pro 7 Screen Replacement, Disconnect the display cables: adım 18, 3 resimden 2. Microsoft Surface Pro 7 Screen Replacement, Disconnect the display cables: adım 18, 3 resimden 3.
    • Use a pair of tweezers to peel back the silver tape covering the left display cable connector.

    • Do not remove the tape from the ribbon cable.

    • Insert the flat end of a spudger underneath the tape and pry up on the connector to disconnect it from the motherboard.

  19. Microsoft Surface Pro 7 Screen Replacement: adım 19, 3 resimden 1. Microsoft Surface Pro 7 Screen Replacement: adım 19, 3 resimden 2. Microsoft Surface Pro 7 Screen Replacement: adım 19, 3 resimden 3.
    • Use a pair of tweezers to peel back the silver tape securing the right display cable to the motherboard.

    • Do not remove the tape from the ribbon cable.

    • Use the flat end of a spudger to lift the right display cable straight up and disconnect it from the motherboard.

  20. Microsoft Surface Pro 7 Screen Replacement: adım 20, 1 resimden 1.
  21. Microsoft Surface Pro 7 Screen Replacement, Remove the display cables: adım 21, 1 resimden 1.
    • Use an opening pick to pry up one edge of the EMI shield covering the display board.

    • Try not to deform the shield too much—you will need to reinstall it during reassembly.

  22. Microsoft Surface Pro 7 Screen Replacement: adım 22, 1 resimden 1.
    • Lift the EMI shield away from the display board and remove it.

  23. Microsoft Surface Pro 7 Screen Replacement: adım 23, 2 resimden 1. Microsoft Surface Pro 7 Screen Replacement: adım 23, 2 resimden 2.
    • Use the flat end of a spudger to pry the display interconnect cable straight up and out of its socket on the board.

  24. Microsoft Surface Pro 7 Screen Replacement: adım 24, 3 resimden 1. Microsoft Surface Pro 7 Screen Replacement: adım 24, 3 resimden 2. Microsoft Surface Pro 7 Screen Replacement: adım 24, 3 resimden 3.
    • Use an opening tool to pry up one end of the EMI shield covering the second display cable.

    • Try not to deform the shield too much—you will need to reinstall it during reassembly.

    • Remove the EMI shield.

  25. Microsoft Surface Pro 7 Screen Replacement: adım 25, 2 resimden 1. Microsoft Surface Pro 7 Screen Replacement: adım 25, 2 resimden 2.
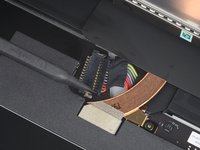
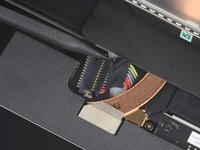
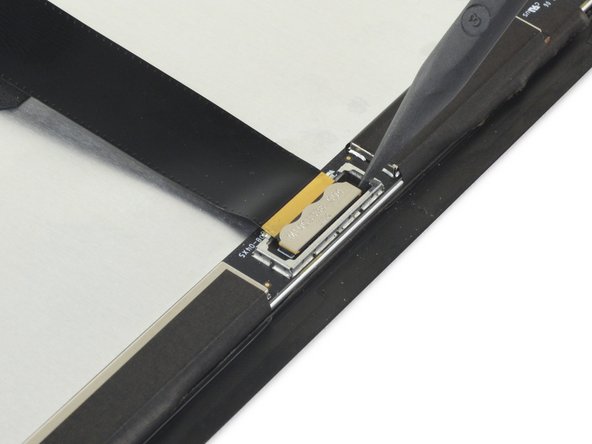
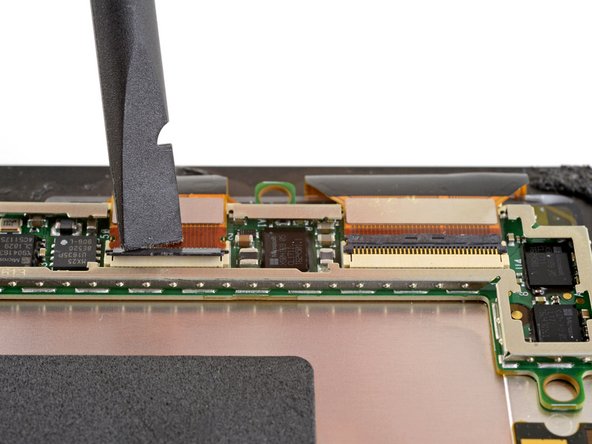
    • Use the tip of a spudger to pry the digitizer connector straight up and out of its socket on the screen.

  26. Microsoft Surface Pro 7 Screen Replacement, Disconnect the display board: adım 26, 3 resimden 1. Microsoft Surface Pro 7 Screen Replacement, Disconnect the display board: adım 26, 3 resimden 2. Microsoft Surface Pro 7 Screen Replacement, Disconnect the display board: adım 26, 3 resimden 3.
    • Use a spudger to flip up the small locking flaps on the display cable ZIF connectors.

  27. Microsoft Surface Pro 7 Screen Replacement: adım 27, 3 resimden 1. Microsoft Surface Pro 7 Screen Replacement: adım 27, 3 resimden 2. Microsoft Surface Pro 7 Screen Replacement: adım 27, 3 resimden 3.
    • Use tweezers to slide the display cables straight out of their sockets on the display board.

  28. Microsoft Surface Pro 7 Screen Replacement, Remove the display board: adım 28, 3 resimden 1. Microsoft Surface Pro 7 Screen Replacement, Remove the display board: adım 28, 3 resimden 2. Microsoft Surface Pro 7 Screen Replacement, Remove the display board: adım 28, 3 resimden 3.
    • Slide an opening pick under the display board to separate the adhesive holding it onto the back of the screen.

    • If the adhesive is stubborn, it may help to heat the display board using an iOpener, hair dryer, or heat gun. Take care not to overheat the screen.

  29. Microsoft Surface Pro 7 Screen Replacement: adım 29, 1 resimden 1.
    • Remove the display board.

    • During reassembly, remove the adhesive from under the display board with isopropyl alcohol (≥90%) and a lint-free cloth or coffee filter. Then, apply new adhesive from a precut adhesive card and secure it to the new screen.

  30. Microsoft Surface Pro 7 Screen Replacement: adım 30, 1 resimden 1.
    • Only the screen remains.

Sonuç

To reassemble your device, follow the above steps in reverse order.

Take your e-waste to an R2 or e-Stewards certified recycler.

Repair didn’t go as planned? Try some basic troubleshooting, or ask our Answers community for help.

30 farklı kişi bu kılavuzu tamamladı.

Sam Omiotek

Üyelik tarihi: 02/25/19

71.975 İtibar

288 adet Kılavuz yazıldı

24 Yorum

Can you recommend a specific seller for the display, I’ll need to replace my screen before long. Thanks!

Eric Fike - Yanıt

What type of glue for reassembly? What temperature of heat setting do you recommend?

Anthony Finch - Yanıt

I managed to remove the old screen, clean off the old adhesive, apply new adhesive but not remove the backing yet. I connected the new screen and cables back the original way. I then uninstalled the touch drivers and restarted the surface. The touch function on the screen is still not working, any furthur suggestions?

Bryce Stevenson - Yanıt

Yorum Ekle

İstatistikleri Görüntüle:

Son 24 Saat: 55

Son 7 gün: 359

Son 30 gün: 1,685

Her zaman: 63,895