Giriş
Follow this guide to replace the screen on a Microsoft Surface Pro 7.
There is a significant chance that you may break the unreinforced and fragile display panel during this procedure. Be sure to apply adequate heat and be extremely careful while slicing through the adhesive. Wear safety glasses in case the glass shatters.
Neye ihtiyacın var
-
-
If your display glass is cracked, keep further breakage contained and prevent bodily harm during your repair by taping the glass.
-
Lay overlapping strips of clear packing tape over the Surface’s display until the whole face is covered.
-
Do your best to follow the rest of the guide as described. However, once the glass is broken, it will likely continue to crack as you work, and you may need to use a metal prying tool to scoop the glass out.
-
-
-
Heat an iOpener and apply it to the right edge of the Surface's screen for two minutes.
-
-
-
Take note of the screen adhesive layout before continuing:
-
These areas only contain adhesive and are safe to cut.
-
The display board and flex cables sit here close to the edge. Cut carefully and do not insert the pick more than 1/8 inch (3 mm).
-
Fragile antenna cables lie under this part of the screen. Carefully follow the procedure in step 13 to avoid damaging them. The adhesive is also the thickest here.
Be prepared; the bluetooth/wifi antennas are adhered to the glass with this very strong tape. You WILL 98% of the time damage them; have another module available that includes the antennas before you attempt this repair as you will damage them if you've never done this repair before. Ive done dozens of these and damage most of them.
For tablets without swollen batteries you can use one of these: https://www.amazon.com/gp/product/B019PX...
For tablets with swollen batteries, you can use one of these: https://www.amazon.com/220V-300W-Tool-Bl...
Just be careful that you don't damage the touchscreen by heating one spot too much. Also, the trick is to get the pick against the back of the display above the adhesive.
David S. -
I managed to remove the screen successfully without breaking the glass, but I found out I completely sliced through cables underneath the lower portion of the display as I used a razor blade, so be careful!
Muhammad, if you are still looking at this, what do the antennas connect to> I can't find the antennas on my glass, nor where they would connect to the frame?
-
-
-
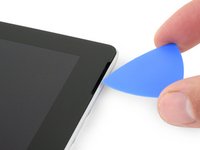
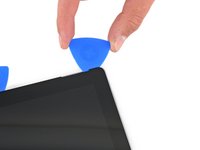
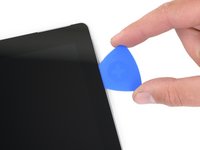
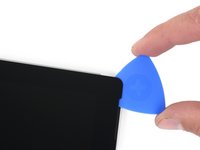
Insert an opening pick into the speaker opening on the screen and slide the pick between the glass and speaker grille.
Note carefully where they start. It is the only place with any sort of access. Razor blade is best. Use picks to hold the top open. Do NOT insert more than a quarter inch ever.
-
-
-
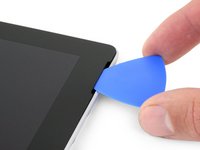
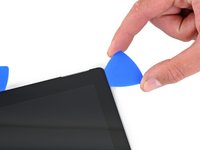
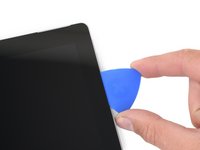
Rotate the pick toward the bottom of the Surface to slide it underneath the lower edge of the speaker cutout.
-
-
-
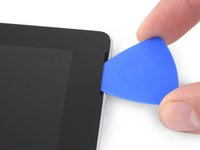
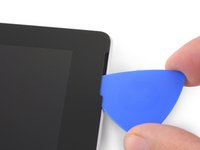
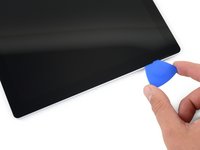
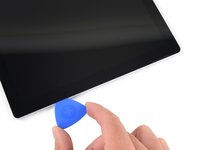
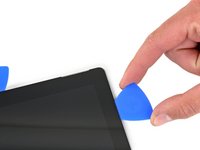
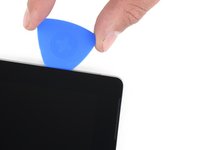
Slide the pick down the right edge of the Surface to slice through the adhesive under the screen.
-
Leave this opening pick in the right edge to prevent the adhesive from resealing.
-
-
-
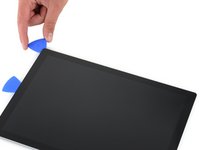
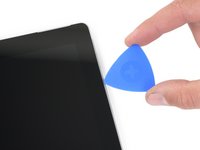
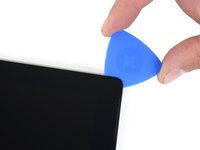
Reheat your iOpener and apply it to the bottom edge of the Surface's screen for two minutes.
-
-
-
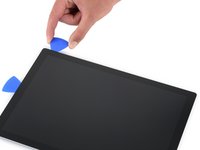
Reheat your iOpener and apply it to the left edge of the Surface's screen for two minutes.
-
-
-
-
Reheat your iOpener and apply it to the left edge of the Surface's screen for two minutes.
-
-
-
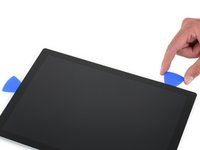
Insert the point of a pick under the display where you just stopped cutting. Do not insert the pick deeper than the edge of the bezel.
-
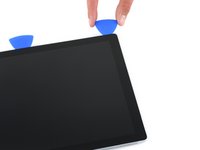
Carefully roll the pick to the right, pressing the long edge of the pick into the screen adhesive underneath the bezel, cutting the adhesive as you go. Do not slide the pick along the edge of the Surface.
-
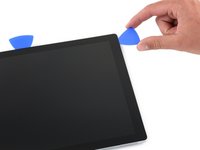
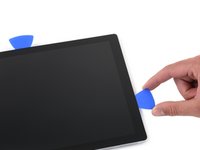
Repeat this motion of inserting the point of the pick where you just cut, and rolling to the right all along the top edge of the Surface, until the pick is 2.5 inches (64 mm) from the right edge of the Surface.
-
-
-
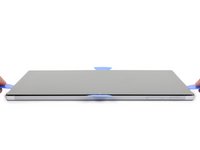
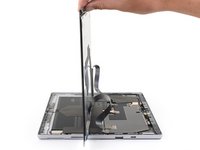
Very slowly lift the screen assembly away from the Surface case. If you encounter any resistance, stop and check that all the adhesive is separated.
-
Use an opening pick to cut through any remaining adhesive.
Be sure to lift the top first ( camera side) as the ribbon cable have more give that way. I tore one of the cables trying to open from the bottom
-
-
-
Use the pointed tip of a spudger to carefully push on each side of the battery connector.
-
Alternating from one side to the other, gently “walk” the connector out of its socket.
-
-
-
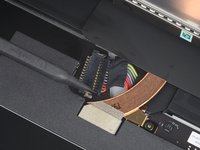
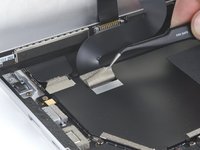
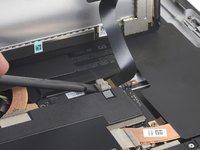
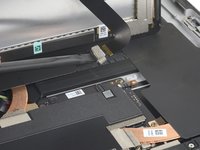
Use a pair of tweezers to peel back the silver tape covering the left display cable connector.
-
Insert the flat end of a spudger underneath the tape and pry up on the connector to disconnect it from the motherboard.
I found that the replacement screen cable does not run the same way as the previous screen and it actually doubles over. Is there a reason for this? Can I get a cable that matches the new screen anywhere?
-
-
-
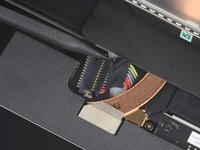
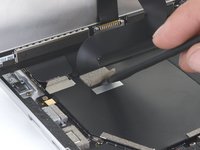
Use an opening pick to pry up one edge of the EMI shield covering the display board.
-
-
-
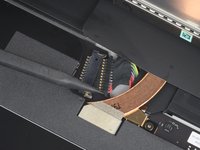
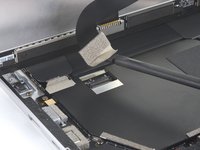
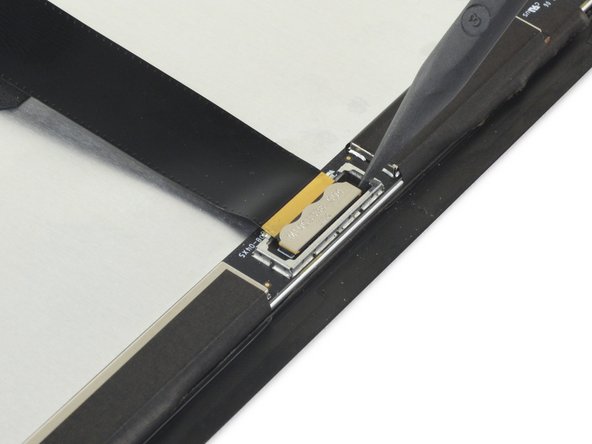
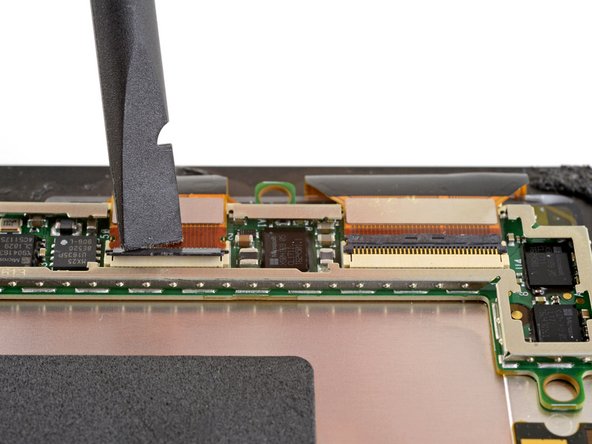
Use a spudger to flip up the small locking flaps on the display cable ZIF connectors.
-
-
-
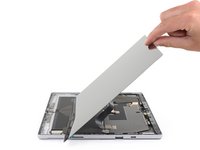
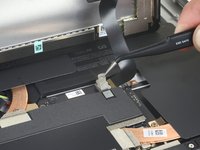
Slide an opening pick under the display board to separate the adhesive holding it onto the back of the screen.
-
-
-
Remove the display board.
Que tipo de adesivo se recomienda? Se necesita que conduzca la electricidad?
-
-
-
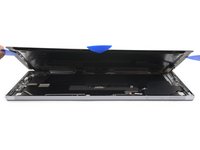
Only the screen remains.
Hallo das Display auf der Rückseite hat ca. 4 kreisförmige schwarze runde matten/gumipolster und vier große.
rund herum ist auf der kanne ebenfalls ein Klebestreifen angebracht. wo bekomme ich diese teile oder Klebestreifen?
Welche auswirkungen kann es haben wenn das Display hinten dies nicht aufweist?
Ein Link wäre sehr hilfreich.
Danke
-


To reassemble your device, follow the above steps in reverse order.
Take your e-waste to an R2 or e-Stewards certified recycler.
Repair didn’t go as planned? Try some basic troubleshooting, or ask our Answers community for help.
To reassemble your device, follow the above steps in reverse order.
Take your e-waste to an R2 or e-Stewards certified recycler.
Repair didn’t go as planned? Try some basic troubleshooting, or ask our Answers community for help.
İptal et: Bu kılavuzu tamamlamadım.
36 farklı kişi bu kılavuzu tamamladı.

28Kılavuz Yorumları
Thank you very much!
What type of glue for reassembly? What temperature of heat setting do you recommend?
I managed to remove the old screen, clean off the old adhesive, apply new adhesive but not remove the backing yet. I connected the new screen and cables back the original way. I then uninstalled the touch drivers and restarted the surface. The touch function on the screen is still not working, any furthur suggestions?
Probably you have issues with board.
Matjaž -
@bryce Stevenson tries connections also the ribbon cable connecting digitizer and LCD. I would assume the screen is faulty defective if that doesn’t work!
Note that pictures here do not include a portion of the "Antenna Wireless WiFi Cover Trim Flex Cable" at the top on either side of the Surface's cameras underneath the screen. There are two thin soft layers that can be pulled away from that assembly during screen removal.
There are warnings about this, but it is difficult to do well. Especially without good reference photos to know what to expect.
Also, the iOpener method doesn't personally seem feasible having attempted it. Would suggest heating pad. (Or heat gun as recommended, but beware as edges of case are easily tarnished by prolonged or high heat.)
Just a heads up, this is so much more difficult when the entire screen is cracked. Instead of being able to just separate the screen by sliding the opening pick, you will have to scrape off each small piece of glass from the adhesive along the edge. The one section of my screen that wasn't cracked was super easy to separate from the adhesive with a heat gun. That being said, I have installed the new screen, and everything does seem to be in good working order.
One more tip, if you broke your screen with a drop, inspect the frame and make sure it isn't bent in and would otherwise not allow the new screen to sit inside flush. My top right corner that had damage from impact has the frame bent in so that the screen corner sits on top of the frame instead of within it. No good way to bend the metal out with the screen stuck to the new adhesive. Just double check and fix it before installing the new screen!
successfully remove and implemented another screen
I removed the old screen and cleaned off the adhesive. Plugged in the new screen's ribbon cables and attempted to power it back on. I get the Windows logo to appear and it quickly returns to black screen. However the system continues to boot and I am even able to log in when I plug it into an external monitor. Do you have any suggestions for how to troubleshoot it further?
I had to re-seat the ZIF connectors (step 26) 3 times before it worked
Ben -
What device is used for this tutorial?
I ask because of a couple of factors;
1) the screen in the tutorial has a silver block to the left (looking at back of LCD) of the LCD ribbon connector; however the original LCD for the Surface Pro 7 (and the photos of the replacement you sell) does not have that.
-- This causes the LCD flex cable to be too short to replace the screen--
Looking at the tutorial it appeared that I had the correct replacement screen, but in fact, I did not. not your fault, but it does make it difficult to rely on your guide to be accurate if it is not of the actual device you say it is for.
I did a lot of digging into this; it appears Microsoft made two versions of their LCD (LP123WQ1 & LP123WQ2) the one in this Guide is version 1 (Q1 of the two options) but Version 2 uses a smaller Cable and has the connector farther to the left than Version 1
Just saying to let people know that you need to be aware of this going into it; unfortunately, there is no way to know which version you have unless you open it up and remove the old one before you order the new one.
I bought wrong model of display too (LP123WQ2 from iFixit)
But after that I ordered cable for this display (LCD Flex Cable for Microsoft Surface Pro 7 1866 ) - and could attach display.
So, not it works good!
Bonjour, j'ai fait le changement de l'écran mais je n'ai pas gardé l'adhésif comme indiqué (je n'ai pas bien lu). Savez-vous ou je peux me procurer un adhésif similaire?
Avec mes meilleures salutations.
Hello, I changed the screen but I didn't keep the adhesive as indicated (I didn't read it correctly). Do you know where I can get a similar adhesive?
With my best regards.
https://www.ebay.co.uk/itm/115477361245?...
cheapest i could find
Ben -
ive replaced surace pro 7 screens in the past using i fix it procedures. im in the process of fixing another screen and was browsing screens and found screens that stated "no frame". ive never seen the term beforeand wanted clarification. is the frame the metal board that supports the lcd/digitizer?
Hi! The version for sale on iFixit (https://www.ifixit.com/products/surface-...) is not specified.
There are two versions of this screen. Version 1 and Version 2. They are incompatible based on their connectors. Completely indistinguishable from the outside (because Microsoft has to make it even harder to repair it by making sure you can't order the screen before disassembly). Physically the connector is the same, but it is in a different place, so the screen will not align properly if you get the wrong version replacement.
What version is it for sale on the iFixit page?
Comments did not load when I originally made this comment, but was answered by Thomas Niegisch and Виктор Ганелес above; iFixit sells the V2 of the screen only, so if you need V1 you should find somewhere else to purchase.
What can you do if the screen is shattered?
I just ordered a screen on eBay. It came with a board, so changed it including that board. Reassembled, but it would not work (touch screen). I reopened to put the old board in and it kind of worked. There is a blind area vertical right in the middle of the screen top to bottom. I assumed it’s the screen. Ordered another screen… same thing. Exchanged the board again: no touch screen. Ordered new ribbon cable and another board: no success (screen works, touch does not). Put in original board: screen and touch work, but touch is with blind spot and at the edges not responsive with finger….
What am I missing? Any ideas?
I went through the process of removing the screen to repair a broken hinge, and now my screen is showing broken lines up/down and left/right. The larger ribbon cable had torn during removal and I replaced it. There are no visible cracks when the screen is off but there is a clear line in the screen like a break when it is on. Is this most likely a broken screen or a bad cable? If anyone can help I'd appreciate it.
Hi! I managed to break both display cables when removing the screen. Does your kit come with cables as well? If not, is it possible to order them along with the screen?