Ana içeriğe geç
Onarım Topluluğuna Katılın - Hesap Oluşturun

Rotor Riot Face Button Replacement

Neye ihtiyacın var

  1. Rotor Riot Face Button Replacement, Remove the iPhone mount: adım 1, 3 resimden 1. Rotor Riot Face Button Replacement, Remove the iPhone mount: adım 1, 3 resimden 2. Rotor Riot Face Button Replacement, Remove the iPhone mount: adım 1, 3 resimden 3.
    • Use your fingers to remove the screw on the back side of the controller securing the iPhone mount.

    • Remove the iPhone mount.

    FixBot'a Sor

    Yorum Ekle

  2. Rotor Riot Face Button Replacement, Unscrew the back cover: adım 2, 1 resimden 1.
    • Use a T6 Torx screwdriver to remove the eight 9.2 mm-long screws securing the back cover.

    • Don't try to remove the back cover all the way yet! It's still connected to the mainboard.

    FixBot'a Sor

    Yorum Ekle

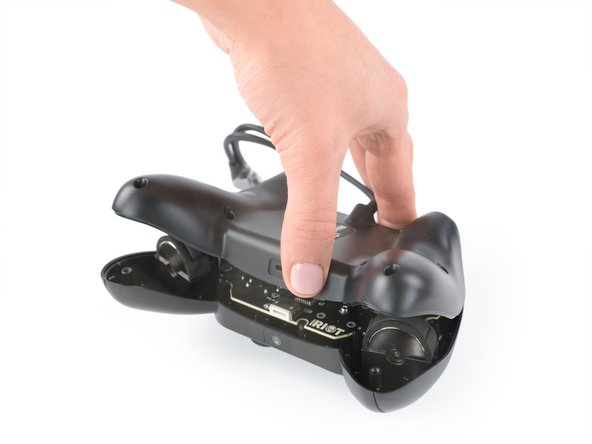
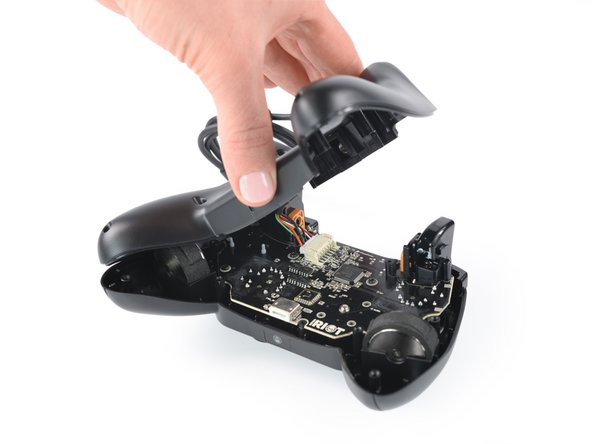
  3. Rotor Riot Face Button Replacement, Swing open the back cover: adım 3, 3 resimden 1. Rotor Riot Face Button Replacement, Swing open the back cover: adım 3, 3 resimden 2. Rotor Riot Face Button Replacement, Swing open the back cover: adım 3, 3 resimden 3.
    • Lift up the back cover of the controller.

    • Lift the back cover to a 45 degree angle and place it next to the controller.

    • Don't strain the interconnect cable during this procedure.

    FixBot'a Sor

    Yorum Ekle

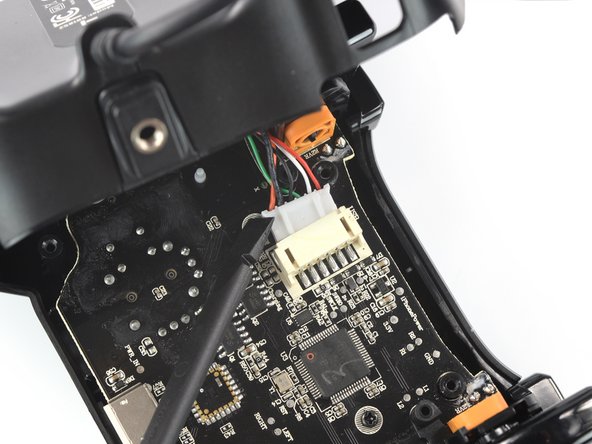
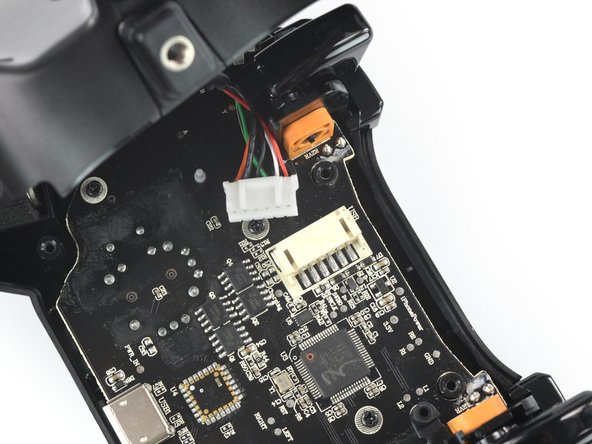
  4. Rotor Riot Face Button Replacement, Disconnect the phone connector cable: adım 4, 3 resimden 1. Rotor Riot Face Button Replacement, Disconnect the phone connector cable: adım 4, 3 resimden 2. Rotor Riot Face Button Replacement, Disconnect the phone connector cable: adım 4, 3 resimden 3.
    • Use a spudger to disconnect the phone connector cable from the mainboard.

    FixBot'a Sor

    Yorum Ekle

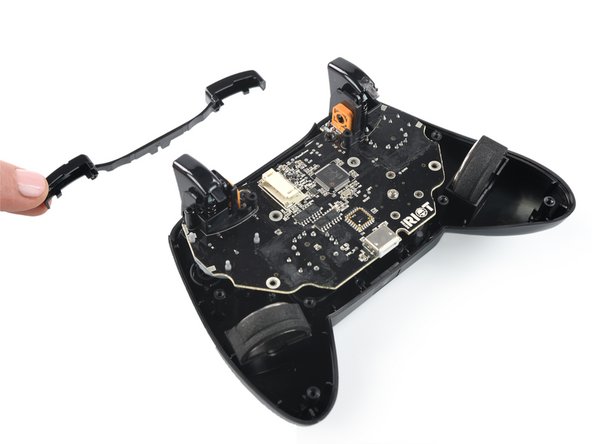
  5. Rotor Riot Face Button Replacement, Remove the back cover: adım 5, 1 resimden 1.
    • Remove the back cover.

    FixBot'a Sor

    Yorum Ekle

  6. Rotor Riot Face Button Replacement, Remove the shoulder buttons: adım 6, 2 resimden 1. Rotor Riot Face Button Replacement, Remove the shoulder buttons: adım 6, 2 resimden 2.
    • Remove the shoulder buttons by lifting them out of the case.

    FixBot'a Sor

    Yorum Ekle

  7. Rotor Riot Face Button Replacement, Unscrew the mainboard: adım 7, 1 resimden 1.
    • Use a Phillips screwdriver to remove the four 7.0 mm-long screws securing the mainboard.

    FixBot'a Sor

    Yorum Ekle

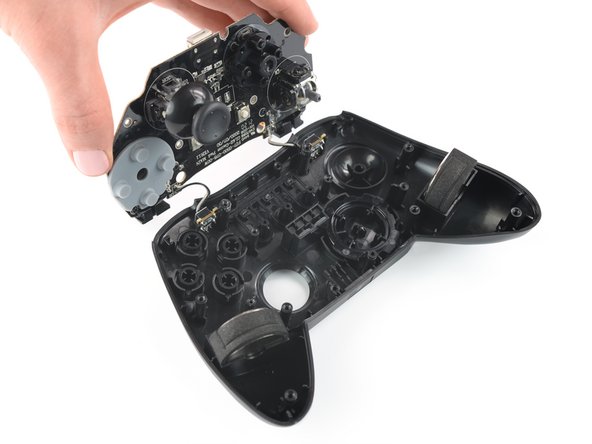
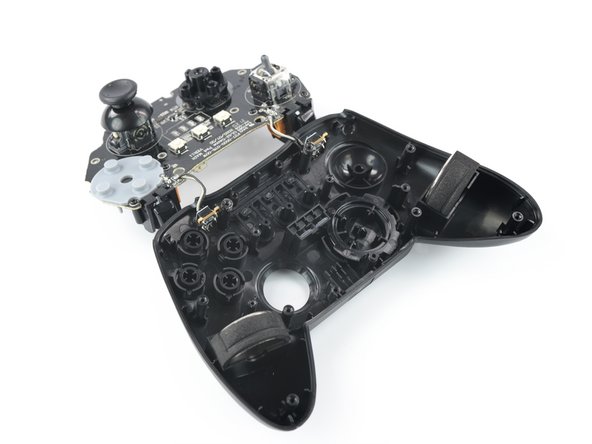
  8. Rotor Riot Face Button Replacement, Flip over the mainboard: adım 8, 3 resimden 1. Rotor Riot Face Button Replacement, Flip over the mainboard: adım 8, 3 resimden 2. Rotor Riot Face Button Replacement, Flip over the mainboard: adım 8, 3 resimden 3.
    • Flip over the mainboard and place it above the controller housing.

    • Avoid tensioning the trigger button cables during this procedure and don't try to remove the mainboard all the way yet! It is still connected to the controller housing.

    FixBot'a Sor

    Yorum Ekle

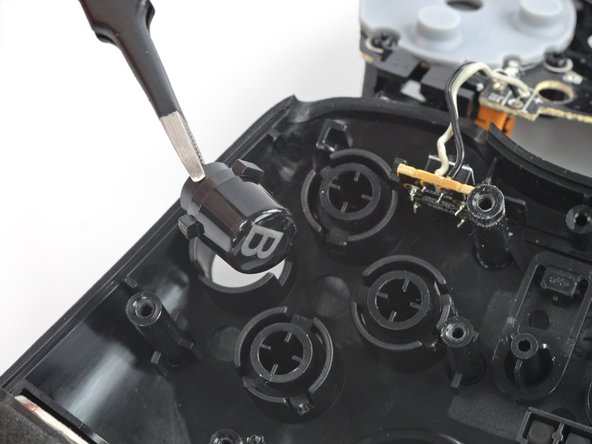
  9. Rotor Riot Face Button Replacement, Remove the face buttons: adım 9, 2 resimden 1. Rotor Riot Face Button Replacement, Remove the face buttons: adım 9, 2 resimden 2.
    Bu adımda kullanılan alet:
    Tweezers
    $4.99
    • Use a pair of tweezers to remove the face buttons from the housing.

    • The alignment pegs on each button are designed to prevent incorrect installation. Make sure your new buttons fit properly in the controller case.

    FixBot'a Sor

    Yorum Ekle

Sonuç

To reassemble your device, follow these instructions in reverse order.

Take your e-waste to an R2 or e-Stewards certified recycler.

Repair didn’t go as planned? Try some basic troubleshooting, or ask our Answers community for help.


İptal et: Bu kılavuzu tamamlamadım.

Adriana Zwink

Üyelik tarihi: 12/18/19

67.717 İtibar

167 adet Kılavuz yazıldı

Ekip

iFixit iFixit üyesi

Staff

123 Üyeler

28.236 adet Kılavuz yazıldı

0Kılavuz Yorumları

Yorum Ekle

İstatistikleri Görüntüle:

Son 24 Saat: 0

Son 7 gün: 6

Son 30 gün: 28

Her zaman: 407