Giriş
Use this guide to replace a worn-out battery in your Samsung Galaxy S6 Edge+.
Before disassembling your phone, discharge the battery below 25%. A charged lithium-ion battery can catch fire and/or explode if accidentally punctured.
If your battery is swollen, take appropriate precautions. Do not heat your phone. If needed, you can use a dropper or syringe to inject isopropyl alcohol (90+%) around the edges of the back cover to weaken the adhesive. Swollen batteries can be very dangerous, so wear eye protection and exercise due caution, or take it to a professional if you're not sure how to proceed.
This guide involves removing the rear glass, which destroys the adhesive holding it in place. The adhesive will need to be replaced before the rear glass is replaced or reinstalled.
Neye ihtiyacın var
-
-
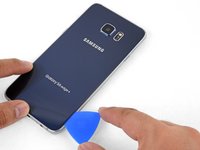
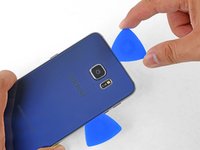
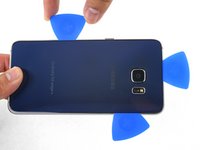
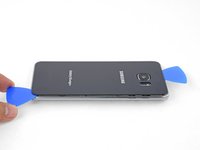
Heat an iOpener and apply it to the volume button side of the phone for about two minutes.
-
-
-
Bu adımda kullanılan alet:Tesa 61395 Tape$5.99
-
First use tweezers to peel away any remaining adhesive from both the back cover and the phone's chassis.
-
Then, clean the adhesion areas with high concentration isopropyl alcohol (at least 90%) and a lint-free cloth. Swipe in one direction only, not back and forth. This will help prep the surface for the new adhesive.
-
Be sure to turn on your phone and test your repair before installing new adhesive and resealing the phone.
-
Replacement adhesive comes in a pre-cut sheet to match the exact contours of the back cover. The sheet is asymmetrical, so make sure the screw holes in the adhesive sheet line up with the screws on the frame before applying the adhesive.
-
After installing the rear cover, apply strong, steady pressure to your phone for several minutes to help the adhesive form a good bond, such as by placing it under a stack of heavy books.
-
-
-
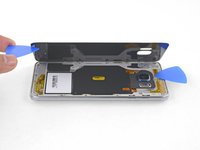
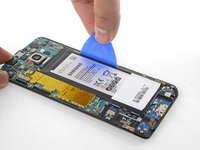
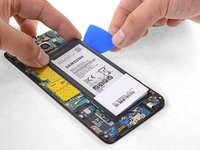
Insert an opening pick between the display frame and the battery.
-
Slide the pick underneath the battery as far as you can while maintaining a firm grip on the pick.
-
Slide the pick down the side of the battery to break up the adhesive underneath.
-
-
-
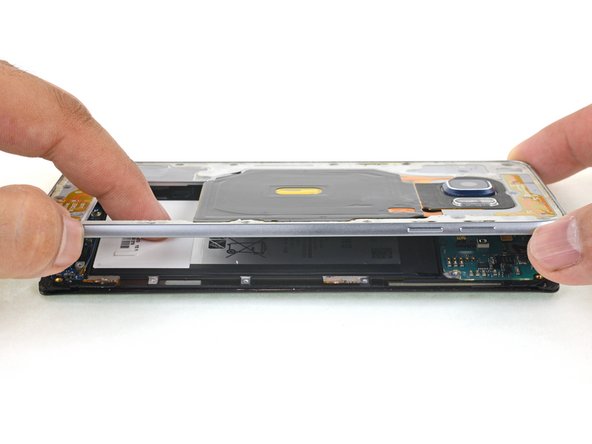
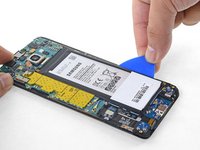
Twist the opening pick to lift the battery away from the display frame.
-
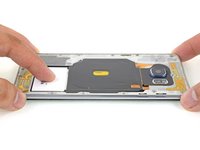
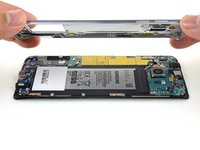
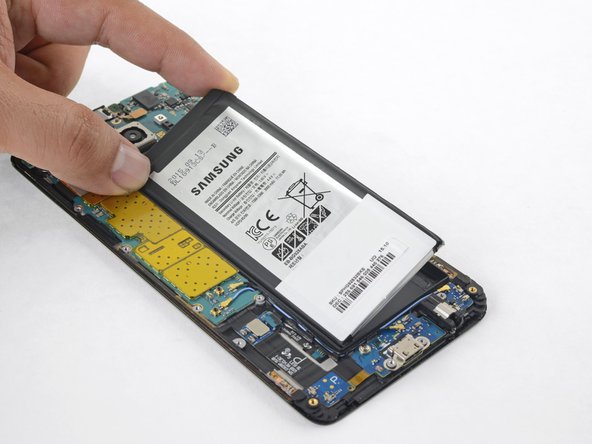
Remove the battery.
-
Remove any remaining adhesive from the phone, and clean the glued areas with isopropyl alcohol and a lint-free cloth.
-
Secure the new battery with pre-cut adhesive or double-sided adhesive tape. In order to position it correctly, apply the new adhesive into the phone, not directly onto the battery. The adhesive should go around the perimeter of the battery compartment, but not in the rectangular cutout in the center (which is actually the back side of the display).
-
Press the battery firmly into place for 5-10 seconds.
-


To reassemble your device, follow these instructions in reverse order.
After completing this guide, calibrate your newly-installed battery.
To reassemble your device, follow these instructions in reverse order.
After completing this guide, calibrate your newly-installed battery.
İptal et: Bu kılavuzu tamamlamadım.
26 farklı kişi bu kılavuzu tamamladı.

9Kılavuz Yorumları
This guide is not too realistic the iFixit iOpener does not get anywhere hot enough to actually heat the glue and the suction cup is also really inadequate and does not keep suction long enough to pull the back off. I managed to do it with a heat gun and glass mover suction cup, which in my opinion is necessary for this fix. This over all was an easy fix and only took about 40 mins to complete
I have tried using a hair dryer and one of the suction cups that comes with replacement kits and it didn’t work, will a dent puller suction cup work?
Do I really need new adhesive for the battery or will the midframe and old adhesive hold it well enough?
I would recommend new adhesive for the battery, just to be safe. The battery won’t fall out of the phone if it doesn’t have new adhesive, but there’s always a chance that if it slides around it could damage its cable or connector.
So when i lift up the suction cup should teh back just lift up a little or do i need to hold the phone down some how?