Ana içeriğe geç

Sony Cyber-shot DSC-H20 Screen Replacement

Neye ihtiyacın var

  1. Sony Cyber-shot DSC-H20 Screen Replacement, Screen: adım 1, 2 resimden 1. Sony Cyber-shot DSC-H20 Screen Replacement, Screen: adım 1, 2 resimden 2.
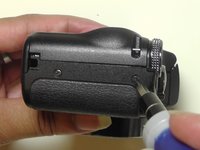
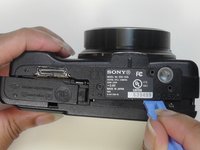
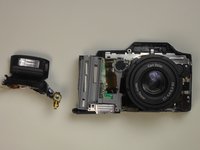
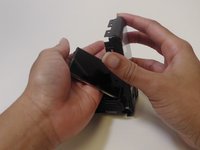
    • Slide open the battery cover and remove the battery and the Memory Stick Duo.

    • Return the battery cover to its closed position.

  2. Sony Cyber-shot DSC-H20 Screen Replacement: adım 2, 1 resimden 1.
    • Remove all three screws from the bottom of the camera.

  3. Sony Cyber-shot DSC-H20 Screen Replacement: adım 3, 2 resimden 1. Sony Cyber-shot DSC-H20 Screen Replacement: adım 3, 2 resimden 2.
    • Remove the screws on the left and right sides of the camera.

  4. Sony Cyber-shot DSC-H20 Screen Replacement: adım 4, 3 resimden 1. Sony Cyber-shot DSC-H20 Screen Replacement: adım 4, 3 resimden 2. Sony Cyber-shot DSC-H20 Screen Replacement: adım 4, 3 resimden 3.
    • Press down on the flash cover to raise the flash.

    • Remove both screws that hold the flash cover to the body of the camera.

  5. Sony Cyber-shot DSC-H20 Screen Replacement: adım 5, 1 resimden 1.
    • Place the camera upside down with the battery port positioned upward.

    • Slide open the battery port.

  6. Sony Cyber-shot DSC-H20 Screen Replacement: adım 6, 3 resimden 1. Sony Cyber-shot DSC-H20 Screen Replacement: adım 6, 3 resimden 2. Sony Cyber-shot DSC-H20 Screen Replacement: adım 6, 3 resimden 3.
    • Pry the front cover of the camera off with the plastic opening tool.

  7. Sony Cyber-shot DSC-H20 Screen Replacement: adım 7, 1 resimden 1.
    • Remove the power shutter unit.

  8. Sony Cyber-shot DSC-H20 Screen Replacement: adım 8, 2 resimden 1. Sony Cyber-shot DSC-H20 Screen Replacement: adım 8, 2 resimden 2.
    • Unscrew the screw located at the back left corner of the flash component.

    • Set the flash component aside.

  9. Sony Cyber-shot DSC-H20 Screen Replacement: adım 9, 1 resimden 1.
    • Remove the two screws from the bottom of the motherboard.

  10. Sony Cyber-shot DSC-H20 Screen Replacement: adım 10, 1 resimden 1.
    • Use the plastic opening tool to assist you in separating the metal frame from the back cover of the camera.

  11. Sony Cyber-shot DSC-H20 Screen Replacement: adım 11, 2 resimden 1. Sony Cyber-shot DSC-H20 Screen Replacement: adım 11, 2 resimden 2.
    • Flip the metal frame over to the left side of the camera and onto the surface on which you are working.

  12. Sony Cyber-shot DSC-H20 Screen Replacement: adım 12, 2 resimden 1. Sony Cyber-shot DSC-H20 Screen Replacement: adım 12, 2 resimden 2.
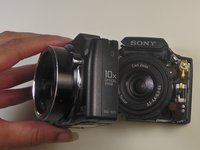
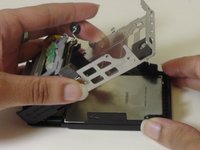
    • Now remove the LCD screen by bringing the back cover over to the left so that the LCD screen falls into your hand.

    I had a pin fall out, I don’t know where it goes now.

    Lucas Vaughn - Yanıt

Sonuç

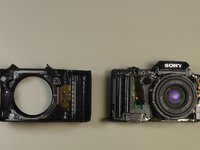
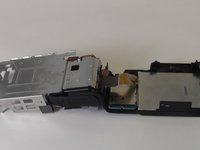
To reassemble your device, follow these instructions in reverse order.

2 farklı kişi bu kılavuzu tamamladı.

Rachel Payne

Üyelik tarihi: 02/23/15

392 İtibar

2 adet Kılavuz yazıldı

Ekip

USF Tampa, Team 1-1, Leahy Winter 2015 USF Tampa, Team 1-1, Leahy Winter 2015 üyesi

USFT-LEAHY-W15S1G1

3 Üyeler

10 adet Kılavuz yazıldı

1Rehber Yorum

Thank you so much. I could successfully open the camera and got the LCD display out. But I couldn't find out how to replace the LCD, I wanted to mean where to open the LCD cable?

ummejamil - Yanıt

Yorum Ekle

İstatistikleri Görüntüle:

Son 24 Saat: 1

Son 7 gün: 1

Son 30 gün: 25

Her zaman: 2,199