Ana içeriğe geç

Toshiba Satellite C55-a5310 Keyboard Replacement

Neye ihtiyacın var

  1. Toshiba Satellite C55-a5310 Keyboard Replacement, Battery: adım 1, 3 resimden 1. Toshiba Satellite C55-a5310 Keyboard Replacement, Battery: adım 1, 3 resimden 2. Toshiba Satellite C55-a5310 Keyboard Replacement, Battery: adım 1, 3 resimden 3.
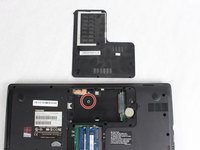
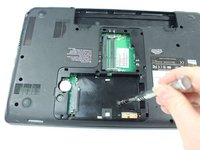
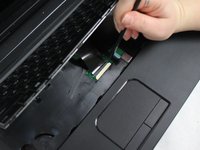
    • Push the left tab with your left hand.

    • Then push the right tab with your right hand.

    • While your right hand is still pushing, remove the battery with your left hand.

  2. Toshiba Satellite C55-a5310 Keyboard Replacement, Keyboard: adım 2, 2 resimden 1. Toshiba Satellite C55-a5310 Keyboard Replacement, Keyboard: adım 2, 2 resimden 2.
    • Remove this screw with a JIS #000 screwdriver.

    • This screw does not come out all the way.

  3. Toshiba Satellite C55-a5310 Keyboard Replacement: adım 3, 1 resimden 1.
    • Remove the panel with the plastic opening tool. Make sure you lift it on all four sides.

  4. Toshiba Satellite C55-a5310 Keyboard Replacement: adım 4, 2 resimden 1. Toshiba Satellite C55-a5310 Keyboard Replacement: adım 4, 2 resimden 2.
    • Using the JIS #000 screwdriver, remove the .5mm screw.

  5. Toshiba Satellite C55-a5310 Keyboard Replacement: adım 5, 2 resimden 1. Toshiba Satellite C55-a5310 Keyboard Replacement: adım 5, 2 resimden 2.
    • Use the plastic opening tool to remove the keyboard from the laptop.

  6. Toshiba Satellite C55-a5310 Keyboard Replacement: adım 6, 2 resimden 1. Toshiba Satellite C55-a5310 Keyboard Replacement: adım 6, 2 resimden 2.
    • Once keyboard is popped out, use a nylon spudger to undo the ribbon or flap that attaches the back of the keyboard to the inside base of the laptop.

Sonuç

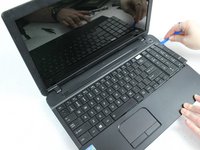
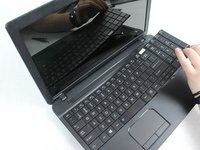
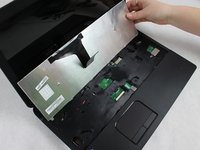
To reassemble your device, follow these instructions in reverse order.

3 farklı kişi bu kılavuzu tamamladı.

Kari Rodgers

Üyelik tarihi: 02/08/18

482 İtibar

4 adet Kılavuz yazıldı

Ekip

2 Yorum

Step has the incorrect screw to release the keyboard. There is no need to open the back panel. The screw which holds down the keyboard is the long screw between the Serial Number sticker and the battery release switch #2.

Anthony Francisco - Yanıt

Agreed 100%. Good thing I looked at this comment before I ran into major trouble. Thank you!

Jeff Breuer -

Yorum Ekle

İstatistikleri Görüntüle:

Son 24 Saat: 0

Son 7 gün: 0

Son 30 gün: 1

Her zaman: 2,234