Giriş
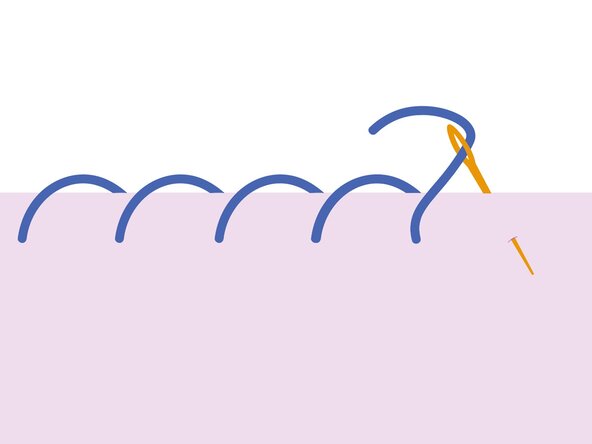
This guide demonstrates how to do a hand sewn whip stitch to close a fabric tear on a pair of Patagonia® Quandary pants. The whip stitch is a versatile technique that binds torn edges together with looping stitches, making it ideal for sealing small rips and preventing further fraying.
Hand sewn repairs are a fun and effective way to extend the life of gear at home. DIY repairs won't void the Patagonia warranty—they're actually encouraged!
Patagonia items can also be taken in to a local retail store for repair evaluation or sent in to Patagonia through their mail-in repair service.
Let's get fixing!
Related Tutorials
Related Articles
Neye ihtiyacın var
-
-
-
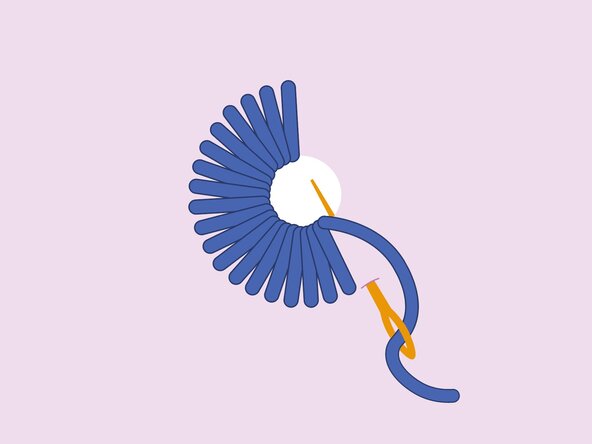
When placed close together, whip stitches can also reinforce an opening to create a buttonhole or a decorative eyelet.
 FixBot'a Sor
-
-
-
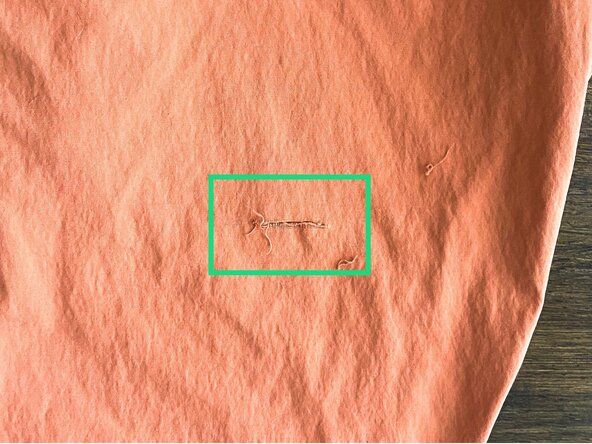
Locate the damaged area and trim away any loose or hanging threads.
-
In this tutorial, the whip stitch will be used to seal a short, straight tear with minimal fraying and fabric loss.
-
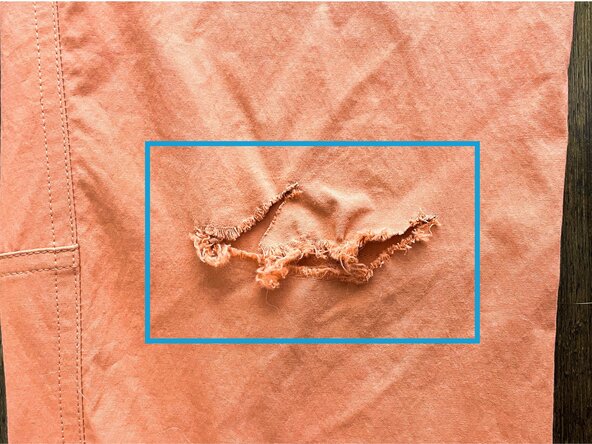
If the damage is more extensive, a variation of this technique can be used to attach a patch over the damaged area. See Whip Stitch on a Patch or Blanket Stitch on a Patch.
-
-
-
Cut a length of thread approximately 24 inches (~61 cm) long.
-
Thread the needle and adjust the thread so there are equal lengths of thread on each side of the needle.
-
Tie an overhand knot with both ends to create a doubled length of thread.
-
See Needles and Thread for more details.
-
-
-
-
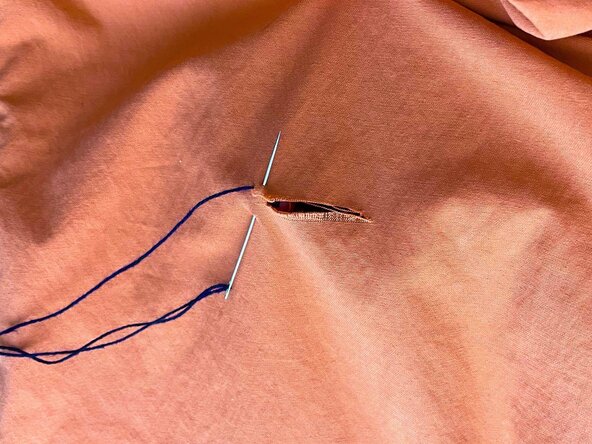
Insert the needle up from the backside of the fabric, about 1/8 inch (~3 mm) diagonally away from the end of the tear. Pull tight so the knot is flush on the backside.
-
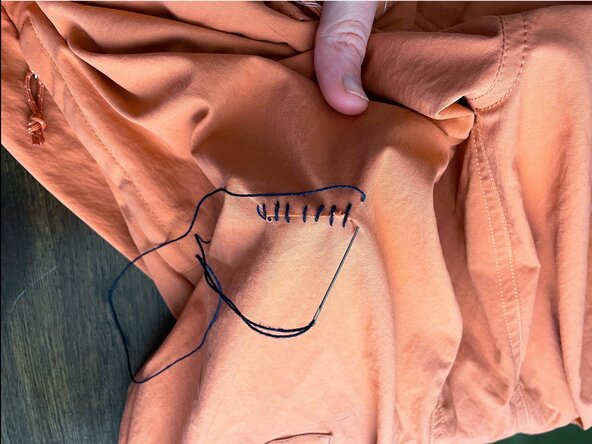
Pierce down into the fabric 1/4 inch (~6 mm) away from the first stitch, on the opposite side of the tear, then bring the needle back up right next to the first stitch, about 1/8 inch (~3 mm) away. Pull through.
-
-
-
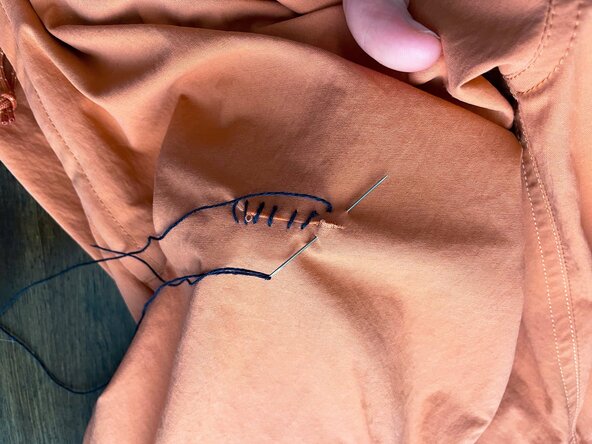
Repeat the process from the previous step to continue stitching in a spiral pattern, passing the needle from one side of the tear to the other.
-
Maintain consistent tension and spacing for a neat appearance.
-
-
-
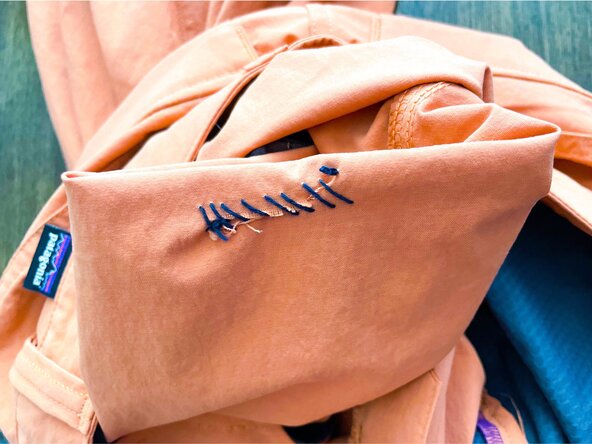
Continue whip stitching until you get to the opposite side of the tear.
-
Make a final stitch beyond the end of the tear to secure the stitching, just as it was anchored at the beginning of the tear.
-
Pass the needle through to the backside of the fabric.
-
Make a secure knot on the backside of the fabric using one of the techniques from Knot Thread to the Fabric (2 Ways) and trim the extra thread.
-
-
-
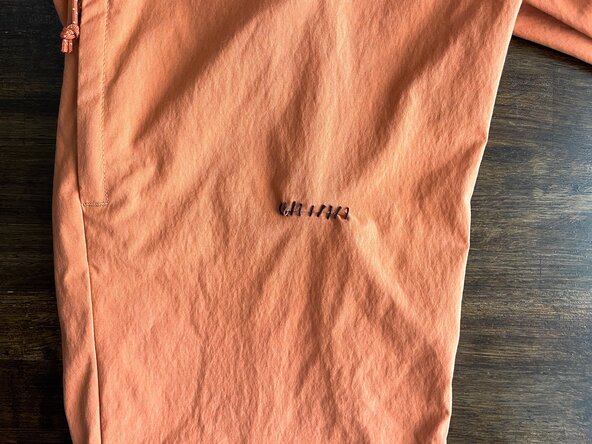
Check that the tear is effectively sealed and that the stitching has even spacing and appropriate tension.
-
Trim any loose threads.
-
-









İptal et: Bu kılavuzu tamamlamadım.
3 farklı kişi bu kılavuzu tamamladı.


