Giriş
Replace or upgrade the CPU. Don't forget to apply a new layer of thermal compound before reassembling your iMac.
Follow our thermal paste guide for instructions on cleaning and preparing the thermal surfaces and applying a new layer of thermal compound onto the CPU and GPU dies.
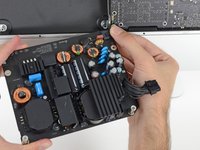
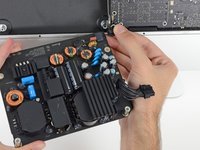
Before beginning any work on your iMac: Unplug the computer and press and hold the power button for ten seconds to discharge the power supply's capacitors.
Be very careful not to touch the capacitor leads or any exposed solder joints on the back of the power supply. Only handle the board by the edges.
Neye ihtiyacın var
-
Bu adımda kullanılan alet:iMac Intel 27" Cardboard Service Wedge$4.99
-
With the hinge free to move, the iMac will be unbalanced and hard to work on. Repairs can be completed with the iMac laying down, but are faster and easier with an iMac service wedge.
-
If you are using the iFixit cardboard service wedge, follow these assembly directions to put it together.
-
-
Bu adımda kullanılan alet:Plastic Cards$2.99
-
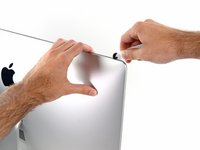
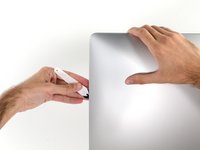
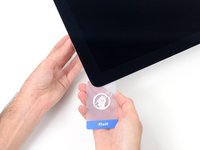
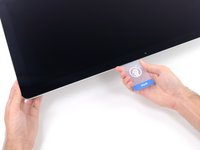
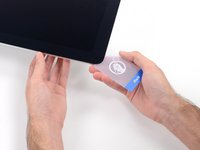
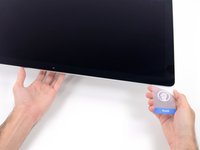
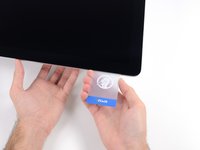
Set the iMac face-up on a table.
-
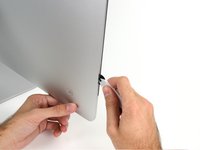
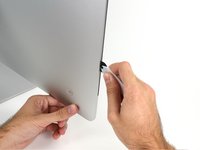
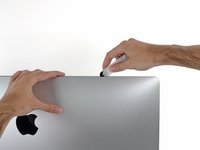
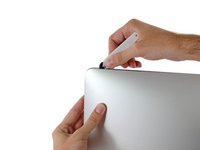
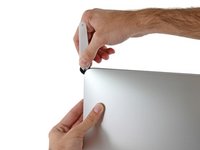
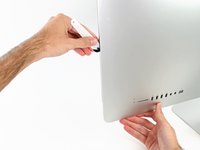
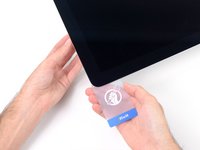
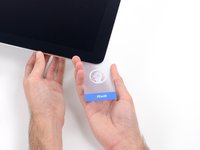
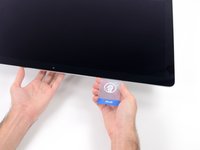
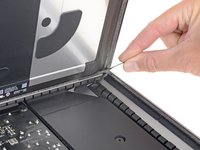
Starting from the top right corner of the iMac, insert a plastic card between the display and frame.
-
-
-
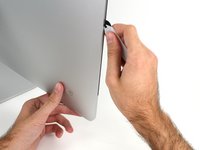
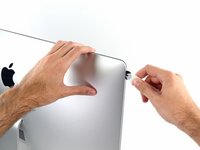
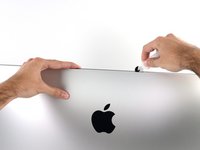
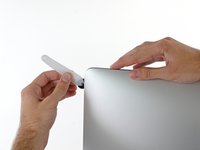
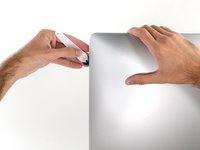
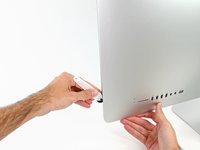
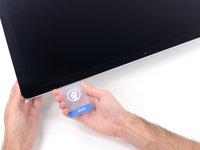
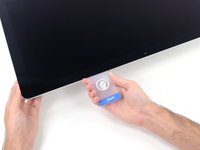
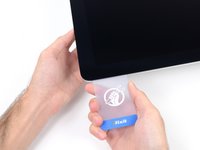
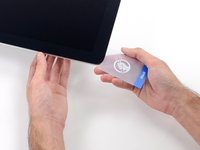
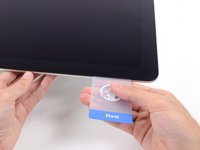
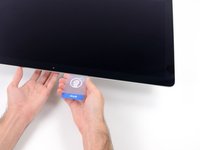
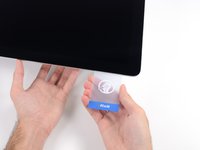
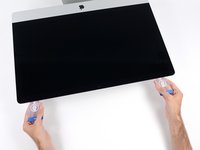
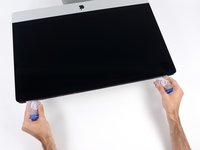
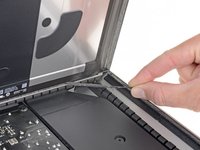
With the cards inserted as shown near the corners, gently twist the cards to increase the gap between display and case.
-
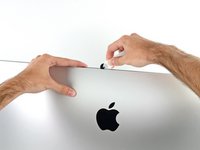
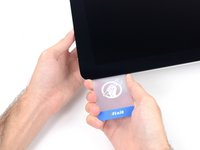
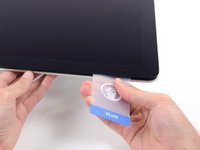
If there are any sections that seem to stick and won't separate, stop twisting and use one of the cards to cut the adhesive in the problem area.
-
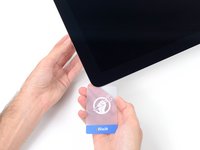
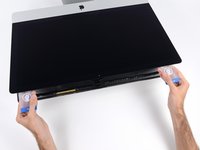
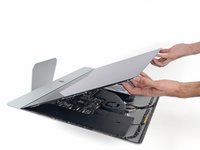
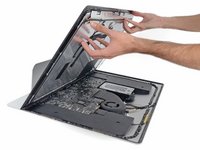
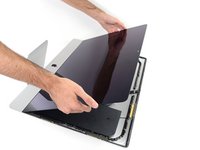
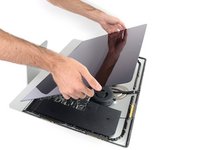
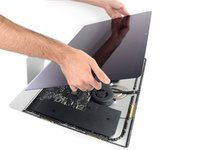
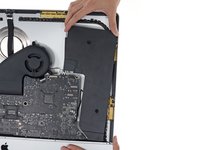
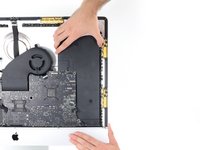
Begin to lift the top of the display up from the frame.
-
-
-
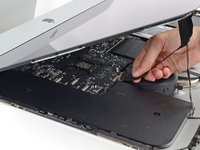
If there is a wire or cable underneath adhesive tape, always pull the tape off first.
-
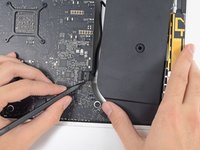
If the cable is glued to the chassis, use a heated iOpener or a hair dryer to soften the adhesive first. You can then slide an opening pick underneath the cable to loosen it. Never pull directly on the delicate connectors.
-
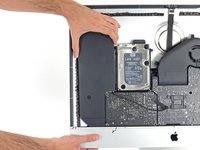
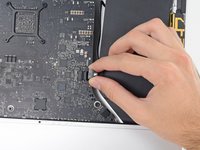
Slide an opening pick underneath the foam cushion pieces to separate them from the display, and gently pull them off. You may need some double sided tape to re-attach them to the new display.
-
-
-
-
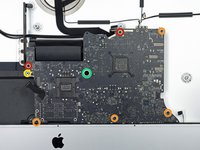
Use a Phillips screwdriver to remove the nine 3.2 mm screws securing the support bracket.
-
You may need to peel up the display adhesive lining the bottom edge of the iMac enclosure to access the screws.
-
-
-
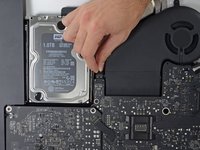
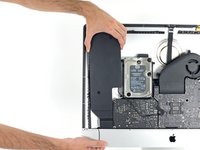
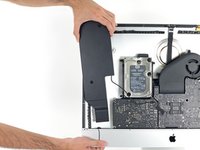
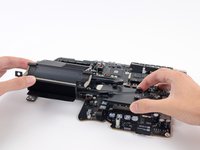
Pull straight up on the SATA data/power cable to disconnect it from the drive.
-
-
-
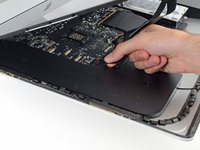
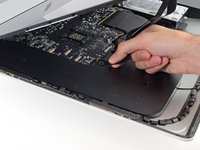
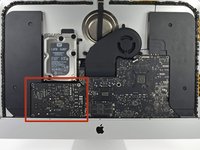
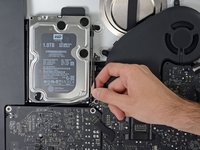
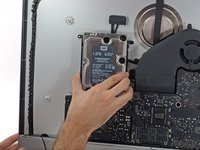
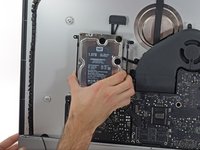
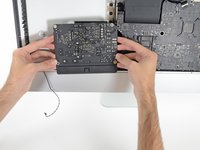
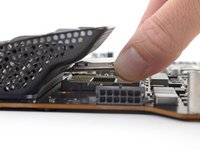
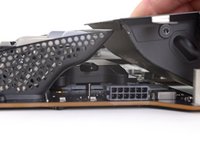
Disconnect the power supply control cable from the power supply.
-
-
-
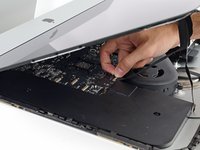
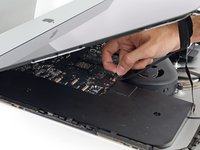
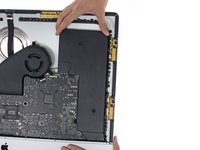
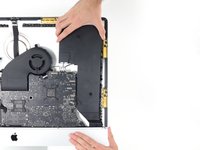
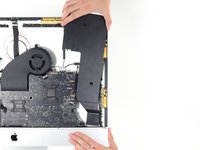
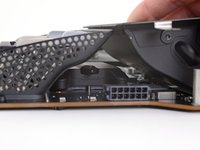
Use the tip of a spudger to disconnect the fan cable's connector from its socket on the logic board.
-
-
-
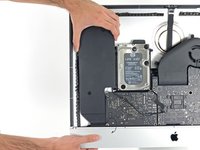
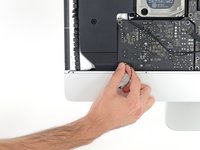
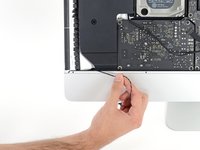
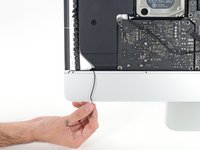
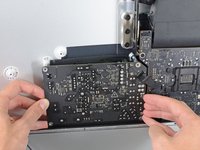
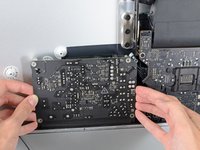
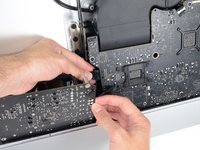
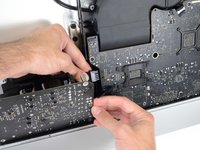
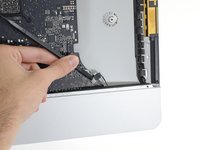
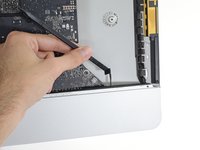
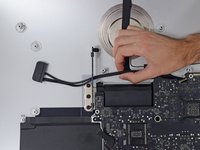
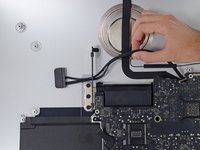
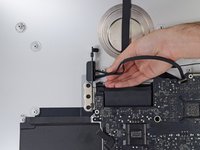
Use the flat end of a spudger to disconnect each of the four antenna connectors from the AirPort/Bluetooth card.
-
Leftmost
-
Top
-
Upper right
-
Lower right
-
-
-
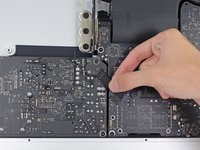
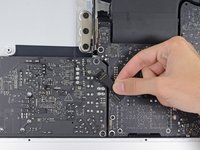
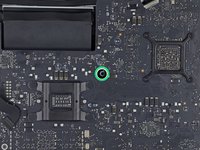
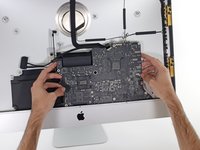
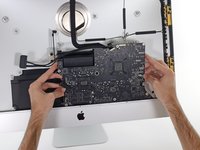
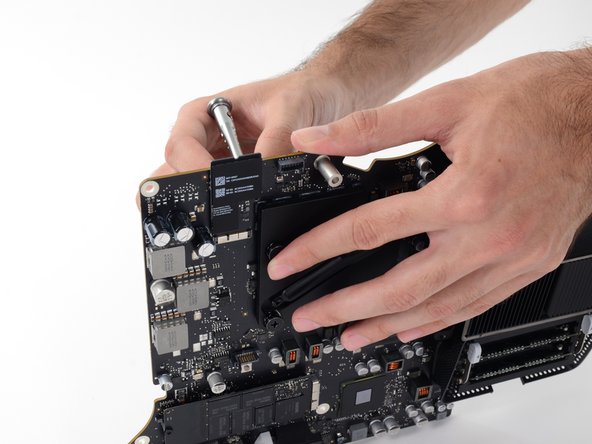
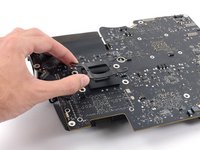
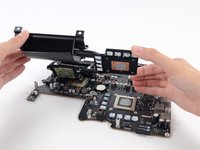
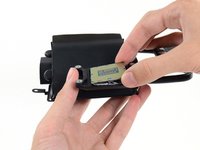
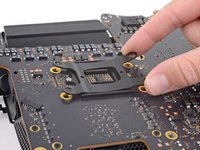
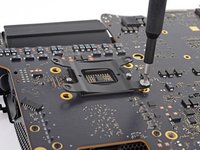
Insert the flat end of a spudger between the CPU and heat sink.
-
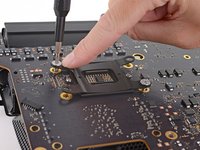
Gently pry the CPU up by slightly twisting the spudger.
-
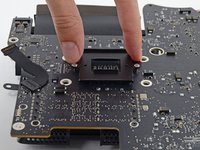
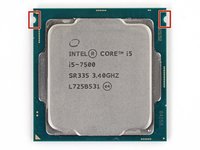
Remove the CPU from the heat sink. Be careful not to touch the contacts.
-
-
-
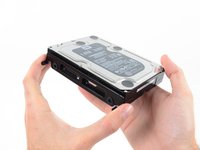
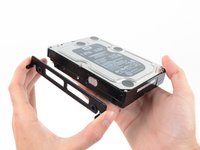
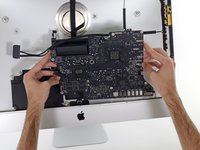
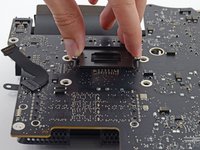
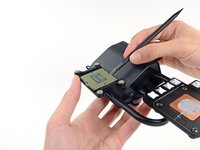
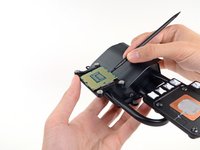
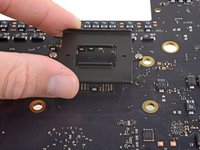
Replace the backing plate on the motherboard, and hold it in place while you turn the board over so the side with the CPU socket faces up.
-
-
-
Before installing the heat sink, see our thermal paste guide for instructions on cleaning and preparing the thermal surfaces and applying a new layer of thermal compound onto the CPU and GPU dies.
-
For the VRAM chips surrounding the GPU, install thermal pads or a thick thermal paste such as K5-PRO, rather than regular thermal paste.
-
The CPU
-
The GPU
-
The VRAM chips
-
The heat sink plates
-
-
-
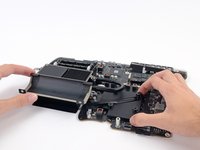
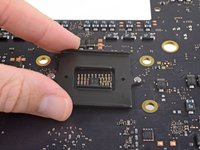
Align the holes on the CPU section of the heat sink with the pins on the backing plate.
-
Set the heat sink straight down on the CPU, GPU, and VRAM chips.
-
-
-
Place the spring plate on the backing plate.
-
Carefully thread one of the CPU heat sink screws slightly into the heat sink so that just a couple threads are engaged.
-
Press down on the opposite corner of the spring plate from where you just installed a screw.
-
While holding the corner down, thread another screw into that corner of the heat sink, again just tightening it until a couple threads are engaged.
-
-
-
Repeat the process of pressing down the spring plate and slightly threading in the screws to install the remaining two heat sink screws.
-
Tighten the screws down a little at a time in the same order that you installed them—in an "X" pattern starting at one corner and then crossing to the opposite corner.
-


To reassemble your device, follow these instructions in reverse and use our Adhesive Strips Guide to reattach the display glass.
Take your e-waste to an R2 or e-Stewards certified recycler.
Repair didn’t go as planned? Try some basic troubleshooting, or ask our Answers community for help.
To reassemble your device, follow these instructions in reverse and use our Adhesive Strips Guide to reattach the display glass.
Take your e-waste to an R2 or e-Stewards certified recycler.
Repair didn’t go as planned? Try some basic troubleshooting, or ask our Answers community for help.
İptal et: Bu kılavuzu tamamlamadım.
40 farklı kişi bu kılavuzu tamamladı.

27 Yorum
The thermal compound/paste that is used by Apple on the GPU and memory is less than stellar. I would highly recommend stressing the GPU Memory gap in this guide. As you can see in the images of the cooler, specifically the GPU side, apple uses a white paste compound for thermal transfer. The problem is that the cooler does not contact the memory for the GPU. Once you remove the cooler it breaks the compound in several spots, and it will never be as good as it was unless care is made, and you are aware of this prior to re-installation.
Furthermore, with the GTX775M and GTX780M equipped iMacs, the temperatures are already above normal without removing the cooler. If you try and push these chips with the added memory in the latest generation games you will get artifacts from overheating. Due to the gap between the memory and the cooler you are also unable to use Arctic Silver as a remedy, as the gap is too much, with the logic board being vertical. (Risking seepage down the board, which I have already seen when performing the proper fix on another iMac) The coverage and type of thermal compound Apple is using is not sufficient. In the factory state the thermal compound is centered on the memory, however only 40% of the actual module comes in contact of the memory and the cooler. What I have done on my iMac and a few others so far is use thermal tape.
Hello, i am upgradinf the imac at the moment and want to renew the thermal paste.
For the vram i want to use the thermal tape, could you twll me with thickness you used?
YES, I F*&^* hate thermal tape when compared to quality compound. With this only exception, the tape is more effective than the stock compound, and it is quarantined to make 100% contact, while dissipating heat properly. I have seen a drop of 15% under heavy use on the GPU since using the tape. YOU do not want to use cheap thermal tape! Standard tape only has a 3-5 watt thermal conductivity, which is equal to or less than a standard compound. You can go through frozencpu.com and purchase Fujipoly Extreme Thermal Pads which have a rating of 11. For use on the 27" iMacs, I went with 100 x 15 x 1.5 and (2) are needed to do completely cover both sides of the memory banks on the logic board.
Please, if you remove the cooler to replace the CPU you have to be aware of the GPU and the gap involved on the memory chips, and the potential of further gaps upon re-installation.