Ana içeriğe geç
Onarım Topluluğuna Katılın - Hesap Oluşturun

iPhone 12 Pro Rear-Facing Cameras Replacement

Neye ihtiyacın var

    1. iPhone 12 Pro Rear-Facing Cameras Replacement, Remove the pentalobe screws: adım 1, 1 resimden 1.
      • Caution: Before you begin, discharge your iPhone battery below 25%. A charged lithium-ion battery can catch fire and/or explode if accidentally punctured.

      • Power off your iPhone before beginning disassembly.

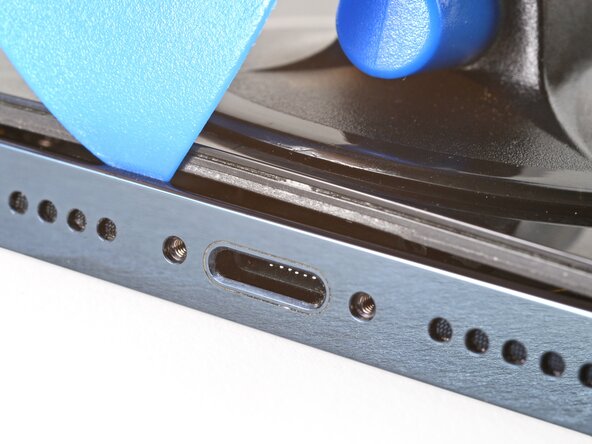
      • Remove the two 6.75 mm long pentalobe P2 screws at the bottom edge of the iPhone.

      • Opening the iPhone's display will compromise its waterproof seals. Have replacement seals ready before you proceed past this step, or take care to avoid liquid exposure if you reassemble your iPhone without replacing the seals.

      FixBot'a Sor

      Yorum Ekle

    1. iPhone 12 Pro Rear-Facing Cameras Replacement, Mark your opening picks: adım 2, 3 resimden 1. iPhone 12 Pro Rear-Facing Cameras Replacement, Mark your opening picks: adım 2, 3 resimden 2. iPhone 12 Pro Rear-Facing Cameras Replacement, Mark your opening picks: adım 2, 3 resimden 3.
      • If inserted too far, an opening pick can damage your device. Follow this step to mark your pick and prevent damage.

      • Measure 3 mm from the tip and mark the opening pick with a permanent marker.

      • You can also mark the other corners of the pick with different measurements.

      • Alternatively, tape a coin to a pick 3 mm from the tip.

      FixBot'a Sor

      Yorum Ekle

    1. iPhone 12 Pro Rear-Facing Cameras Replacement, Tape over any cracks: adım 3, 3 resimden 1. iPhone 12 Pro Rear-Facing Cameras Replacement, Tape over any cracks: adım 3, 3 resimden 2. iPhone 12 Pro Rear-Facing Cameras Replacement, Tape over any cracks: adım 3, 3 resimden 3.
      • If your iPhone has a cracked screen, keep further breakage contained and prevent bodily harm during your repair by taping over the glass.

      • Lay overlapping strips of clear packing tape over the iPhone's screen until the whole face is covered.

      • Wear safety glasses to protect your eyes from any glass shaken free during the repair.

      • If you can't get the suction cup to stick in the next few steps, fold a strong piece of tape (such as duct tape) into a handle and lift the screen with that instead.

      • If all else fails, you can superglue the suction cup to the screen.

      FixBot'a Sor

      Yorum Ekle

    2. iPhone 12 Pro Rear-Facing Cameras Replacement, Anti-Clamp instructions: adım 4, 3 resimden 1. iPhone 12 Pro Rear-Facing Cameras Replacement, Anti-Clamp instructions: adım 4, 3 resimden 2. iPhone 12 Pro Rear-Facing Cameras Replacement, Anti-Clamp instructions: adım 4, 3 resimden 3.
      Bu adımda kullanılan alet:
      Clampy - Anti-Clamp
      $24.95
      • The next three steps demonstrate the Anti-Clamp, a tool we designed to make the opening procedure easier. If you aren't using the Anti-Clamp, skip down three steps for an alternate method.

      • For complete instructions on how to use the Anti-Clamp, check out this guide.

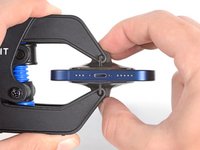
      • Pull the blue handle backwards to unlock the Anti-Clamp's arms.

      • Slide the arms over either the left or right edge of your iPhone.

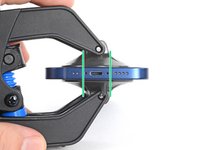
      • Position the suction cups near the bottom edge of the iPhone—one on the front, and one on the back.

      • Squeeze the cups together to apply suction to the desired area.

      • If you find that the surface of your iPhone is too slippery for the Anti-Clamp to hold onto, you can use tape to create a grippier surface.

      FixBot'a Sor

      Yorum Ekle

    3. iPhone 12 Pro Rear-Facing Cameras Replacement: adım 5, 3 resimden 1. iPhone 12 Pro Rear-Facing Cameras Replacement: adım 5, 3 resimden 2. iPhone 12 Pro Rear-Facing Cameras Replacement: adım 5, 3 resimden 3.
      • Pull the blue handle forwards to lock the arms.

      • Turn the handle clockwise 360 degrees or until the cups start to stretch.

      • Make sure the suction cups remain aligned with each other. If they begin to slip out of alignment, loosen the suction cups slightly and realign the arms.

      FixBot'a Sor

      Yorum Ekle

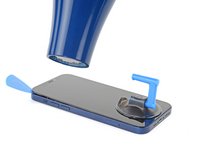
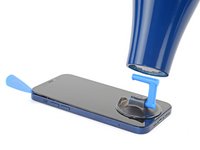
    4. iPhone 12 Pro Rear-Facing Cameras Replacement: adım 6, 3 resimden 1. iPhone 12 Pro Rear-Facing Cameras Replacement: adım 6, 3 resimden 2. iPhone 12 Pro Rear-Facing Cameras Replacement: adım 6, 3 resimden 3.
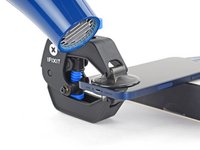
      • Support your iPhone on something sturdy such as a hardcover book so it rests hands-free and parallel to the ground; this makes it easier to work with in the following steps.

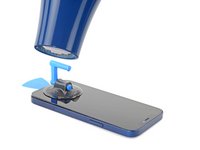
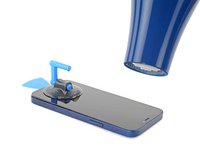
      • Use a hair dryer to heat along the bottom edge of the iPhone. The screen should feel slightly too hot to touch.

      • For complete instructions on how to use a hair dryer, check out this guide.

      • Wait one minute to give the adhesive a chance to release and present an opening gap.

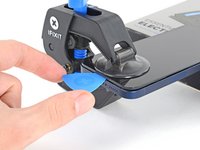
      • Insert an opening pick under the plastic screen bezel when the Anti-Clamp creates a large enough gap.

      • If the Anti-Clamp doesn't create a sufficient gap, apply more heat to the area and rotate the handle a quarter turn.

      • Don't crank more than a quarter turn at a time, and wait one minute between turns. Let the Anti-Clamp and time do the work for you.

      • Skip the next three steps.

      FixBot'a Sor

      Yorum Ekle

    5. iPhone 12 Pro Rear-Facing Cameras Replacement, Heat the bottom edge: adım 7, 1 resimden 1.
      • Use a hair dryer or heat gun to heat the bottom half of the screen until it’s slightly too hot to touch. This softens the adhesive securing it.

      • Improper use of a heat gun can destroy the display and/or battery—review this guide for instructions. To prevent screen damage, keep your heat source moving rather than focused on one spot.

      • For tips on using a hair dryer to soften adhesive, check out this guide.

      FixBot'a Sor

      Yorum Ekle

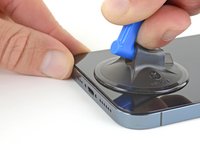
    6. iPhone 12 Pro Rear-Facing Cameras Replacement, Apply a suction handle: adım 8, 2 resimden 1. iPhone 12 Pro Rear-Facing Cameras Replacement, Apply a suction handle: adım 8, 2 resimden 2.
      • If you're using a single suction handle, apply it to the bottom edge of the screen.

      FixBot'a Sor

      Yorum Ekle

    7. iPhone 12 Pro Rear-Facing Cameras Replacement, Screen information: adım 9, 2 resimden 1. iPhone 12 Pro Rear-Facing Cameras Replacement, Screen information: adım 9, 2 resimden 2.
      • To avoid damaging your screen in the next step, note the following:

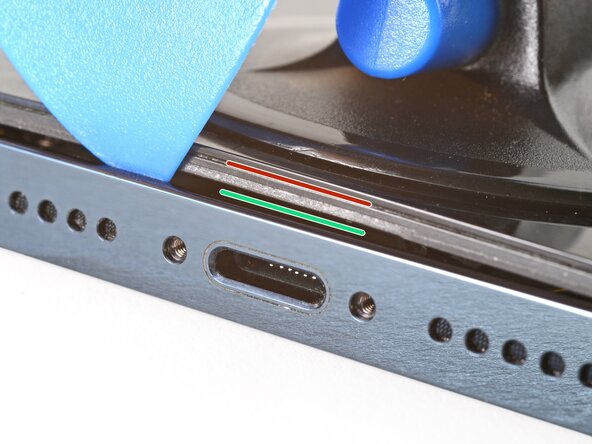
      • There's a plastic bezel on the underside of the screen. Your opening pick will go underneath this bezel.

      • There's a seam between the plastic bezel and the display panel. Don't insert your pick here or you'll damage the screen.

      • Sometimes the display panel separates from the bezel before you even get a chance to insert a pick. This may be unavoidable depending on the condition of the adhesive. In this case, you’ll most likely need to replace your entire screen.

      FixBot'a Sor

      Yorum Ekle

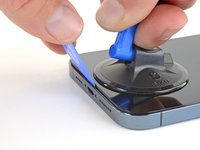
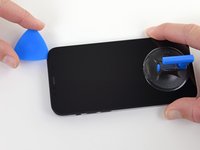
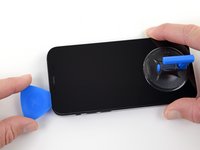
    8. iPhone 12 Pro Rear-Facing Cameras Replacement, Lift the screen slightly: adım 10, 3 resimden 1. iPhone 12 Pro Rear-Facing Cameras Replacement, Lift the screen slightly: adım 10, 3 resimden 2. iPhone 12 Pro Rear-Facing Cameras Replacement, Lift the screen slightly: adım 10, 3 resimden 3.
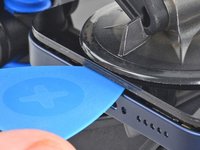
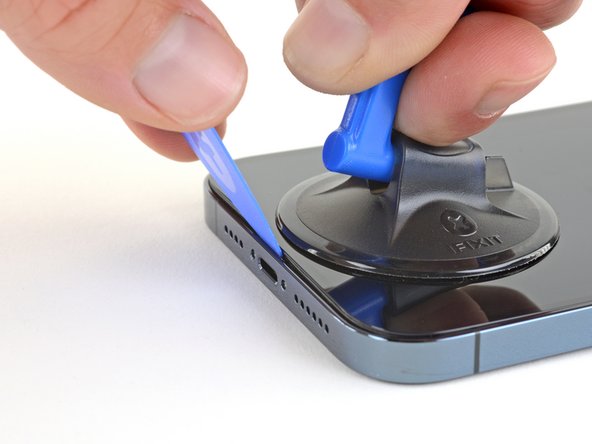
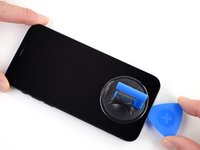
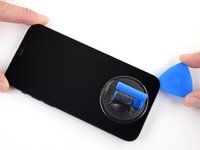
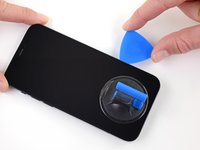
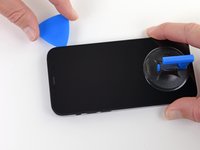
      • Pull up on the suction cup with firm, constant pressure to create a slight gap between the screen and the frame.

      • Insert an opening pick at a steep angle into the gap.

      • Remember to insert the opening pick under the thick plastic bezel to avoid damaging your screen.

      FixBot'a Sor

      Yorum Ekle

    9. iPhone 12 Pro Rear-Facing Cameras Replacement, Separate the bottom edge adhesive: adım 11, 3 resimden 1. iPhone 12 Pro Rear-Facing Cameras Replacement, Separate the bottom edge adhesive: adım 11, 3 resimden 2. iPhone 12 Pro Rear-Facing Cameras Replacement, Separate the bottom edge adhesive: adım 11, 3 resimden 3.
      • Don't insert your opening pick deeper than 3 mm along the bottom edge.

      • Slide your pick back and forth along the bottom edge to separate the adhesive.

      • Leave your pick inserted in the bottom right corner to prevent the adhesive from re-sealing.

      FixBot'a Sor

      Yorum Ekle

    10. iPhone 12 Pro Rear-Facing Cameras Replacement, Heat the right edge: adım 12, 2 resimden 1. iPhone 12 Pro Rear-Facing Cameras Replacement, Heat the right edge: adım 12, 2 resimden 2.
      • Use a hair dryer to heat the right edge of the iPhone (the edge with the power button) until the screen is slightly too hot to touch.

      FixBot'a Sor

      Yorum Ekle

    11. iPhone 12 Pro Rear-Facing Cameras Replacement, Separate the right adhesive: adım 13, 3 resimden 1. iPhone 12 Pro Rear-Facing Cameras Replacement, Separate the right adhesive: adım 13, 3 resimden 2. iPhone 12 Pro Rear-Facing Cameras Replacement, Separate the right adhesive: adım 13, 3 resimden 3.
      • Slide the opening pick around the bottom right corner of the iPhone to separate its adhesive.

      • Continue sliding up the right edge of the iPhone until you reach the top right corner.

      • Don't insert your pick more than 3 mm, as you may damage internal components.

      • Leave the pick in the top right corner before continuing.

      FixBot'a Sor

      Yorum Ekle

    12. iPhone 12 Pro Rear-Facing Cameras Replacement, Heat the top edge: adım 14, 1 resimden 1.
      • Use a hair dryer to heat the top edge of the iPhone until the screen is slightly too hot to touch.

      FixBot'a Sor

      Yorum Ekle

    13. iPhone 12 Pro Rear-Facing Cameras Replacement: adım 15, 3 resimden 1. iPhone 12 Pro Rear-Facing Cameras Replacement: adım 15, 3 resimden 2. iPhone 12 Pro Rear-Facing Cameras Replacement: adım 15, 3 resimden 3.
      • Slide the opening pick around the top right corner of the iPhone to separate the top adhesive.

      • Leave the pick in the top left corner before continuing.

      • Don't insert your pick more than 3 mm, as you may damage the top sensors.

      FixBot'a Sor

      Yorum Ekle

    14. iPhone 12 Pro Rear-Facing Cameras Replacement, Heat the left edge: adım 16, 2 resimden 1. iPhone 12 Pro Rear-Facing Cameras Replacement, Heat the left edge: adım 16, 2 resimden 2.
      • Use a hair dryer to heat the left edge of the iPhone until the screen is slightly too hot to touch.

      FixBot'a Sor

      Yorum Ekle

    15. iPhone 12 Pro Rear-Facing Cameras Replacement, Separate the left adhesive: adım 17, 3 resimden 1. iPhone 12 Pro Rear-Facing Cameras Replacement, Separate the left adhesive: adım 17, 3 resimden 2. iPhone 12 Pro Rear-Facing Cameras Replacement, Separate the left adhesive: adım 17, 3 resimden 3.
      • Don't insert your pick deeper than 2 mm along the left edge to avoid the two cables connecting the screen to the phone.

      • Rotate your pick around the top left corner of the screen.

      • Slide your pick to the bottom left corner of the screen to separate the adhesive.

      • If you're having trouble separating the adhesive, reheat the left edge.

      FixBot'a Sor

      Yorum Ekle

    16. iPhone 12 Pro Rear-Facing Cameras Replacement, Open the iPhone: adım 18, 3 resimden 1. iPhone 12 Pro Rear-Facing Cameras Replacement, Open the iPhone: adım 18, 3 resimden 2. iPhone 12 Pro Rear-Facing Cameras Replacement, Open the iPhone: adım 18, 3 resimden 3.
      • Rotate your iPhone so the right edge faces you.

      • Open the iPhone by swinging the display up from the right side, like the front cover of a book.

      • Don't try to fully separate the display yet, as several fragile ribbon cables still connect it to the iPhone's logic board.

      • Lean the display against something to keep it propped up while you're working on the phone.

      • During reassembly, lay the display in position, align the clips along the top edge, and carefully press the top edge into place before snapping the rest of the display down. If it doesn't click easily into place, check the condition of the clips around the perimeter of the display and make sure they aren't bent.

      FixBot'a Sor

      Yorum Ekle

    17. iPhone 12 Pro Rear-Facing Cameras Replacement, Unscrew the battery and display connector cover: adım 19, 1 resimden 1.
      Bu adımda kullanılan alet:
      Magnetic Project Mat
      $19.95
      • Remove two 1.1 mm long Y000 screws securing the battery and display connector cover.

      • Throughout this repair, keep track of each screw and make sure it goes back exactly where it came from to avoid damaging your iPhone.

      • During reassembly, this is a good point to power on your iPhone and test all functions before you seal the display in place. Be sure to power your iPhone back down completely before you continue working.

      FixBot'a Sor

      Yorum Ekle

    18. iPhone 12 Pro Rear-Facing Cameras Replacement, Remove the battery connector cover: adım 20, 1 resimden 1.
      • Remove the cover.

      FixBot'a Sor

      Yorum Ekle

    19. iPhone 12 Pro Rear-Facing Cameras Replacement, Disconnect the battery: adım 21, 2 resimden 1. iPhone 12 Pro Rear-Facing Cameras Replacement, Disconnect the battery: adım 21, 2 resimden 2.
      • Use a spudger or a clean fingernail to pry the battery connector up from its socket on the logic board.

      • Try not to damage the black silicone seal surrounding this and other board connections. These seals provide extra protection against water and dust intrusion.

      • Bend the connector slightly away from the logic board to prevent it from accidentally making contact with the socket and providing power to the phone during your repair.

      FixBot'a Sor

      Yorum Ekle

    20. iPhone 12 Pro Rear-Facing Cameras Replacement, Disconnect the display cable: adım 22, 2 resimden 1. iPhone 12 Pro Rear-Facing Cameras Replacement, Disconnect the display cable: adım 22, 2 resimden 2.
      • Use a spudger or a fingernail to disconnect the display cable connector.

      • To re-attach press connectors like this one, carefully align and press down on one side until it clicks into place, then repeat on the other side. Do not press down on the middle. If the connector is misaligned, the pins can bend, causing permanent damage.

      FixBot'a Sor

      Yorum Ekle

    21. iPhone 12 Pro Rear-Facing Cameras Replacement, Disconnect the digitizer cable: adım 23, 2 resimden 1. iPhone 12 Pro Rear-Facing Cameras Replacement, Disconnect the digitizer cable: adım 23, 2 resimden 2.
      • Use a spudger or a fingernail to disconnect the digitizer cable connector.

      • If any part of your screen doesn't respond to touch after your repair, disconnect the battery and then re-seat this connector, making sure it clicks fully into place and that there's no dust or other obstruction in the socket.

      FixBot'a Sor

      Yorum Ekle

    22. iPhone 12 Pro Rear-Facing Cameras Replacement, Unscrew the front sensor connector cover: adım 24, 1 resimden 1.
      • Use a Y000 driver to remove four screws securing the front sensor connector cover.

      • Three 1.1 mm-long screws

      • One 1.4 mm-long screw

      FixBot'a Sor

      Yorum Ekle

    23. iPhone 12 Pro Rear-Facing Cameras Replacement, Remove the front sensor connector cover: adım 25, 3 resimden 1. iPhone 12 Pro Rear-Facing Cameras Replacement, Remove the front sensor connector cover: adım 25, 3 resimden 2. iPhone 12 Pro Rear-Facing Cameras Replacement, Remove the front sensor connector cover: adım 25, 3 resimden 3.
      • Swing the cover up from the left until the small clip on the right unhooks.

      • Remove the cover.

      • During reassembly, insert the clip on the right edge into its slot first, then hinge the rest of the cover into place.

      FixBot'a Sor

      Yorum Ekle

    24. iPhone 12 Pro Rear-Facing Cameras Replacement, Disconnect the front sensors: adım 26, 2 resimden 1. iPhone 12 Pro Rear-Facing Cameras Replacement, Disconnect the front sensors: adım 26, 2 resimden 2.
      • Use a spudger or a fingernail to disconnect the front sensor assembly cable connector.

      FixBot'a Sor

      Yorum Ekle

    25. iPhone 12 Pro Rear-Facing Cameras Replacement, Remove the display assembly: adım 27, 1 resimden 1.
      FixBot'a Sor

      Yorum Ekle

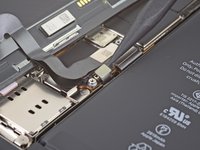
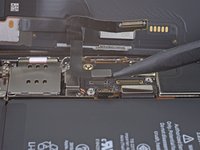
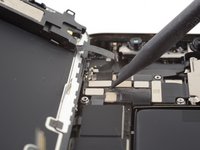
    1. iPhone 12 Pro Rear-Facing Cameras Replacement, Unscrew the camera cover: adım 28, 1 resimden 1.
      • Use a Y000 driver to remove the four screws securing the rear-facing camera sensor.

      • Three 1.6 mm long screws

      • One 1.4 mm screw

      FixBot'a Sor

      Yorum Ekle

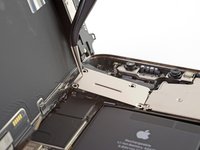
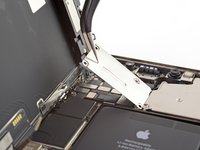
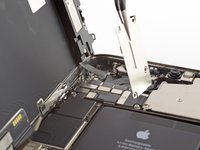
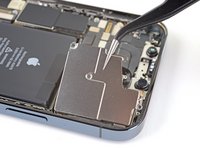
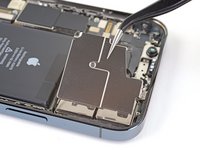
    2. iPhone 12 Pro Rear-Facing Cameras Replacement, Remove the camera cover: adım 29, 2 resimden 1. iPhone 12 Pro Rear-Facing Cameras Replacement, Remove the camera cover: adım 29, 2 resimden 2.
      • Lift the camera cover from the edge closest to the logic board, and remove it.

      • To reinstall the camera cover, first insert the tab on the outside edge into its slot in the phone frame. Then hinge the cover closed.

      FixBot'a Sor

      Yorum Ekle

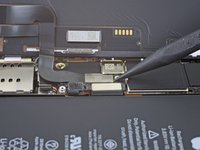
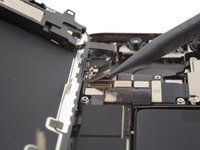
    3. iPhone 12 Pro Rear-Facing Cameras Replacement, Disconnect the camera assembly: adım 30, 2 resimden 1. iPhone 12 Pro Rear-Facing Cameras Replacement, Disconnect the camera assembly: adım 30, 2 resimden 2.
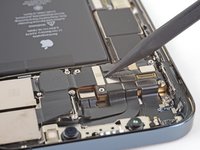
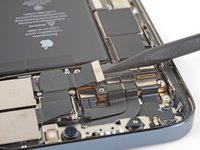
      • Use a spudger or a fingernail to disconnect the first camera cable connector by prying it straight up from its socket.

      FixBot'a Sor

      Yorum Ekle

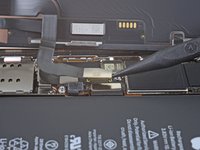
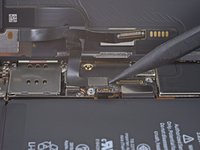
    4. iPhone 12 Pro Rear-Facing Cameras Replacement: adım 31, 2 resimden 1. iPhone 12 Pro Rear-Facing Cameras Replacement: adım 31, 2 resimden 2.
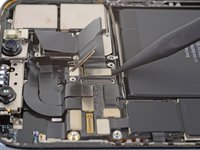
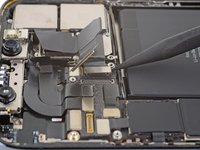
      • Use a spudger or a fingernail to disconnect the second camera cable connector by prying it straight up from its socket.

      FixBot'a Sor

      Yorum Ekle

    5. iPhone 12 Pro Rear-Facing Cameras Replacement, Remove the rear-facing cameras: adım 32, 3 resimden 1. iPhone 12 Pro Rear-Facing Cameras Replacement, Remove the rear-facing cameras: adım 32, 3 resimden 2. iPhone 12 Pro Rear-Facing Cameras Replacement, Remove the rear-facing cameras: adım 32, 3 resimden 3.
      • Use the tip of a spudger to lift the camera assembly out of the iPhone.

      • Remove the rear-facing cameras.

      FixBot'a Sor

      Yorum Ekle

Sonuç

Compare your new replacement part to the original part—you may need to transfer remaining components or remove adhesive backings from the new part before installing.

To reassemble your device, follow the above steps in reverse order.

After your repair, depending on the replacement part, you may be able to calibrate it using Apple's Repair Assistant, available as of iOS 18. Update your device, navigate to Settings General About Parts & Service History, tap Restart & Finish Repair, and follow the onscreen prompts.

Take your e-waste to an R2 or e-Stewards certified recycler.

Repair didn’t go as planned? Try some basic troubleshooting, or ask our iPhone 12 Pro Answers community for help.

İptal et: Bu kılavuzu tamamlamadım.

14 farklı kişi bu kılavuzu tamamladı.

Adam O'Camb

Üyelik tarihi: 04/11/15

224.296 İtibar

416 adet Kılavuz yazıldı

4Kılavuz Yorumları

!WARNING! TL;DR using the iFixIt camera and this guide will result in a never-ending warning on your lock screen and system messages about it not being a genuine Apple camera.

The guide is great. Apple’s right to repair tenticals aren’t. I had the joy of having a friend ship the part from the US to Europe, since the parts weren’t available from iFixIt Europe — parts + shipping, +shipping to europe +import fees (Another $100+ on top of the cost). Turning the phone on for the first time revealed a pop-up about a non-Genuine camera. Then I proceeded to find a badge on settings which is permanently warning me that the camera isn’t genuine. The worst part, a push-style notification constantly on the lock screen notifying me of a non-genuine Apple camera. Needless to say, I’m incredibly unhappy.

Apollo Enhet - Yanıt Paylaş
Hi. Is the push message on the Lock Screen similar to the screen replacement message, in that it only continues for 4 days?

bearzac - Yanıt Paylaş

Excellent demonstration

Jabulani Vilagazi - Yanıt Paylaş

How to fix

Face ID Is Not Available

Try setting up Face ID later.

Rahman Ihsan - Yanıt Paylaş

Yorum Ekle

İstatistikleri Görüntüle:

Son 24 Saat: 20

Son 7 gün: 134

Son 30 gün: 621

Her zaman: 55,082