Giriş
For an easier repair, use our fix kit and follow this shorter guide to replace your iPhone 5’s entire screen.
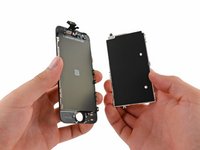
For more advanced fixers, this guide will help you replace only the iPhone’s LCD + digitizer assembly (a.k.a. the bare “front panel”). This requires you to transfer several components from your original screen to the new one before installing it—including the front-facing camera, earpiece speaker, LCD shield plate, and home button assembly.
You can also use this guide to replace the front panel assembly cable bracket.
Need a guide for the iPhone 5s LCD and digitizer instead? We got you covered!
Neye ihtiyacın var
Videoya Genel Bakış
-
-
-
Lay overlapping strips of clear packing tape over the iPhone's display until the whole face is covered.
 FixBot'a Sor
-
-
-
Power off your iPhone before beginning disassembly.
-
Remove the two 3.6 mm Pentalobe screws next to the Lightning connector.
-
-
-
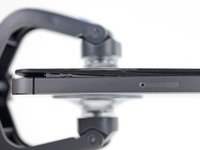
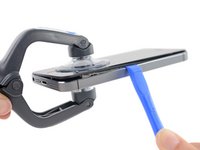
Regardless of the tool you use, you need to be sure you pull up the entire display.
-
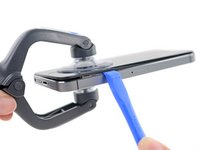
If the glass begins to separate from the plastic, as shown in the first image, slide a plastic opening tool between the plastic frame and the metal phone body to pry the metal clips out of the case.
-
-
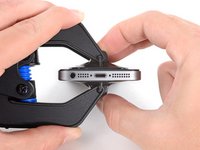
Bu adımda kullanılan alet:Clampy - Anti-Clamp$24.95
-
Pull the blue handle backwards to unlock the Anti-Clamp's arms.
-
Slide the arms over either the left or right edge of your iPhone.
-
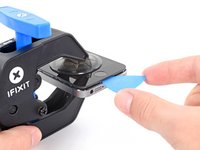
Position the suction cups near the bottom edge of the iPhone just above the home button—one on the front, and one on the back.
-
Squeeze the cups together to apply suction to the desired area.
-
-
-
Pull the blue handle forwards to lock the arms.
-
Turn the handle clockwise 360 degrees or until the cups start to stretch.
-
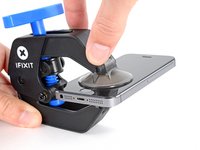
Insert an opening pick under the screen when the Anti-Clamp creates a large enough gap.
-
Skip the next two steps.
-
-
-
Press a suction cup onto the screen, just above the home button.
-
-
-
While holding the iPhone down with one hand, pull up on the suction cup to slightly separate the front panel assembly from the rear case.
-
With a plastic opening tool, begin to gently pry the rear case down, away from the screen, while you pull up with the suction cup.
-
-
-
Continue to pry up around the sides of the front panel assembly, detaching the clips along the left and right side.
-
-
-
Once the clips have been released on the bottom and sides of the front panel assembly, pull the bottom of the assembly away from the rear case.
-
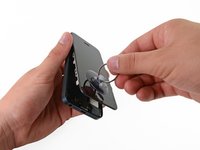
Open the display to about a 90º angle, and lean it against something to keep it propped up while you're working on the phone.
-
Add a rubber band to keep the display securely in place while you work. This prevents undue strain on the display cables.
-
-
-
Remove the following two screws securing the metal battery connector bracket to the logic board:
-
One 1.8 mm Phillips screw
-
One 1.6 mm Phillips screw
-
-
-
-
Remove the metal battery connector bracket from the iPhone.
-
-
-
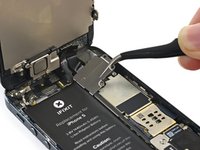
Use a plastic opening tool to gently pry the battery connector up from its socket on the logic board.
-
-
-
Remove the following screws securing the front panel assembly cable bracket to the logic board:
-
Two 1.2 mm Phillips screws
-
One 1.6 mm Phillips screw
-
-
-
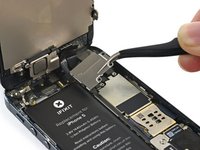
Lift the display cable bracket toward the battery to unhook it, and remove it from the iPhone.
-
-
-
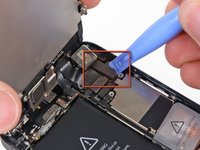
Use a plastic opening tool or a fingernail to disconnect the three front panel assembly cables:
-
Front-facing camera and sensor cable
-
LCD cable
-
Digitizer cable
-
-
-
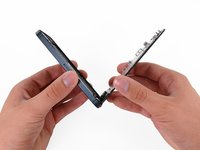
Remove the front panel assembly from the rear case.
-
-
-
-
-
Remove two screws securing the front-facing camera bracket to the display assembly.
-
One 4.1 mm Phillips screw
-
One 2.2 mm Phillips screw
-
-
-
There is a small, black plastic spacer underneath the metal bracket at the upper screw. The upper screw goes through the metal bracket then through this plastic spacer.
-
-
-
-
-
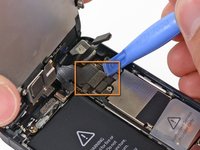
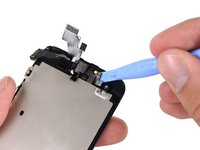
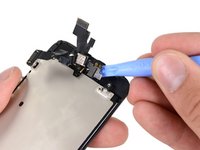
Starting under the earpiece speaker contacts, use a plastic opening tool or the tip of a spudger to pry the front facing camera cable out of the display assembly.
-
-
-
-
-
Remove the two 1.3 mm Phillips #000 screws securing the home button bracket to the display assembly.
-
NOTE: When reinstalling the two 1.3 mm Phillips #000 screws, take care not to over tighten them as they can penetrate the other side of the display.
-
-
-
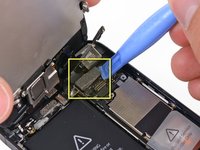
Use a plastic opening tool to pry the edge of the home button ribbon cable up from the display assembly.
-
Start on the right, at the area of the ribbon cable between the gold contact points, and work to the left.
-
-
-
-
-
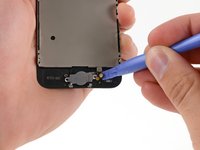
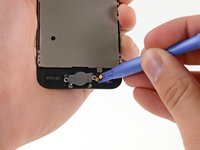
Use a plastic opening tool to pry the home button up from the display assembly.
-
-
-
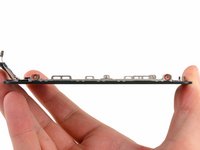
Remove two 1.2 mm Phillips screws from each side of the LCD frame (four total).
-
-
-
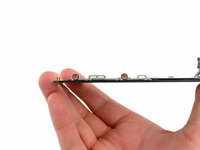
Remove the two screws securing the LCD shield plate to the display assembly:
-
One 1.4 mm Phillips screw
-
One 2.6 mm Phillips screw
-
-
-
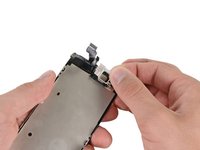
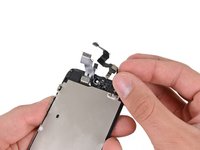
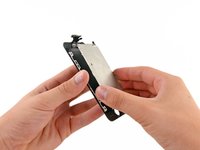
The bare display assembly remains.
-
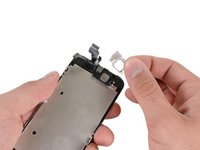
Make sure to remove the protective cover from your new display assembly as well as the protective cover on the back of the LCD.
-
Note: When reassembled, the screen may not turn on. Try fixing this by plugging your phone in, and holding down the power and home buttons at the same time for 20 seconds.
-
-


To reassemble your device, follow these instructions in reverse order.
İptal et: Bu kılavuzu tamamlamadım.
1573 farklı kişi bu kılavuzu tamamladı.


141Kılavuz Yorumları
As far as screens go, with the technology and build quality involved, I dont see this screen going under $200. Wasn't difficult at all, but there are still many steps involved. Great guide ifixit!
Actually right now they are $30 for Grade A.
iPhone 8 screen replacements now less than $20 :)