Giriş
Use this guide to replace the Lightning connector assembly, which also includes the headphone jack and microphone. If you've tried cleaning the lightning port to no avail, replacing the Lightning connector can solve charging and connectivity issues.
You can also use this guide for reference when replacing the following parts:
- Battery Connector Bracket
- Front Panel Assembly Cable Bracket
- Lightning Connector Bracket
- Microphone Brace
Neye ihtiyacın var
-
-
Power off your iPhone before beginning disassembly.
-
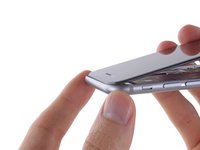
Remove the two 3.6 mm-long P2 Pentalobe screws next to the Lightning connector.
-
-
Bu adımda kullanılan alet:Clampy - Anti-Clamp$24.95
-
Pull the blue handle backwards to unlock the Anti-Clamp's arms.
-
Slide the arms over either the left or right edge of your iPhone.
-
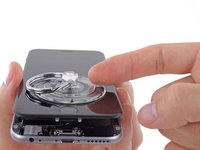
Position the suction cups near the bottom edge of the iPhone just above the home button—one on the front, and one on the back.
-
Squeeze the cups together to apply suction to the desired area.
-
-
Bu adımda kullanılan alet:Clampy - Anti-Clamp$24.95
-
If you don't have an Anti-Clamp, use a single suction cup to lift the front panel:
-
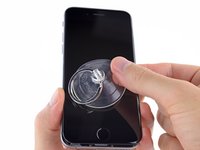
Press a suction cup onto the screen, just above the home button.
-
-
-
While holding the iPhone down with one hand, pull up on the suction cup to slightly separate the front panel assembly from the rear case.
-
Using a plastic opening tool, begin to gently pry the rear case down, away from the display assembly, while continuing to pull up with the suction cup.
-
-
-
Open the iPhone by swinging the home button end of the front panel assembly away from the rear case, using the top of the phone as a hinge.
-
-
Bu adımda kullanılan alet:Magnetic Project Mat$19.95
-
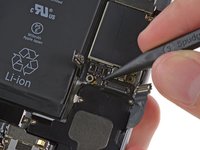
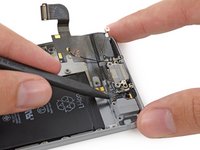
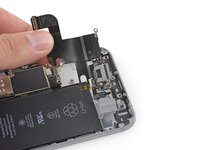
Remove the following Phillips screws from the battery connector bracket:
-
One 2.2 mm screw
-
One 3.2 mm screw
-
-
-
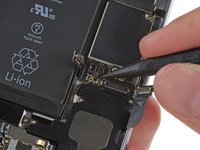
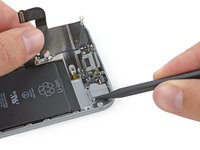
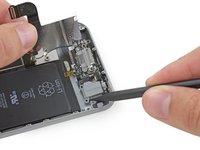
Use a plastic opening tool to gently pry the battery connector up from its socket on the logic board.
-
-
-
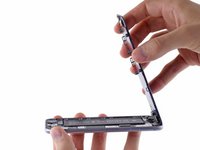
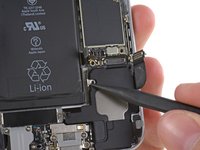
Remove the following five Phillips screws securing the front panel assembly cable bracket:
-
Three 1.2 mm screws
-
One 1.7 mm screw
-
One 3.1 mm screw
-
-
-
-
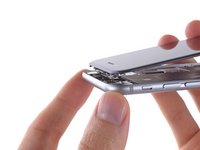
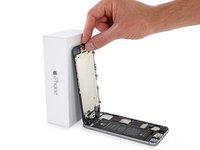
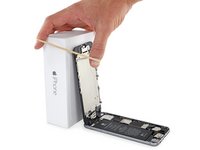
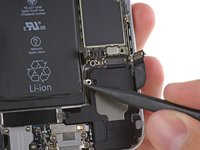
Remove the front panel assembly from the rear case.
-
-
-
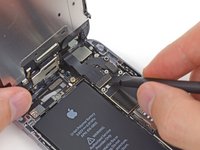
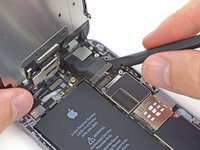
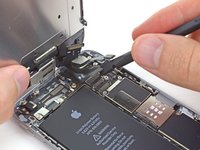
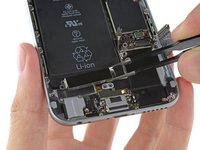
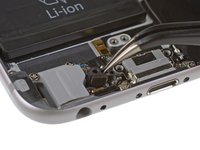
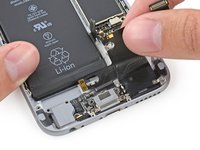
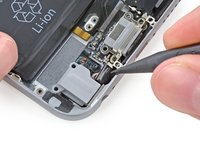
Use the flat end of a spudger to disconnect the Lightning connector assembly cable and fold it out of the way of the speaker.
-
-
-
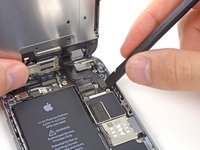
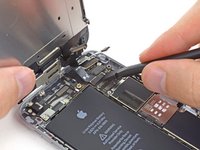
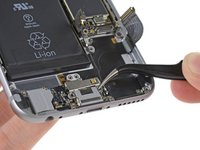
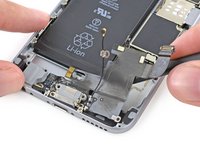
Remove the two 1.6 mm Phillips #00 screws securing the vibrator to the rear case.
-
-
-
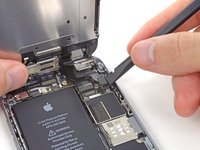
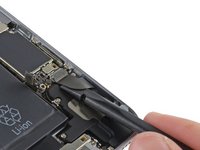
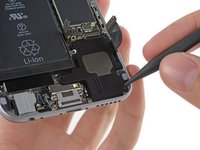
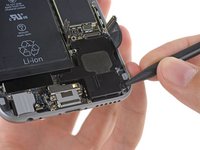
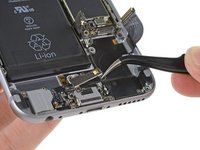
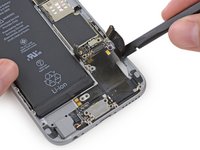
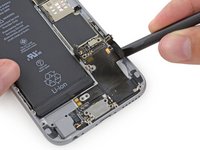
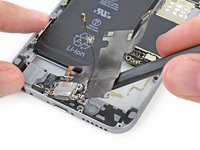
Use the tip of a spudger to help guide the headphone jack out of its recess in the rear case.
-
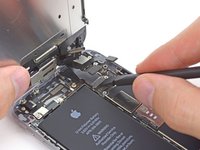
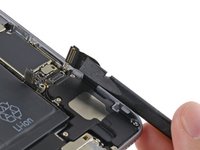
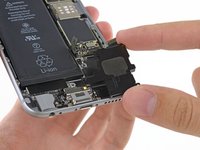
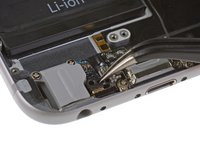
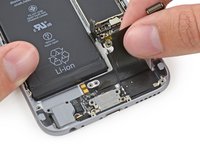
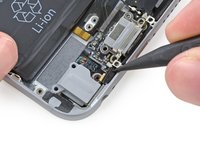
Remove the Lightning connector assembly from the iPhone.
-
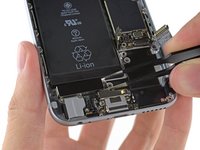
Use a plastic tool to scour any bits of adhesive residue from the rear case behind the cable.
-
Carefully compare your replacement part to your original cable and make sure they match. Your replacement Lightning connector assembly may be missing certain components that need to be transferred from the original.
-
Components that commonly need to be transferred include the headphone jack gasket, microphone bracket, and antenna interconnect clip.
-


To reassemble your device, follow these instructions in reverse order.
To reassemble your device, follow these instructions in reverse order.
İptal et: Bu kılavuzu tamamlamadım.
756 farklı kişi bu kılavuzu tamamladı.
Ekli Belgeler


135 Yorum
It isn't necessary to remove the screen as long as you can support it properly while doing the rest of the work. In my experience, unnecessarily removing screens can do more harm than good and causes extra work for yourself
I was trying to find exactly this message. Thanks!
I agree with this comment. If you can support it, don’t disconnect the screen connectors. I took the screen off and had two vertical white lines on my display when I was finished. I had to re-seat the connector multiple times to get the problem to go away. It’s working great now.
deshave -
I changed the charge port on an iphone 6. Apple diagnose the charge port not working to the owner of this iPhone. Now that its changed the phone still wont turn on. It doesnt even show the battery icon that it needs to be charged. What is a most likely scenario for this? Is it a bad LCD? A bad Battery? Someone help me.