Giriş
Follow the steps in this guide to replace the Home Button Assembly, including the gasket and cable, in your iPhone 6s Plus. Note that home buttons are paired with their respective logic board, so Touch ID will no longer work after you replace the Home Button Assembly.
You can also use this guide to replace the home button bracket.
Neye ihtiyacın var
-
-
Power off your iPhone before beginning disassembly.
-
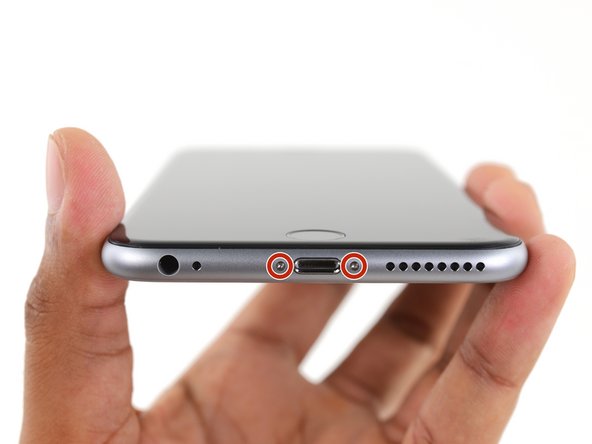
Remove the two 3.4 mm Pentalobe screws on either side of the Lightning port.
-
-
Bu adımda kullanılan alet:Clampy - Anti-Clamp$24.95
-
Pull the blue handle backwards to unlock the Anti-Clamp's arms.
-
Slide the arms over either the left or right edge of your iPhone.
-
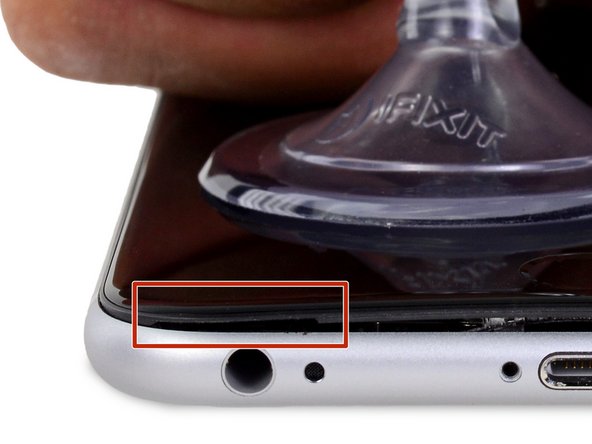
Position the suction cups near the bottom edge of the iPhone just above the home button—one on the front, and one on the back.
-
Squeeze the cups together to apply suction to the desired area.
-
-
Bu adımda kullanılan alet:Clampy - Anti-Clamp$24.95
-
If you don't have an Anti-Clamp, follow the next three steps to use a suction handle.
-
Apply mild heat to the lower edge of the iPhone using an iOpener or hair dryer for about a minute.
-
-
-
-
Gently grasp the display assembly and lift it up to open the phone, using the clips at the top of the front panel as a hinge.
-
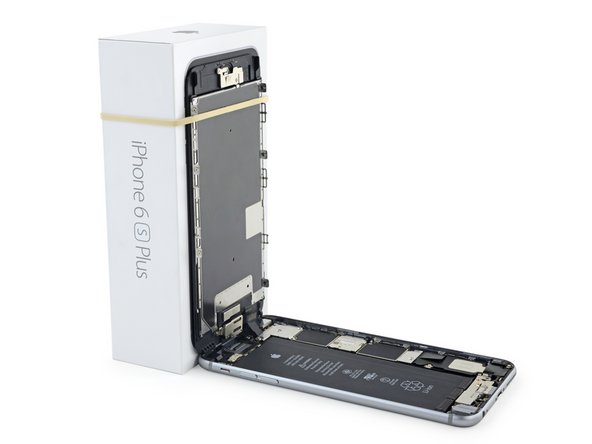
Open the display to about a 90º angle, and lean it against something to keep it propped up while you're working on the phone.
-
Add a rubber band to keep the display securely in place while you work. This prevents undue strain on the display cables.
-
-
Bu adımda kullanılan alet:Magnetic Project Mat$19.95
-
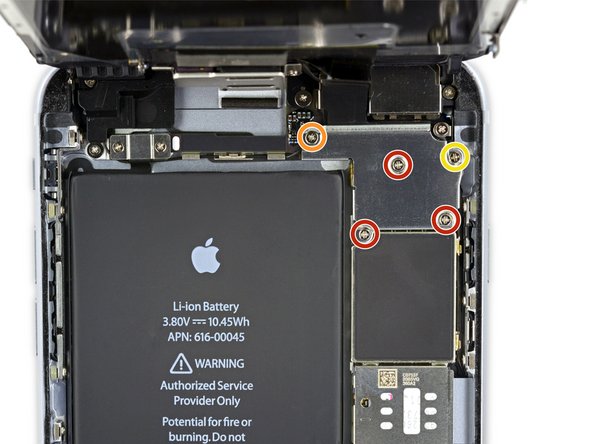
Remove two Phillips screws securing the battery connector bracket to the logic board, of the following lengths:
-
One 2.9 mm screw
-
One 2.3 mm screw
-
-
-
Remove the following Phillips screws:
-
Three 1.3 mm screws
-
One 1.6 mm screw
-
One 3.0 mm screw
-
-
-
Remove the two 1.9 mm Phillips screws securing the home button bracket.
-
-
Bu adımda kullanılan alet:iOpener$17.99
-
Apply mild heat (with an iOpener, heat gun, or hair dryer) to soften the adhesive securing the home button gasket.
-
Using your fingertip, gently press up on the home button from the front side of the display assembly. Use firm, constant pressure to slowly separate the home button's rubber gasket from the front panel.
-
To reassemble your device, follow these instructions in reverse order.
To reassemble your device, follow these instructions in reverse order.
İptal et: Bu kılavuzu tamamlamadım.
76 farklı kişi bu kılavuzu tamamladı.
14Kılavuz Yorumları
I swear a night time operation for a home button transfer was not easy! But... I pulled it off!
Which part is difficult?
The only problem I experienced was that you have to re-use the black gasket around the home button. It was tricky to have to place it on the new home button, but I got it after a few tries.
No, the fingerprint scanner and logic board are paired during their manufacturing so if the original scanner is destroyed, you will never have Touch ID again. But you should regain the functionality of the button.


