Giriş
A damaged or malfunctioning prop arm is a common issue caused by crashes or strenuous flight with your DJI Mavic Mini and will put the drone out of commission until resolved. This guide will walk you through the steps to remove and replace any prop arms you may need to fix to get your drone back in the air.
A basic knowledge of soldering is recommended before beginning this repair as several connection on the main board must be removed and re-soldered and major errors in this process could permanently impact the drone. iFixit's guide to soldering is linked here as well as later in the guide if you need to learn or refresh your skills.
Neye ihtiyacın var
-
-
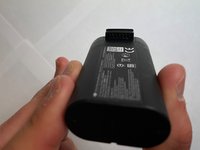
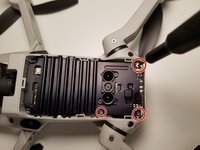
Orient the DJI Mavic Mini so that the camera faces away.
-
Use your finger to depress the lip on the panel until the lid becomes ajar.
-
Flip the panel up to expose the battery module.
-
-
-
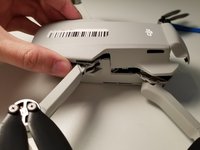
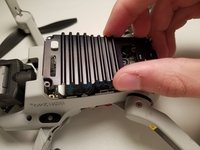
Remove the top panel of the drone by prying open the seam around the device using your fingers or an iFixit opening tool.
-
-
-
-
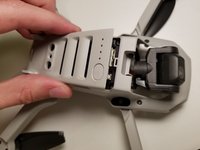
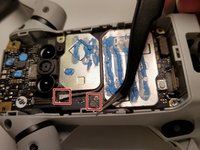
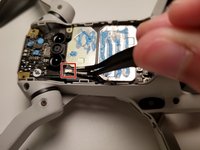
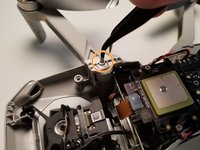
Flip the drone over and use a soldering kit to remove the power cables from the motherboard.
-
If new to soldering, a helpful guide can be found at Soldering Skills.
-
-
-
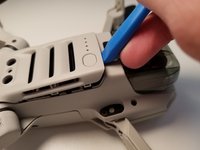
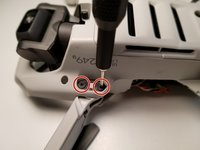
Orient the drone so that the props face the upside down and remove the two 3.5 mm J000 screws from the prop arm being replaced.
-
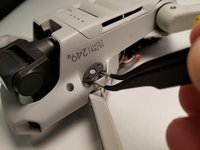
Flip the drone over and use the tweezers to apply pressure to the metal core of the prop arm pin.
-
Flip the drone back over and use fingers or tweezers to remove the prop arm pin from its socket.
-


To reassemble your device, follow these instructions in reverse order.
To reassemble your device, follow these instructions in reverse order.
İptal et: Bu kılavuzu tamamlamadım.
Bir başkası bu kılavuzu tamamladı.

Ekip

Clemson, Team 1-2, Hunter Spring 2022 Clemson, Team 1-2, Hunter Spring 2022 üyesi
CLEM-HUNTER-S22S1G2
5 Üyeler
8 adet Kılavuz yazıldı