Ana içeriğe geç
Lenovo Legion Y7000P Left Fan Replacement

Lenovo Legion Y7000P Left Fan Replacement

Spencer Day

Spencer Day ve başka bir katkıda bulunan

En son March 18, 2024 tarihinde güncellendi

25 - 35 dakika
Orta

Use this guide to replace a broken left fan in your Lenovo Legion Y7000P laptop.

If your screen is facing you, this is the fan on the left side of the laptop.

You may need to replace the fan if your laptop is overheating.

Neye ihtiyacın var

Parçalar

Aletler

Daha fazlasını göster…

iFixit bu bağlantılar üzerinden satın aldığınızda komisyon kazanır.
  1. Lenovo Legion Y7000P Left Fan Replacement, Prepare your laptop for disassembly: adım 1, 2 resimden 1. Lenovo Legion Y7000P Left Fan Replacement, Prepare your laptop for disassembly: adım 1, 2 resimden 2.
    • Allow your laptop's battery to drain below 25% before starting this repair—a charged battery may catch fire if damaged.

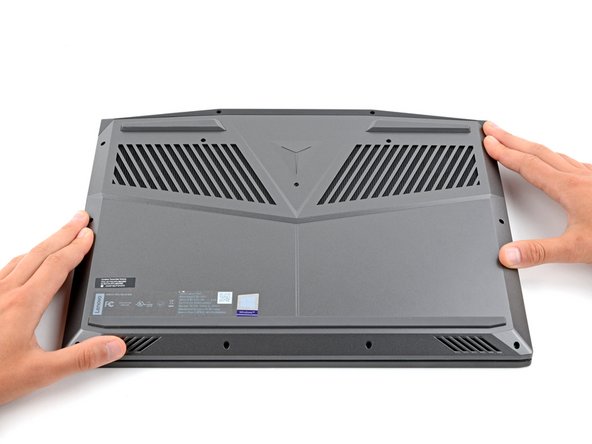
    • Unplug all cables and fully shut down your laptop.

  2. Lenovo Legion Y7000P Left Fan Replacement, Flip your laptop over: adım 2, 1 resimden 1.
    • Flip your laptop over so the rubber feet are facing up.

  3. Lenovo Legion Y7000P Left Fan Replacement, Unfasten the back cover: adım 3, 2 resimden 1. Lenovo Legion Y7000P Left Fan Replacement, Unfasten the back cover: adım 3, 2 resimden 2.
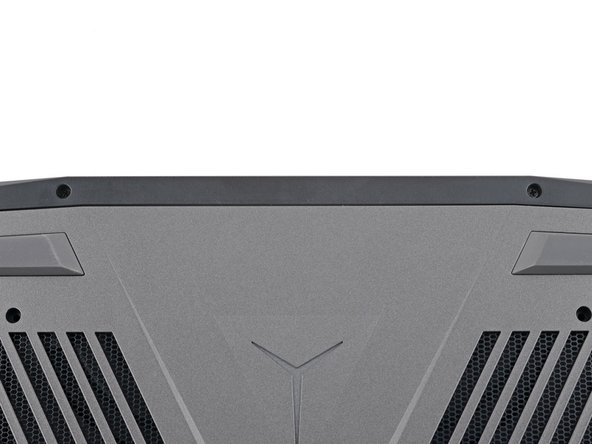
    • Use a Phillips screwdriver to remove the 11 screws securing the back cover:

    • Five 11.5 mm‑long screws

    • Six 4.7 mm-long screws

  4. Lenovo Legion Y7000P Left Fan Replacement, Insert an opening pick: adım 4, 2 resimden 1. Lenovo Legion Y7000P Left Fan Replacement, Insert an opening pick: adım 4, 2 resimden 2.
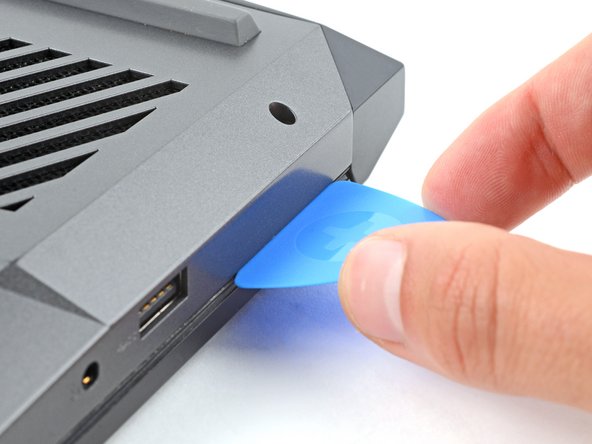
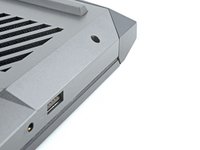
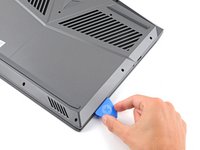
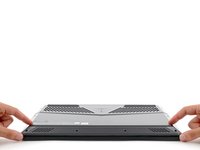
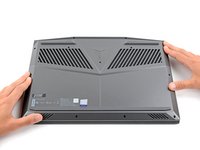
    • Insert the flat side of an opening pick between the top right corner of the back cover and frame.

  5. Lenovo Legion Y7000P Left Fan Replacement, Release the back cover's clips: adım 5, 3 resimden 1. Lenovo Legion Y7000P Left Fan Replacement, Release the back cover's clips: adım 5, 3 resimden 2. Lenovo Legion Y7000P Left Fan Replacement, Release the back cover's clips: adım 5, 3 resimden 3.
    • Plastic clips secure the back cover to the frame. You'll hear and feel them release as you work.

    • Keep the pick angled upwards while sliding to help release the clips.

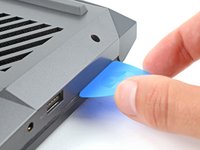
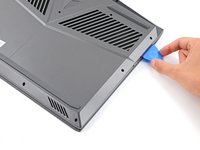
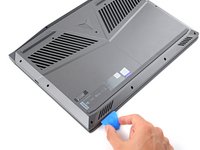
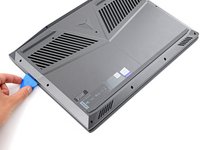
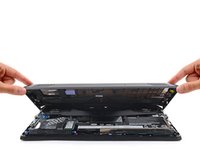
    • Slide the opening pick down the right edge and around the bottom right corner to release the clips.

  6. Lenovo Legion Y7000P Left Fan Replacement: adım 6, 3 resimden 1. Lenovo Legion Y7000P Left Fan Replacement: adım 6, 3 resimden 2. Lenovo Legion Y7000P Left Fan Replacement: adım 6, 3 resimden 3.
    • Slide the opening pick along the front edge and up to the top left corner to release the remaining clips securing the back cover.

  7. Lenovo Legion Y7000P Left Fan Replacement, Remove the back cover: adım 7, 3 resimden 1. Lenovo Legion Y7000P Left Fan Replacement, Remove the back cover: adım 7, 3 resimden 2. Lenovo Legion Y7000P Left Fan Replacement, Remove the back cover: adım 7, 3 resimden 3.
    • Remove the back cover.

  8. Lenovo Legion Y7000P Left Fan Replacement, Reassembly information: adım 8, 3 resimden 1. Lenovo Legion Y7000P Left Fan Replacement, Reassembly information: adım 8, 3 resimden 2. Lenovo Legion Y7000P Left Fan Replacement, Reassembly information: adım 8, 3 resimden 3.
    • During reassembly:

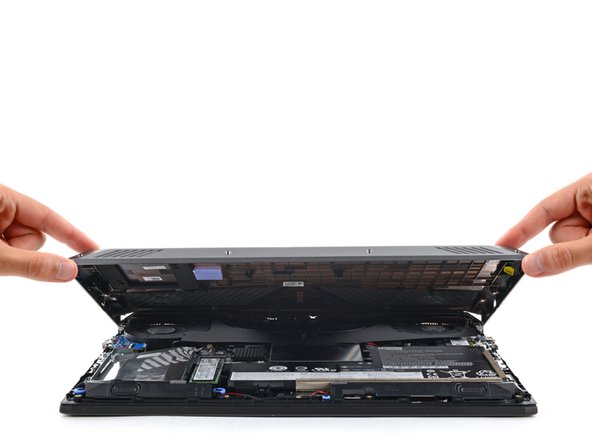
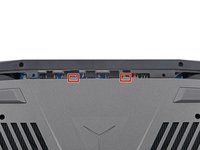
    • Slide the two tabs near the center of the back cover's top edge under the hinge cover.

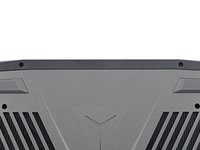
    • Press down firmly around the perimeter of the back cover to engage all the clips.

  9. Lenovo Legion Y7000P Left Fan Replacement, Heat the black cover: adım 9, 2 resimden 1. Lenovo Legion Y7000P Left Fan Replacement, Heat the black cover: adım 9, 2 resimden 2.
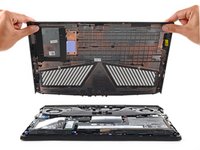
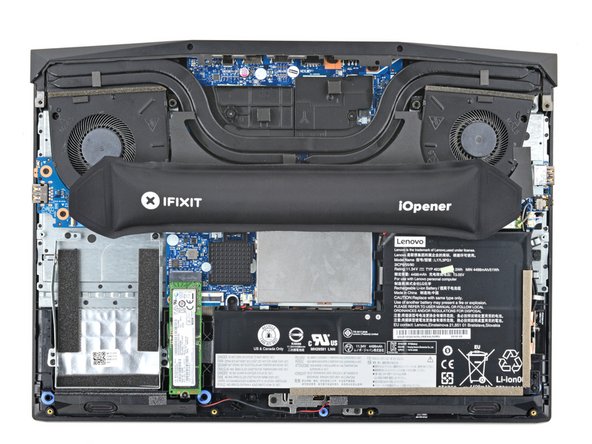
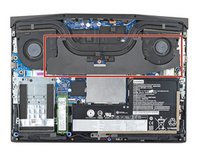
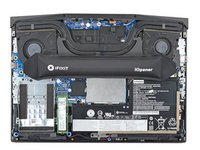
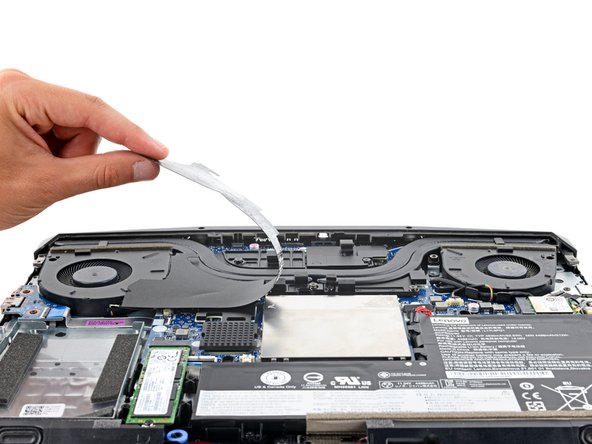
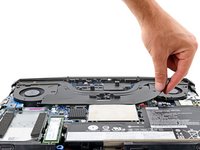
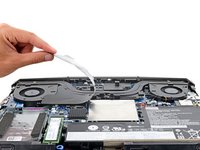
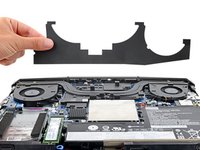
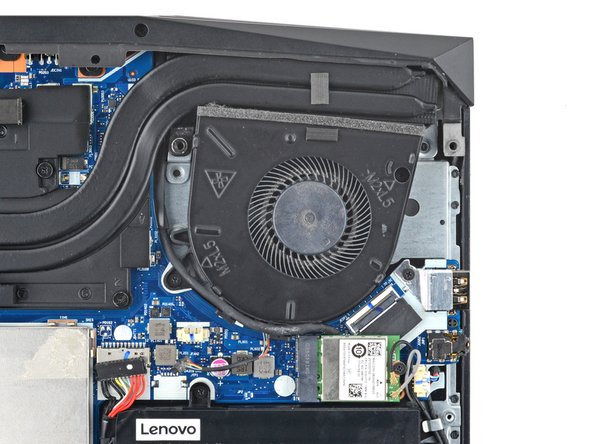
    • A stiff, black cover runs across the heatsink and fans.

    • Removing the cover makes repairs much easier, but isn't required. If you don't want to remove the cover, you can roll it onto itself to keep it out of the way and skip the next two steps.

    • Heat an iOpener and apply it to the cover for two minutes.

    • You can also use a hair dryer. Follow this guide for more instructions.

  10. Lenovo Legion Y7000P Left Fan Replacement, Remove the cover: adım 10, 3 resimden 1. Lenovo Legion Y7000P Left Fan Replacement, Remove the cover: adım 10, 3 resimden 2. Lenovo Legion Y7000P Left Fan Replacement, Remove the cover: adım 10, 3 resimden 3.
    • Gently peel up and remove the black cover.

    • During reassembly, press the cover back into place using the residual adhesive.

  11. Lenovo Legion Y7000P Left Fan Replacement, Disconnect the battery: adım 11, 3 resimden 1. Lenovo Legion Y7000P Left Fan Replacement, Disconnect the battery: adım 11, 3 resimden 2. Lenovo Legion Y7000P Left Fan Replacement, Disconnect the battery: adım 11, 3 resimden 3.
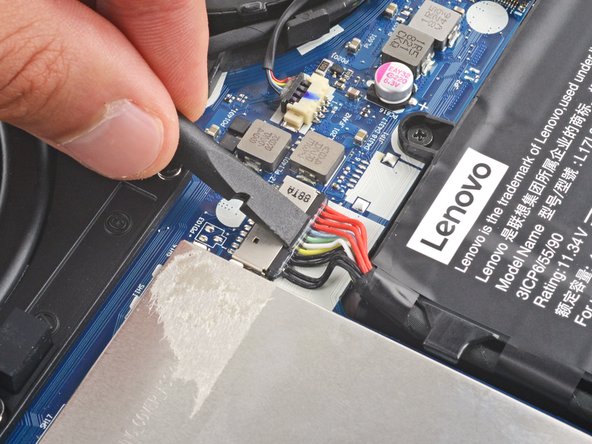
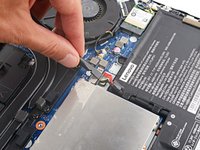
    • Use the flat end of a spudger to push the battery connector straight out of its socket.

    • Push the tab on top of the battery connector, not the wires themselves.

  12. Lenovo Legion Y7000P Left Fan Replacement, Disconnect the fan cable: adım 12, 3 resimden 1. Lenovo Legion Y7000P Left Fan Replacement, Disconnect the fan cable: adım 12, 3 resimden 2. Lenovo Legion Y7000P Left Fan Replacement, Disconnect the fan cable: adım 12, 3 resimden 3.
    • The left fan will be on your right-hand side, as the laptop is laying upside down.

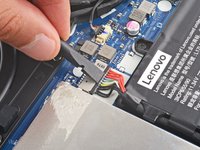
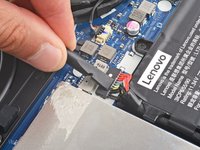
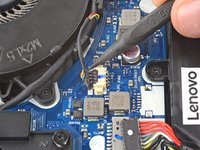
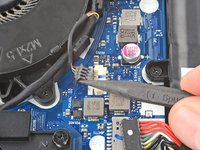
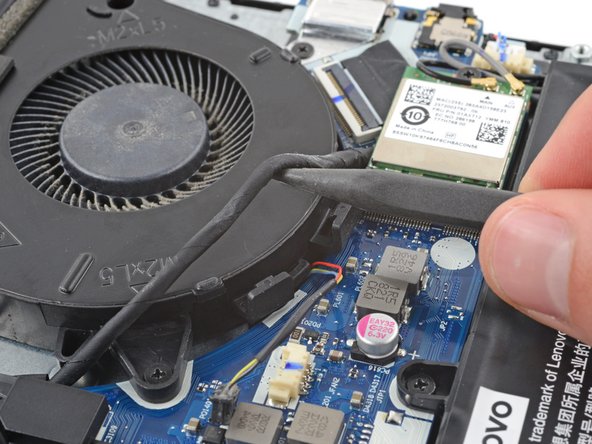
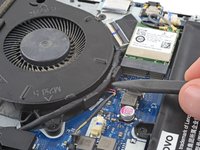
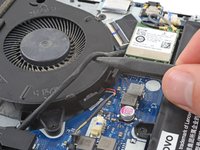
    • Use the point of a spudger to push on alternating sides of the left fan cable connector to "walk" it out of its socket.

  13. Lenovo Legion Y7000P Left Fan Replacement, Unclip the display cable: adım 13, 2 resimden 1. Lenovo Legion Y7000P Left Fan Replacement, Unclip the display cable: adım 13, 2 resimden 2.
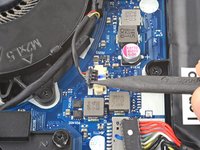
    • Use the point of a spudger to guide the display cable out of the clips on the bottom edge of the left fan.

  14. Lenovo Legion Y7000P Left Fan Replacement, Unfasten the left fan: adım 14, 2 resimden 1. Lenovo Legion Y7000P Left Fan Replacement, Unfasten the left fan: adım 14, 2 resimden 2.
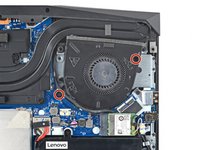
    • Use a Phillips screwdriver to remove the two 5.7 mm‑long screws securing the left fan.

  15. Lenovo Legion Y7000P Left Fan Replacement, Remove the left fan: adım 15, 3 resimden 1. Lenovo Legion Y7000P Left Fan Replacement, Remove the left fan: adım 15, 3 resimden 2. Lenovo Legion Y7000P Left Fan Replacement, Remove the left fan: adım 15, 3 resimden 3.
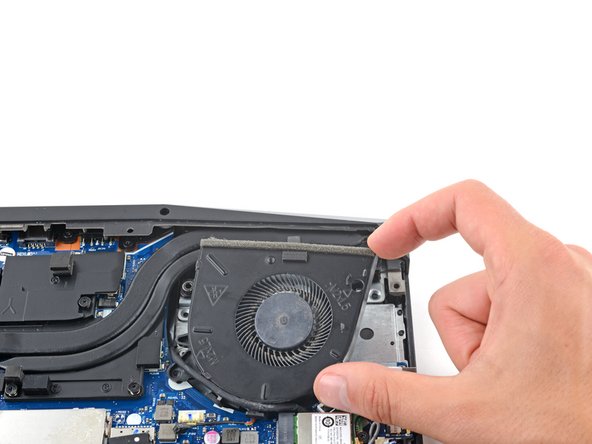
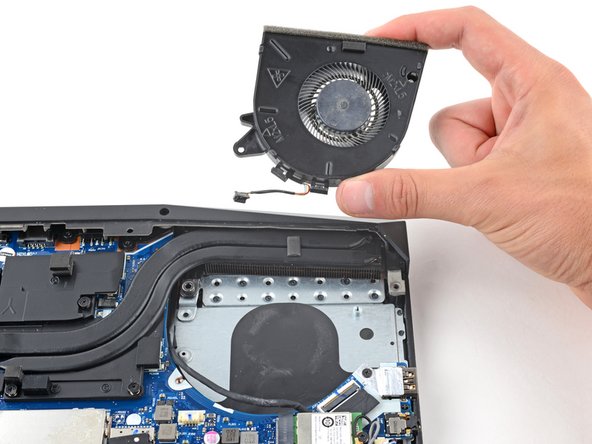
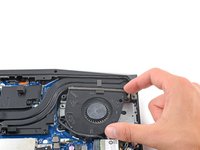
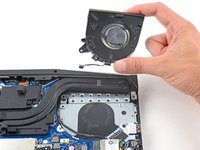
    • Lift the top edge of the left fan.

    • Slide the left fan cable out from under the display cable and remove the fan.

    • During reassembly, make sure the fan cable is under the display cable before securing the fan.

Sonuç

To reassemble your device, follow these instructions in reverse order.

Check your repair by running hardware tests with Lenovo Diagnostics.

Take your e-waste to an R2 or e-Stewards certified recycler.

Repair didn’t go as planned? Try some basic troubleshooting, or ask our Answers community for help.

Spencer Day

Üyelik tarihi: 09/14/22

95.762 İtibar

662 adet Kılavuz yazıldı

Ekip

iFixit iFixit üyesi

Staff

118 Üyeler

19.548 adet Kılavuz yazıldı

0 Yorum

Yorum Ekle

İstatistikleri Görüntüle:

Son 24 Saat: 4

Son 7 gün: 43

Son 30 gün: 270

Her zaman: 543